Xarxes
go 2 top
HW
Each network adapter (network card) has a unique (burned-in) network (MAC, media access control) 6-octet address.
Under W95, use winipcfg to display yours.
Under Linux, we use ifconfig :
nicolau@mars:~$ ifconfig
enp4s0: flags=4163<UP,BROADCAST,RUNNING,MULTICAST> mtu 1500 ; LAN device
ether d0:50:99:4e:81:ee txqueuelen 1000 (Ethernet)
RX packets 83108 bytes 87327792 (87.3 MB)
RX errors 0 dropped 3 overruns 0 frame 0
TX packets 27807 bytes 6669605 (6.6 MB)
TX errors 0 dropped 0 overruns 0 carrier 0 collisions 0
wlx1cbfcee61e65: flags=4163<UP,BROADCAST,RUNNING,MULTICAST> mtu 1500 ; wifi device
inet 192.168.1.50 netmask 255.255.255.0 broadcast 192.168.1.255
inet6 fe80::e0f5:851f:666c:24e1 prefixlen 64 scopeid 0x20<link>
ether 1c:bf:ce:e6:1e:65 txqueuelen 1000 (Ethernet)
RX packets 817684 bytes 916969704 (916.9 MB)
RX errors 0 dropped 227 overruns 0 frame 0
TX packets 463324 bytes 491077760 (491.0 MB)
TX errors 0 dropped 0 overruns 0 carrier 0 collisions 0
Command ncpa.cpl opens a GUI list of adapters
A network adapter requires a device driver, the software that enables a computer
to work with that particular device.
Over a driver, we define some protocols, rules and procedures for communicating.
If we have a mix of adapters and protocols,
the binding order determines the order in which the operating system runs the protocol.
IP aliasing
IP aliasing is associating more than one IP address to a network interface -
wiki
RJ connectors
Pinout (568-B)
Blanco-naranja, Naranja, Blanco-verde, Azul, Blanco-Azul, Verde, Blanco-marrón, Marrón.
|
|
- pin 1 : Blanco - Naranja : Transceive data+
- pin 2 : Naranja : Transceive data-
- pin 3 : Blanco - Verde : Receive data+
- pin 6 : Verde : Receive data-
Details
|
Female

|
Se suelen unir todos los hilos, pero para las comunicaciones Ethernet solo hacen falta los pares "1"-"2" y "3"-"6".
El conector RJ-11 encaja dentro del RJ-45, coincidiendo los pines 4 y 5 con los usados para la transmisión de voz en el RJ-11.
Video com crimpar un conector RJ45
CrossOver cable : 1-3, 2-6, 3-1, 4, 5, 6-2, 7, 8, G-G
RJ45 to USB
USB 3.0 to RJ45, 10 €
IE3 standards
- 802.2 Local Area Network Logical Link Control (LLC)
- 802.3 CSMA/CD LAN - Ethernet
- 802.5 Token Ring LAN
- 802.11 - specs for implementing WLAN
(wireless local area network) computer communication
- 802.11a - 54 Mbps of bandwidth, operates at a frequency range around 5 GHz
- 802.11b - 11 Mbps of bandwidth, operates at a frequency range around 2,4 GHz
- 802.11g - 54 Mbps of bandwidth, operates at 2,4 GHz
- 802.11n - 300 Mbps of bandwidth, operates at 2,4 GHz and 5 GHz
- 802.11ac - operates at 2,4 GHz and 5 GHz ; 1300 Mbps on the 5 GHz band and up to 450 Mbps on the 2.4 GHz band
- 802.11ax - to be published February 2021
Get Intel 802.11 ac for dummies
802.11 speeds
| Estandard | Wifi Alliance | Frequencia | Distancia | Velocidad | els meus adaptadors
|
| 802.11a | wi-fi 2 | 5 GHz | 20 Km | 54 Mbps | .
|
| 802.11b | wi-fi 1 | 2,4 GHz | . | 11 Mbps | .
|
| 802.11g | wi-fi 3 | 2,4 GHz | 50 Km | 54 Mbps | .
|
| 802.11n | wi-fi 4 | 2,4 / 5 GHz | . | 600 Mbps | Belkin N300, Belkin N600, Realtek RTL8188EU
|
| 802.11ac | wi-fi 5 | 2,4 / 5 GHz | . | 450 Mbps / 1,3 Gbps | Xiaomi Mi9, TP-Link Maxelsa
|
| 802.11ax | wi-fi 6 | . | . | . | .
|
wiki
TCP/IP
The Internet protocol suite, often referred to as TCP/IP,
is a set of protocols designed to work together
to provide end-to-end transmission of messages across interconnected networks.
                                                       Application formats - HTML, XML

 Application layer  Telnet, FTP, API (as Sockets)      layer 5-7 : session, presentation - SSL, HTTP
  |                  |                                 * --- socket interface API
 Transport layer    TCP, UDP                           layer 4 : transport - TCP o UDP
  |                  |
 Network layer      IP, ICMP                           layer 3 : network - IP
  |                  |
 Link layer         ARP, LLC                           layer 2 : data - ethernet
  |                  |
 Physical layer     Ethernet hardware                  layer 1 : physical - twisted pair

 TCP - connection-oriented; splits and re-assembles data using datagrams. Stream protocol.
 UDP - connectionless, unreliable. Datagram protocol.
 IP - no error control, only a header checksum.
 ARP - maps IP addresses to hardware addresses : "who has <IP>; tell <IP>" : output is a MAC
 RARP - "who is <MAC>; tell <MAC>" : output is an IP
ARP is
RFC
826
ARP stands for Address Resolution Protocol,
which is used to find the media access control address of a network neighbour for a given IPv4 Address.
LAN speed negotiation
Auto-negotiation is the feature that allows a port on a switch, router, server, or other device
to communicate with the device on the other end of the link to determine the optimal duplex mode and speed for the connection.
It must be enabled on both sides of the link.
what is ethernet auto negotiation
Routing
An IP address is a 32-bit number that uniquely identifies a host (computer or other device, such as a printer or router) on a TCP/IP network.
The subnet mask is used by the TCP/IP protocol to determine whether a host is on the local subnet or on a remote network.
By example :
11000000.10101000.01111011.10000100 -- IP address (192.168.123.132)
11111111.11111111.11111111.00000000 -- Subnet mask (255.255.255.0)
This gives you the following:
11000000.10101000.01111011.00000000 -- Network address (192.168.123.0)
00000000.00000000.00000000.10000100 -- Host address (000.000.000.132)
When a network device generates network traffic that needs to be sent across a network,
it first compares the destination's IP address with its own network prefix.
If the destination IP address has the same network prefix as that of the sending device,
then the sending device will recognise that the destination device is on the same network
and, therefore, it can then send the traffic directly to it.
If the network prefixes differ,
then it will send the message to its default gateway,
which will forward it on towards the receiving device.
pg 37/320, Learning Python Network Programming (2015), Gooner, \\w500\C:\sebas\miscosas\llibres\tech
subnetting details
TCP/IP utilities
Few useful utilities are :
ipconfig [win] / netstat -nr [unix]
Flags que el poden complementar :
- /release - release the IP address for the specified adapter.
- /renew - renew the IP address for the specified adapter.
- /flushdns - purges the DNS Resolver cache.
- /registerdns - refreshes all DHCP leases and re-registers DNS names [***]
- /displaydns - display the contents of the DNS Resolver Cache, quite interesting
- /showclassid - displays all the DHCP class IDs allowed for adapter.
- /setclassid - modifies the DHCP class id.
ping
Convierte nombre NETBIOS en dirección IP.
ICMP based => not session based
See ping -r or pingroute or pathping
pathping (win32)
c:\> pathping
Usage: pathping [-g host-list] [-h maximum_hops] [-i address] [-n]
[-p period] [-q num_queries] [-w timeout] [-P] [-R] [-T]
[-4] [-6] target_name
Options:
-g host-list Loose source route along host-list.
-h maximum_hops Maximum number of hops to search for target.
-i address Use the specified source address.
-n Do not resolve addresses to hostnames (faster !).
-p period Wait period milliseconds between pings.
-q num_queries Number of queries per hop.
-w timeout Wait timeout milliseconds for each reply.
-P Test for RSVP PATH connectivity.
-R Test if each hop is RSVP aware.
-T Test connectivity to each hop with Layer-2 priority tags.
-4 Force using IPv4.
-6 Force using IPv6.
arp
ARP performs IP address-to-Media Access Control (MAC) address resolution for outgoing packets.
wiki :
given an IP, it will try to find the corresponding MAC address.
mr Yuri Volobuev's (1997)
ARP and ICMP redirection games, magnific !
2x codi :
send_arp.c
&
icmp_redir.c.
ARP
spoofing
(Arpspoof (parte de las herramientas de DSniff), Arpoison, Cain and Abel, Ettercap y netcut son algunas de las herramientas que pueden usarse para llevar a cabo los ataques ARP Poisoning)
:
Fyodor's exploit world
arping
Convert MAC to IP
Works for machines which answer broadcast pings, i.e. not for windows machines
arping is a tool for probing hosts in a network.
Unlike the ping command, which operates at the network layer, arping operates at the data link layer and uses the Address Resolution Protocol (ARP).
FreshMeat (linux only) :
Arping is an ARP level ping utility. It's good for finding out if an IP is taken before you have routing to that subnet. It can also ping MAC addresses directly.
manual
&
package
[root@lab2 ~]# arping
Usage: arping [-fqbDUAV] [-c count] [-w timeout] [-I device] [-s source] destination
-f : quit on first reply
-q : be quiet
-b : keep broadcasting, don't go unicast
-D : duplicate address detection mode
-U : Unsolicited ARP mode, update your neighbours
-A : ARP answer mode, update your neighbours
-V : print version and exit
-c count : how many packets to send
-w timeout : how long to wait for a reply
-I device : which ethernet device to use (eth0)
-s source : source ip address
destination : ask for what ip address
The -I option seems to indicate that you are using the version from the iputils-arping package
Try the arping package instead
nicolau@mars:~$ arping -I wlx984827ca1628 192.168.1.229
ARPING 192.168.1.229 from 192.168.1.134 wlx984827ca1628
Unicast reply from 192.168.1.229 [6C:1D:EB:F7:FA:A5] 43.207ms
Unicast reply from 192.168.1.229 [6C:1D:EB:F7:FA:A5] 4.963ms
Unicast reply from 192.168.1.229 [6C:1D:EB:F7:FA:A5] 5.797ms
rarp
wiki :
given a MAC address, it tries to find the corresponding IP address.
url :
Reverse ARP is a predecessor to BOOTP, on which DHCP is based.
Generally, the spec. requires an *authoritative* response (hence the questions about a RARP server).
It may very well be that there are TCP/IP implementations out there which will respond to RARP packets in the way you describe,
but I have yet to find any.
Besides, RARP (because of it's associations with BOOTP), is totally the wrong thing to use... what you *really* want is
INVARP which was invented for use by ATM switches so that their IP addresses could be queried directly based on MAC address.
But, again, nobody outside of the ATM community implements INVARP in their TCP/IP stack.
Effectively, what this means is that there is *no way* within the scope of the standard protocols
to force a system whose MAC address you know to tell you it's associated IP address.
There may be a way to do it outside of the standards
(maybe by crafting an ICMP packet with a bogus IP and sending it directly to the system...
and then reading the real IP out of the reply..), but that would have unpredictable results...
Anyway, sorry to continue the bad news :-(
route
See route print !
Llista les interficies i els seus "adapter number" :
c:\> route print
===========================================================================
Interface List
16...78 dd 08 c1 ce ab ......Bluetooth Device (Personal Area Network)
12...00 21 6a b6 cd 56 ......Intel(R) WiFi Link 5300 AGN
1...........................Software Loopback Interface 1
19...00 00 00 00 00 00 00 e0 Microsoft ISATAP Adapter #2
30...00 00 00 00 00 00 00 e0 Microsoft ISATAP Adapter #3
La manera mes moderna és:
c:\> netsh int ipv4 show interfaces
Idx Met MTU State Name
--- ---------- ---------- ------------ ---------------------------
1 50 4294967295 connected Loopback Pseudo-Interface 1
12 25 1500 connected Wireless Network Connection
16 50 1500 disconnected Bluetooth Network Connection
ftp = file transfer protocol
ftp [-v] [-d] [-i] [-n] [-g] [-k realm] [-f] [-x] [-u] [-t] [host]
"ftp -i <url>" for non-interactive multiple file transfer
The prompt feature of the mput command can be disabled by invoking ftp with the -i option.
In this instance, all file names that match the pattern in your mput command will be transferred
without confirmation.
url
CD = change remote working dir
DIR = list remote directory
PWD = display remote directory name
LCD = change LOCAL directory !
nbtstat
Convierte dirección IP en nombre NETBIOS
c:\> nbtstat -A 192.168.1.33
Conexión de área local 3:
Dirección IP: [192.168.1.2] Id. de ámbito : []
NetBIOS Remote Machine Name Table
Nombre Tipo Estado
---------------------------------------------
AIRIS-1234 <00> Único Registrado
AIRIS-1234 <20> Único Registrado
GRUPO_TRABAJO <00> Grupo Registrado
GRUPO_TRABAJO <1E> Grupo Registrado
GRUPO_TRABAJO <1D> único Registrado
Dirección MAC = 00-10-A7-2C-42-1A
nslookup
DNS : nslookup uses /etc/resolv.conf
Try to use dig or
dig web interface
8 nslookup commands
Use nslookup to troubleshoot
DNS :
- find out "A" record (IP address) of domain : "nslookup yahoo.com"
- find out Reverse Domain lookup : "nslookup 209.191.122.70"
- find out specific Domain lookup : "nslookup ir1.fp.vip.mud.yahoo.com."
- query MX (Mail Exchange) record : "nslookup -query=mx www.yahoo.com"
- query NS (Name Server) record : "nslookup -query=ns www.yahoo.com"
- query SOA (Start of Authority) record : "nslookup -type=soa www.yahoo.com"
- query all Available DNS records : "nslookup -query=any yahoo.com" {***}
- enable Debug mode : "nslookup -debug yahoo.com" + "set debug" + "yahoo.com"
Or you can use
dig !
10 Linux nslookup command examples for DNS lookup
- $ nslookup redhat.com
- $ nslookup -query=mx redhat.com - maps a domain name to a list of mail exchange servers for that domain
- $ nslookup -type=ns redhat.com {*****} - output the name serves which are associated with the given domain
- $ nslookup -type=soa redhat.com - provides the authoritative information about the domain, the e-mail address of the domain admin, the domain serial number, etc
- $ nslookup -type=any google.com
- $ nslookup 209.132.183.181
- $ nslookup redhat.com ns1.redhat.com
- $ nslookup -port 56 redhat.com
- $ nslookup -timeout=10 redhat.com
- $ nslookup -debug redhat.com
The Geek Stuff
nslookup command to find email servers
c:\> nslookup -query=mx tinet.cat
Server: abc.mydomain.com
Address: 1.2.3.4
Non-authoritative answer:
tinet.cat MX preference = 10, mail exchanger = mx2.tinet.org
tinet.cat MX preference = 10, mail exchanger = mx1.tinet.org
ARP games
Clear ARP cache (windows) :
netsh interface ip delete arpcache
netsh - doing it from command line
Set IP, mask, default gateway, DNS :
netsh interface ip show config // display IP configuration
netsh interface ip set address name="Local Area Connection" static 192.168.0.100 255.255.255.0 192.168.0.1 1 // set IP configuration
netsh interface ip set dns "Local Area Connection" static 192.168.0.200 // set DNS
show all interfaces with an IP
c:\> netsh interface ip show config
Configuration for interface "Bluetooth Network Connection"
DHCP enabled: Yes
InterfaceMetric: 50
DNS servers configured through DHCP: None
Register with which suffix: Primary only
WINS servers configured through DHCP: None
Configuration for interface "Wireless Network Connection"
DHCP enabled: Yes
IP Address: 192.168.1.99
Subnet Prefix: 192.168.1.0/24 (mask 255.255.255.0)
Default Gateway: 192.168.1.1
Gateway Metric: 0
InterfaceMetric: 25
DNS servers configured through DHCP: 192.168.1.1
Register with which suffix: Primary only
WINS servers configured through DHCP: None
Configuration for interface "Loopback Pseudo-Interface 1"
DHCP enabled: No
IP Address: 127.0.0.1
Subnet Prefix: 127.0.0.0/8 (mask 255.0.0.0)
InterfaceMetric: 50
Statically Configured DNS Servers: None
Register with which suffix: Primary only
Statically Configured WINS Servers: None
DNS register, display, flush, etc
Purgar DNS en windows: > ipconfig /flushdns
Purgar DNS Linux: # /etc/init.d/nscd restart
Purgar DNS Ubuntu: $ sudo /etc/init.d/networking restart
Registrar DNS windows: > ipconfig /registerdns [***]
Registrar Linux con cliente samba en servidor DNS win: $ net ads dns register -P
Ver servidores DNS en Windows: > ipconfig /all
Ver servidores DNS en Linux / Ubuntu: $ cat /etc/resolv.conf
Ver Gateway en Windows: > ipconfig
Ver Gateway en Linux / Ubuntu: $ route | grep default
(nota: $ route -n => la pasarela de la superruta 0.0.0.0 es el gateway principal)
Llista de
comandes per DNS [***], as
net stop dns
net start dns
Curiós:
If a DNS server with static IP is not running the DHCP Client,
the server may receive Event ID 5782 with "No DNS servers configured for local system" error.
Interesting Linux command : nsupdate, but not an easy one ...
Client configuration file : /etc/dhclient.conf has "send host-name 'host.fq.name'" line !
dubtes DNS
Com es fa per definir un "alias" ?
dubtes resolv.conf
When configuring the resolver library to use the BIND name service for host lookups,
you also have to tell it which name servers to use.
There is a separate file for this, called resolv.conf.
If this file does not exist or is empty, the resolver assumes the name server is on your local host.
This means that on a host running a name server, you should create a zero-length /etc/resolv.conf file,
even if you don't intend to put any directives in it.
{"BIND bible", page 123}
If you run a name server on your local host, you have to set it up separately, as will be explained in the following section.
If your are on a local network and have the opportunity to use an existing nameserver, this should always be preferred.
The most important option in resolv.conf is nameserver, which gives the IP-address of a name server to use.
If you specify several name servers by giving the nameserver option several times, they are tried in the order given.
You should therefore put the most reliable server first.
Currently, up to three name servers are supported.
Two other options, domain and search deal with default domains that are tacked onto a hostname if BIND fails to resolve it with the first query.
The search option specifies a list of domain names to be tried.
If no search option is given, a default search list is constructed from the local domain name by using the domain name itself,
plus all parent domains up to the root.
On a normally configured system, this file should not be necessary.
The only name server to be queried will be on the local machine (no nameserver in resolv.conf),
the domain name is determined from the host name,
and the domain search path is constructed from the domain name.
url
Diferencia entre "search bar.es.hal.com" i "domain bar.es.hal.com" dins de resolv.conf ?
Si posem "search example.com company.net" dins el fitxer "resolv.conf"
i fem servir un nom curt com "test",
llavors s'intenta resoldre primer "test.example.com" i despres "test.company.net"
Si posem "domain vbrew.com",
i volem resoldre el nom vale,
primer fem servir el nom "vale", i si falla, "vale.vbrew.com", i finalment "vale.com".
Conclusió :
- 1-o va NAMESERVER
- 2-o va SEARCH
- 3-o va DOMAIN
Compte :
aqui diu que ...
(sobre "resolv.conf File Format for TCP/IP", AIX 6.1)
The domain entry and search entry are mutually exclusive.
If both entries are used, the one that appears last will override the other.
Also "BIND bible" page 105 ...
|
FQDN
url
You can't change the FQDN (as returned by hostname --fqdn) or the DNS domain name (as returned by dnsdomainname) with this command.
The FQDN of the system is the name that the resolver(3) returns for the host name.
Technically: The FQDN is the name gethostbyname(2) returns for the host name returned by gethostname(2).
The DNS domain name is the part after the first dot.
Therefore it depends on the configuration (usually in /etc/host.conf) how you can change it.
Usually (if the hosts file is parsed before DNS or NIS) you can change it in /etc/hosts.
The FQDN
|
route print de les meves maquines
P4 :
======================================================================
Interface list
0x1 ............................. MS TCP Loopback interface
0x30002 ... 00 10 A7 2C 70 30 ... Ralink RT2500 Wireless LAN card
0x2 ....... 00 02 2A FA 00 04 ... Realtek RTL8139 (A/B/C/8130) PCI Ethernet adapter
======================================================================
T42 :
======================================================================
Interface list
0x1 ............................. MS TCP Loopback interface
0x3 ....... 00 11 25 43 08 1a ... Intel(R) PRO/1000 MT Mobile Connection
0x40002 ... 00 00 00 00 00 01 ... AGN Virtual Network Adapter
0x40005 ... 00 0e 35 9a 07 69 ... Intel(R) PRO/Wireless 2200BG Network Connection
======================================================================
route command
Commands
route print
route add
route delete
route print command
Display interface id and MAC address:
c:\> route print
===========================================================================
Interface List
16...78 dd 08 c1 ce ab ......Bluetooth Device (Personal Area Network)
12...00 21 6a b6 cd 56 ......Intel(R) WiFi Link 5300 AGN
1...........................Software Loopback Interface 1
18...00 00 00 00 00 00 00 e0 Microsoft ISATAP Adapter
13...00 00 00 00 00 00 00 e0 Microsoft 6to4 Adapter
14...00 00 00 00 00 00 00 e0 Teredo Tunneling Pseudo-Interface
19...00 00 00 00 00 00 00 e0 Microsoft ISATAP Adapter #2
===========================================================================
route add command
If your need to get to site x.x.x.x you can use the following command.
route add x.x.x.x mask 255.255.255.255 y.y.y.y
where y.y.y.y is your local gateway.
There is a flag that you have to add if you want it to survive a reboot though (-p)
url
|
TCP/IP tools
|
Conversions i algoritmes
|
 Top
Top
|
- Host name -> IP address : nslookup, ping
- Nom NetBios -> IP address : nbtstat
- IP address -> MAC address : ping, nmap
- MAC address -> IP address : arp - run a ping on whole subnet, then display cache using arp -a.
Name and Address Resolution
|
Top
|
|
Windows Sockets applications generally use the gethostbyname() function to resolve a host name to an IP address.
The gethostbyname() function uses the following (default) name look-up sequence:
-
Checks the local host name for a matching name.
-
Checks the hosts file for a matching name entry.
-
If a Domain Name Server is configured, it queries it.
-
If no match is found, try NetBIOS name-resolution
until the point at which DNS resolution is attempted.
Some applications use the gethostbyaddr() function to resolve
an IP address to a host name.
The gethostbyaddr() call uses the following (default) sequence:
-
Check the host's file for a matching address entry.
-
If a Domain Name Server is configured, it queries it.
-
Send a NetBIOS Adapter Status Request to the IP address being queried.
If it responds with a list of NetBIOS names registered for the adapter,
parse it for the computer name.
|
From
here
socket
A socket is an abstraction of a communication endpoint and it allows your program to communicate with another program using file descriptors.r
The socket pair for a TCP connection is a 4-tuple that identifies two endpoints of the TCP connection:
the local IP address, local port, foreign IP address, and foreign port.
A socket pair uniquely identifies every TCP connection on a network.
The two values that identify each endpoint, an IP address and a port number, are often called a socket.
Each sockets conversation is identified by a
unique combination of source and target ip
address and port number, as x.x.x.x(aaaa) y.y.y.y(bbbb)
Only one conversation can exist on a network with a specific signature.
MQFirewalls.pdf [T42:\MQ\BOOKS\Security]
UDP networking
Unlike TCP, UDP has no notion of connections.
A UDP socket can receive datagrams from any server on the network and send datagrams to any host on the network.
In addition, datagrams may arrive in any order, never arrive at all, or be duplicated in transit.
twisted matrix docs
UDP sending
Here's simple code to post a note by UDP in Python 3:
import socket
UDP_IP = "127.0.0.1"
UDP_PORT = 5005
MESSAGE = b"Hello, World!"
print("UDP target IP: %s" % UDP_IP)
print("UDP target port: %s" % UDP_PORT)
print("message: %s" % MESSAGE)
sock = socket.socket( socket.AF_INET, # Internet
socket.SOCK_DGRAM) # UDP
sock.sendto(MESSAGE, (UDP_IP, UDP_PORT))
UDP receiving
Here's simple code to receive UDP messages in Python 3:
import socket
UDP_IP = "127.0.0.1"
UDP_PORT = 5005
sock = socket.socket( socket.AF_INET, # Internet
socket.SOCK_DGRAM) # UDP
sock.bind((UDP_IP, UDP_PORT))
while True:
data, addr = sock.recvfrom(1024) # buffer size is 1024 bytes
print("received message: %s" % data)
UDP communication wiki.python
UDP links
8/4/2005 : BLAT error : unexpected error 10051 from winsock
winsock.h error
list,
Detailed Error Descriptions,
uSoft,
uSoft
The error codes I have got are :
| 10013
| WSAEACCES
| Permission denied.
|
| 10038
| WSAENNOTSOCK
| Socket operation on non-socket. No socket.
|
| 10048
| WSAEADDRINUSE
| Address already in use.
|
| 10049
| WSAEADDRNOTAVAIL
| Address not valid in its context.
|
| 10051
| WSAENETUNREACH
| Network is unreachable.
|
| 10053
| WSAECONNABORTED
| Software caused connection abort.
|
| 10054
| WSAECONNRESET
| Connection reset by peer.
|
| 10061
| WSAECONNREFISED
| Connection refused.
|
| 10093
| WSANOTINITIALISED
| Successful WASStartup not yet performed.
|
WinSock Programmer’s
FAQ,
as
BSD vs winsock compatibility.
ping tools
wiki :
traceroute works, ping not :
stackexchange :
- ping uses ICMP protocol
- tracert (windows) uses ICMP
- traceroute (linux) uses UDP packets
nping
From nmap (insecure.org), see
reference manual
nicolau@mars:~$ sudo nping -c 1 -tcp 192.168.1.39
Starting Nping 0.7.60 ( https://nmap.org/nping ) at 2020-12-07 15:51 CET
SENT (0.0522s) TCP 192.168.1.50:54519 > 192.168.1.39:80 S ttl=64 id=30217 iplen=40 seq=42498120 win=1480
Max rtt: N/A | Min rtt: N/A | Avg rtt: N/A
Raw packets sent: 1 (40B) | Rcvd: 0 (0B) | Lost: 1 (100.00%)
Nping done: 1 IP address pinged in 1.08 seconds
nicolau@mars:~$ sudo nping -c 1 -udp 192.168.1.39
Starting Nping 0.7.60 ( https://nmap.org/nping ) at 2020-12-07 15:51 CET
SENT (0.0597s) UDP 192.168.1.50:53 > 192.168.1.39:40125 ttl=64 id=56094 iplen=28
Max rtt: N/A | Min rtt: N/A | Avg rtt: N/A
Raw packets sent: 1 (28B) | Rcvd: 0 (0B) | Lost: 1 (100.00%)
Nping done: 1 IP address pinged in 1.10 seconds
some problems
W2K : is this correct ?
 c:\TEMP>ping www.google.es -n 09
 Bad value for option -n, valid range is from 1 to 4294967295.
PING code - IPPROTO_ICMP Echo
Del llibre WSNP, chapter 16 :
As we describe in Chapter 14, "Debugging",
the ICMP ping facility provides a way to reach out
and gently touch another machine.
All TCP/IP hosts are required to reply to an ICMP echo request.
Sending an echo request, and reading the echo reply
is the simplest way to check IP connectivity between two network hosts
and by implication it can provide
a surprising amount of other information.
The ICMP ping capability is essential for any network management
application designed to run over WinSock,
but many average applications can benefit also.
By embedding ICMP ping an application
can perform simple diagnostics automatically.
This can help application users, and provide essential information
to support personnel.
To create an ICMP ping application
a WinSock socket() function must support the "raw ICMP" socket type
(af=AF_INET, type=SOCK_RAW, protocol=IPPROTO_ICMP).
The following code example shows you how.
some ping() code
The following code example illustrates the essentials that go into a ping application.
A few things to notice about in this example:
- You can use this code in any operation mode (blocking, non-blocking or asynchronous).
- The ID and sequence numbers in the ICMP header (nIcmpId and nIcmpSeq) allow an application to match echo requests with replies.
At least one WinSock implementation uses the ID field for their own, so we recommend using the sequence field for portability.
- You can expect the echo reply to contain a copy of the data you send
- The syntax for sends and receives are asymmetric. As in Berkeley Sockets, you provide the ICMP header and data when you send,
but when you receive you get the IP header as well as the ICMP header and data.
- In implementations that support the IP_TTL socket option (which we describe next) you could alter the IP time to live before sending the ICMP echo,
and read the destination address from the ICMP error packet response and trace the route of the datagram.
/* ICMP types */
#define ICMP_ECHOREPLY 0 /* ICMP type: echo reply */
#define ICMP_ECHOREQ 8 /* ICMP type: echo request */
/* definition of ICMP header as per RFC 792 */
typedef struct icmp_hdr {
u_char icmp_type; /* type of message */
u_char icmp_code; /* type sub code */
u_short icmp_cksum; /* ones complement cksum */
u_short icmp_id; /* identifier */
u_short icmp_seq; /* sequence number */
char icmp_data[1]; /* data */
} ICMP_HDR, *PICMPHDR, FAR *LPICMPHDR;
#define ICMP_HDR_LEN sizeof(ICMP_HDR)
/* definition of IP header version 4 as per RFC 791 */
#define IPVERSION 4
typedef struct ip_hdr {
u_char ip_hl; /* header length */
u_char ip_v; /* version */
u_char ip_tos; /* type of service */
short ip_len; /* total length */
u_short ip_id; /* identification */
short ip_off; /* fragment offset field */
u_char ip_ttl; /* time to live */
u_char ip_p; /* protocol */
u_short ip_cksum; /* checksum */
struct in_addr ip_src; /* source address */
struct in_addr ip_dst; /* destination address */
} IP_HDR, *PIP_HDR, *LPIP_HDR;
#define IP_HDR_LEN sizeof(IP_HDR)
#define PNGBUFSIZE 8192+ICMP_HDR_LEN+IP_HDR_LEN
/* external functions */
extern void WSAErrMsg(LPSTR);
/* private data */
static ICMP_HDR FAR * lpIcmpHdr ; /* pointers into our I/O buffer */
static IP_HDR FAR * lpIpHdr ;
static char achIOBuf [ PNGBUFSIZE ] ;
static SOCKADDR_IN stFromAddr ;
static DWORD lCurrentTime, lRoundTripTime ;
/*
* Function icmp_open()
*
* Description:
* opens an ICMP "raw" socket.
*/
SOCKET icmp_open(void) {
SOCKET s;
s = socket (AF_INET, SOCK_RAW, IPPROTO_ICMP) ;
if ( s == SOCKET_ERROR ) {
WSAErrMsg ( "socket(type=SOCK_RAW, protocol=IPROTO_ICMP)" ) ;
return ( INVALID_SOCKET ) ;
} ;
return (s) ;
} /* end icmp_open() */
/*
* Function: icmp_sendto()
*
* Description:
* Initializes an ICMP header,
* inserts the current time in the ICMP data
* and initializes the data,
* then sends the ICMP Echo Request to destination address.
*
*/
int icmp_sendto (SOCKET s,
HWND hwnd,
LPSOCKADDR_IN lpstToAddr,
int nIcmpId,
int nIcmpSeq,
int nEchoDataLen) {
int nAddrLen = sizeof(SOCKADDR_IN) ;
int nRet ;
u_short i ;
char c ;
/*--------------------- init ICMP header -----------------------*/
lpIcmpHdr = (ICMP_HDR FAR *) achIOBuf ;
lpIcmpHdr->icmp_type = ICMP_ECHOREQ ;
lpIcmpHdr->icmp_code = 0 ;
lpIcmpHdr->icmp_cksum = 0 ;
lpIcmpHdr->icmp_id = nIcmpId++ ;
lpIcmpHdr->icmp_seq = nIcmpSeq++ ;
/*--------------------put data into packet------------------------
* insert the current time, so we can calculate round-trip time
* upon receipt of echo reply (which will echo data we sent)
*/
lCurrentTime = GetCurrentTime() ;
_fmemcpy ( & ( achIOBuf [ ICMP_HDR_LEN ] ), & lCurrentTime, sizeof(long) ) ;
/* data length includes the time (but not icmp header) */
c=' '; /* first char: space, right after the time */
for ( i = ICMP_HDR_LEN + sizeof(long) ;
( ( i < ( nEchoDataLen + ICMP_HDR_LEN ) ) && ( i < PNGBUFSIZE ) ) ;
i++ ) {
achIOBuf[i] = c ;
c++;
if ( c > '~' ) /* go up to ASCII 126, then back to 32 */
c = ' ';
}
/*----------------------assign ICMP checksum ----------------------
* ICMP checksum includes ICMP header and data, and assumes current
* checksum value of zero in header
*/
lpIcmpHdr->icmp_cksum = cksum( (u_short FAR *) lpIcmpHdr,
nEchoDataLen + ICMP_HDR_LEN ) ;
/*--------------------- send ICMP echo request -------------------*/
nRet = sendto ( s, /* socket */
(LPSTR) lpIcmpHdr, /* buffer */
nEchoDataLen+ICMP_HDR_LEN+sizeof(long), /* length */
0, /* flags */
(LPSOCKADDR) lpstToAddr, /* destination */
sizeof(SOCKADDR_IN) ) ; /* address length */
if (nRet == SOCKET_ERROR) {
WSAErrMsg ( "sendto()" ) ;
}
return ( nRet ) ;
} /* end icmp_sendto() */
/*
* Function: icmp_recvfrom()
*
* Description:
* receive icmp echo reply,
* parse the reply packet to remove the send time from the ICMP data.
*
*/
u_long icmp_recvfrom(SOCKET s,
LPINT lpnIcmpId,
LPINT lpnIcmpSeq,
LPSOCKADDR_IN lpstFromAddr) {
u_long lSendTime;
int nAddrLen = sizeof(struct sockaddr_in);
int nRet, i;
/*-------------------- receive ICMP echo reply ------------------*/
stFromAddr.sin_family = AF_INET ;
stFromAddr.sin_addr.s_addr = INADDR_ANY ; /* not used on input anyway */
stFromAddr.sin_port = 0 ; /* port not used in ICMP */
nRet = recvfrom ( s, /* socket */
(LPSTR) achIOBuf, /* buffer */
PNGBUFSIZE+ICMP_HDR_LEN+sizeof(long)+IP_HDR_LEN, /* length */
0, /* flags */
(LPSOCKADDR) lpstFromAddr, /* source */
& nAddrLen); /* addrlen*/
if ( nRet == SOCKET_ERROR) {
WSAErrMsg ( "recvfrom()" ) ;
}
/*------------------------- parse data ---------------------------
* remove the time from data for return.
* NOTE: the data received and sent may be asymmetric, as they
* are in Berkeley Sockets. As a reusult, we may receive
* the IP header, although we didn't send it. This subtlety is
* not often implemented so we do a quick check of the data
* received to see if it includes the IP header (we look for 0x45
* value in first byte of buffer to check if IP header present).
*/
/* figure out the offset to data */
if (achIOBuf[0] == 0x45) { /* IP header present? */
i = IP_HDR_LEN + ICMP_HDR_LEN ;
lpIcmpHdr = (LPICMPHDR) & ( achIOBuf [ IP_HDR_LEN ] ) ;
} else {
i = ICMP_HDR_LEN ;
lpIcmpHdr = (LPICMPHDR) achIOBuf ;
}
/* pull out the ICMP ID and Sequence numbers */
* lpnIcmpId = lpIcmpHdr->icmp_id ;
* lpnIcmpSeq = lpIcmpHdr->icmp_seq ;
/* remove the send time from the ICMP data */
_fmemcpy ( & lSendTime, ( & achIOBuf[i] ), sizeof(u_long) ) ;
return (lSendTime);
} /* end icmp_recvfrom() */
/*
* Function: cksum()
*
* Description:
* Calculate Internet checksum for data buffer and length
* (one's complement sum of 16-bit words).
* Used in IP, ICMP, UDP, IGMP.
*
*/
u_short cksum (u_short FAR*lpBuf, int nLen) {
register long lSum = 0L; /* work variables */
/* note: to handle odd number of bytes, last (even) byte in
* buffer have a value of 0 (we assume that it does)
*/
while (nLen > 0) {
lSum += *(lpBuf++) ; /* add word value to sum */
nLen -= 2 ; /* decrement byte count by 2 */
}
/* put 32-bit sum into 16-bits */
lSum = ( lSum & 0xffff ) + ( lSum >> 16 ) ;
lSum += ( lSum >> 16 ) ;
/* return Internet checksum. Note:integral type
* conversion warning is expected here. It's ok.
*/
return ( ~ lSum ) ;
} /* end cksum() */
TTL expired in transit
Aquest missatge ...
c:\> ping 9.37.253.130 -t
Pinging 9.37.253.130 with 32 bytes of data:
Reply from 9.27.2.170: TTL expired in transit.
Reply from 9.27.2.170: TTL expired in transit.
... indicates a routing loop :
c:\> tracert 99.37.253.130
Tracing route to ftp3.raleigh.hal.com [99.37.253.130] over a maximum of 30 hops:
1 <1 ms <1 ms <1 ms eNOS10203.bar.es.hal.com [99.137.164.3]
2 <1 ms <1 ms <1 ms 99.137.144.17
3 9 ms 9 ms 9 ms 99.64.174.154
4 117 ms 116 ms 116 ms nc005-r01-12008-pos1-0-101.wan.hal.com [99.64.4.81]
5 118 ms 118 ms 118 ms rtp-sc-b-v557.raleigh.hal.com [99.27.4.12]
6 121 ms 117 ms 117 ms rtp-bd-b-ge2.raleigh.hal.com [99.27.1.12]
7 116 ms 116 ms 117 ms rtp-co-b-v803.raleigh.hal.com [99.27.2.13]
8 117 ms 117 ms 117 ms rtp-pd-10a-v842.raleigh.hal.com [99.27.2.170]
9 117 ms 117 ms 117 ms rtp-co-b-v842.raleigh.hal.com [99.27.2.169]
10 118 ms 117 ms 117 ms rtp-pd-10a-v842.raleigh.hal.com [99.27.2.170]
11 117 ms 117 ms 119 ms rtp-co-b-v842.raleigh.hal.com [99.27.2.169]
12 118 ms 117 ms 117 ms rtp-pd-10a-v842.raleigh.hal.com [99.27.2.170]
13 117 ms 117 ms 117 ms rtp-co-b-v842.raleigh.hal.com [99.27.2.169]
Xorrades TCP/IP
|
Top
|
|
Com saber si el traceroute fa servir ICMP ?
Use -I on Linux
El AIX (as Linux) fa servir UDP, with ICMP responses
Windows : uses ICMP only
|
|
ping always uses icmp
|
|
CIDR
notation :
the mask length specifies the number of leftmost contiguous significant
bits in the corresponding IP address.
Thus, an IP prefix with a prefix length of 15 (denoted /15) covers the
address space of 128k IP addresses,
and a /17 covers the address space of 32k IP addresses.
|
Com saber qui es 9.12.136.103 ?
ping, traceroute, nslookup, dig, host,
|
|
IBM RedBook : "TCP/IP tutorial and technical overview" -
GG243376 !
|
See your
IP as seen from outside (ShowMyIP)
What is my IP ?
Collita pròpia !!!
How to hide your IP ? Use VPN.
Comparativa
|
|
Diferencies entre un proxy i un socks :
- un proxy es ...
 A Proxy Server is a server that sits between a client application, such as a Web browser, and a real server.
 It intercepts all requests to the real server to see if it can fulfill the requests itself, using its "cache".
 If not, it forwards the request to the real server.

 In addition to that, among proxy servers there are so called anonymous proxy servers
 that hide your IP address thereby saving you from vulnerabilities concerned with it.
- un socks es ...
 A protocol for handling TCP traffic through a proxy server.
 It can be used with virtually any TCP application, including Web browsers and FTP clients.
 It provides a simple firewall because it checks incoming and outgoing packets
 and hides the IP addresses of client applications.
|
|
Networking essentials
[T42:\\Books\TCPIP\Essentials]
TCP/IP Fundamentals for Microsoft Windows
|
|
Linux IP commands
display current config for all NIC's: ifconfig
display current config for eth0: ifconfig eth0
assign IP: ifconfig eth0 192.168.1.2
assign multiple IP's: ifconfig eth0:0 192.168.1.2
assign second IP: ifconfig eth0:1 192.168.1.3
disable network card: ifconfig eth0 down
enable network card: ifconfig eth0 up
assign IP/Subnet: ifconfig eth0 192.168.1.2 netmask 255.255.255.0
assign Default Gateway: route add default gw 192.168.1.1
view current routing table: route "or" route -n
view arp cache: arp "or" arp -n
ping: ping -c 3 192.168.1.1
trace Route: traceroute www.whatismyip.com
trace Path: tracepath www.whatismyip.com
DNS Test: host www.whatismyip.com
advanced DNS Test: dig www.whatismyip.com
reverse Lookup: host 66.11.119.69
advanced Reverse Lookup: dig -x 66.11.119.69
TCP dump tcpdump eth
capture network traffic tshark
WhatIsMyIP
Mind "PROMISC" flag :
jac@Gazelle[516]$ ifconfig eth0
eth0 Link encap:Ethernet HWaddr xx:xx:xx:xx:xx:xx
inet addr:10.18.2.35 Bcast:10.18.2.255 Mask:255.255.255.0
UP BROADCAST NOTRAILERS RUNNING PROMISC MTU:1500 Metric:1
RX packets:10723 errors:0 dropped:0 overruns:0 frame:0
TX packets:5439 errors:0 dropped:0 overruns:0 carrier:0
collisions:1 txqueuelen:100
RX bytes:1470520 (1.4 Mb) TX bytes:484154 (472.8 Kb)
Interrupt:9 Base address:0x9000
|
|
win IP commands in detail
c:\> ipconfig /all
Windows IP Configuration
Host Name . . . . . . . . . . . . : scfc1209
Primary DNS Suffix . . . . . . . : bar.es.hal.com [1]
Node Type . . . . . . . . . . . . : Peer-Peer
IP Routing Enabled. . . . . . . . : No
WINS Proxy Enabled. . . . . . . . : No
DNS Suffix Search List. . . . . . : bar.es.hal.com
es.hal.com
hal.com
Ethernet adapter Local Area Connection:
Connection-specific DNS Suffix . : bar.es.hal.com [2]
[1] : MyPC + properties + "Computer Name" + change + "more" : Primary DNS suffix of this computer
(+) change primary DNS suffix when domain membership changes.
[2] : Network Places + properties + specific connection + properties + TCPIP + Advanced + "DNS" : DNS suffix for this connection
(+) register this connection's addresses in DNS
(-) use this connection's DNS suffix in DNS registration
|
What is the format of a valid MAC address ? And OUIs list
A normal MAC address looks like this: 00:09:5B:EC:EE:F2.
It is composed of six octets.
The first half (00:09:5B) of each MAC address is known as the Organizationally Unique Identifier (OUI).
Simply put, it is the card manufacturer.
The second half (EC:EE:F2) is known as the extension identifier and is unique to each network card within the specific OUI.
Many access points will ignore MAC addresses with invalid OUIs.
So make sure you use a valid OUI code when you make up MAC addresses.
Otherwise, your packets may be ignored by the Access Point.
The current list of OUIs may be found
here.
Make sure that that the last bit of first octet is 0.
This corresponds to unicast addresses.
If it is set to 1, this indicates a group address, which is normally exclusively used by multicast traffic.
MAC addresses with a source set to multicast are invalid and will be dropped.
Examples of valid OUIs: 00:1B:23, 08:14:43, AA:00:04 because 0, 8 and A are even.
Examples of invalid OUIs: 01:1B:23, 03:23:32
In particular, it is recommended that the first octet to be 00.
url
00-05-69 (hex) VMware, Inc.
00-0C-29 (hex) VMware, Inc.
00-1C-14 (hex) VMware, Inc
00-50-56 (hex) VMware, Inc.
00-21-5E IBM
C8-4C-75 Cisco
Buscador de MAC's ...
vendor finder
NET command
|
Top
|
NET HELP or NET /? displays
 NET ACCOUNTS             NET HELP              NET SHARE
 NET COMPUTER             NET HELPMSG           NET START
 NET CONFIG               NET LOCALGROUP        NET STATISTICS
 NET CONFIG SERVER        NET NAME              NET STOP
 NET CONFIG WORKSTATION   NET PAUSE             NET TIME
 NET CONTINUE             NET PRINT             NET USE
 NET FILE                 NET SEND              NET USER
 NET GROUP                NET SESSION           NET VIEW
Continue with NET HELP <command>
or use/read
url
So, first we use nbtstat -A <remote ip>
to find out the remote IP and then we use
NET VIEW \\<remote ip> to see the shared resources.
Finally, we test NET USE with diferent user's and keys.
NET VIEW internals
Function
NET VIEW displays a list of resources being shared on a computer.
When used without options,
it displays a list of computers in the current domain or network.
|
NET USE internals
Function
NET USE connects a computer to a shared resource
or disconnects a computer from a shared resource.
When used without options, it lists the computer's connections.
Pre-reqs
- valid User and Password
- shared resource
- network connectivity ( PING is NOT enough )
net use * \\ftp.microsoft.com\data
1.- Resolu"ción de nombres NetBIOS :
(a través de un servidor de nombres, difusión o archivos estáticos)
NetBIOS name query request -->
<-- NetBIOS name query response
2.- Establecer una conexión TCP :
SYN -->
<-- SYN-ACK
ACK -->
3.- Se configura una sesión de NetBIOS a través de esa conexión :
NetBIOS session setup request -->
<-- NetBIOS session setup response
url
Troubleshooting NET USE failure (when PING NetBIOS name works) :
If you can ping a NetBIOS name but cannot use the NET command, follow these steps:
- If this occurs only across a router, check to see if TCP Port 139 is enabled.
- If this occurs only across a router, check to see if the Router is unable to Pass the Large Packet Sizes :
ping <ip> -l 4048
- Check to make sure the Server Service is started on the computer in Control Panel, Services.
Servei :
%system32%\svchost.exe -k netsvcs
Mostrar configuración :
net config server
Enable/Disable NetBios over TCPIP :
Open TCP/IP Properties
Click Advanced
Select WINS tab
|
NET USER internals
Pre-reqs
NET USER creates and modifies user accounts on computers.
When used without switches, it lists the user accounts for the computer.
The user account information is stored in the user accounts database.
NET USER R752196 /DOMAIN
|
The TCP Three way Handshake
|
Top
|
To begin to understand the workings of a port scan,
the basics of creating a TCP Connection needs to be known.
A Connection is established by a process known as the three way handshake:
- The client machine sends out a TCP packet with the SYN bit set (Synchronise).
- The server responds with a SYN / ACK packet (Synchronise, Acknowledge).
- The client then replies with a ACK packet (Acknowledge).
The TCP connection has then been created.
BT4 Identify Live Hosts
- 0trace
- 5nmp
- Angry IPScan
- Arping
- Autoscan
- Fping
- Genlist
- Hping2
- Hping3
- Lanmap
- Lanmap2
- Nbtscan
- Netifera
- Nmap
- Nsat
- Onesixtyone
- OutputPBNJ
- ScanPBNJ
- SCTPscan
- SSLscan
- TCPtraceroute
- Unicornscan
- Zenmap
nmap scans
By default, nmap does host discovery and then performs a port scan against each host it determines is online.
Global
nmap description :
The Art of Port Scanning, by Fyodor [1997].
Fyodor at Black Hat 2008, DEFCON 16
Homepage,
docs.
Tutorial [***]
host discovery : ARP ping "-PR".
Top 30 nmap command examples for sys/network admins [***]
See "Xmas ping" ... to all the IP's !
Use sudo to display the MAC's !!
The Connect Scan
If a SYN Packet is sent to an closed port,
a SYN, ACK response will not be sent.
Instead the target will reply with a RST, ACK (Rest, Acknowledge)
indicating the port is closed.
Read more details
here
The SYN (half open) scan.
The concept behind the half open scan
is to hide the fact a connection is taking place
from the remote operating system.
This is accomplished by never completing the 3 way handshake.
Instead of sending the ending "ACK, a "RST" is sent
to notify the target that the connection should be closed
before it is fully open.
The Null scan.
The concept behind a Null scan
is to send a packet with invalid flags set,
in the case of a null scan, setting no flags.
When the target receives such a packet,
it will either be dropped or responded to with a RST,
this will obviously be dependent on what state
the destination port is currently in (open or closed).
The Xmas Scan
The Xmas scan is similar to the null scan; it is also based on the idea
of sending packets with invalid flags set.
Where as the null scan sends a packet with no options,
the XMAS Scan uses the URG PSH and FIN (Urgent, Push and Finish) flags.
Once again, if the port is closed, a RST will be sent back to the client
and if it is open the packet will be dropped.
Download nmap 4 Windows.
WinPcap is a Windows driver for raw network connection.
It is used by nmap (port scanner software)
and tcpdump (ethernet sniffer).
It is open source and is a driver.
[root@lab2 ~]# TCPDUMP(8) - dump traffic on a network
tcpdump [ -AdDeflLnNOpqRStuUvxX ] [ -c count ]
[ -C file_size ] [ -F file ]
[ -i interface ] [ -m module ] [ -M secret ] [ -r file ]
[ -s snaplen ] [ -T type ] [ -w file ]
[ -W filecount ] [ -E spi@ipaddr algo:secret,... ]
[ -y datalinktype ] [ -Z user ]
[ expression ]
nmap sample - snap an IP range
To fill the ARP table, scan all IPs of a range :
nicolau@nicolau-desktop:~$ nmap -sn 192.168.1.1-255 # "-sn" = ping scan, disable port scan !
Starting Nmap 7.60 ( https://nmap.org ) at 2020-05-25 12:07 CEST
Nmap scan report for _gateway (192.168.1.1)
Host is up (0.068s latency).
Nmap scan report for 192.168.1.2
Host is up (0.19s latency).
Nmap scan report for 192.168.1.127
Host is up (0.19s latency).
Nmap scan report for nicolau-desktop (192.168.1.157)
Host is up (0.00015s latency).
Nmap scan report for r0 (192.168.1.222)
Host is up (0.039s latency).
Nmap done: 255 IP addresses (5 hosts up) scanned in 18.33 seconds
nmap sample - snap all ports of an IP
nmap –sT 192.168.0.1
nmap help
Nmap 4.85BETA8 ( http://nmap.org )
Usage: nmap [Scan Type(s)] [Options] {target specification}
TARGET SPECIFICATION:
Can pass hostnames, IP addresses, networks, etc.
Ex: scanme.nmap.org, microsoft.com/24, 192.168.0.1; 10.0.0-255.1-254
-iL <inputfilename>: Input from list of hosts/networks
-iR <num hosts>: Choose random targets
--exclude <host1[,host2][,host3],...>: Exclude hosts/networks
--excludefile <exclude_file>: Exclude list from file
HOST DISCOVERY:
-sL: List Scan - simply list targets to scan
-sn (old "-sP") : Ping Scan - no port scan, go no further than determining if host is online
-Pn : no ping ; skip the host discovery stage altogether
-PN: treat all hosts as online -- skip host discovery
-PS/PA/PU[portlist]: TCP SYN/ACK or UDP discovery to given ports
-PE/PP/PM: ICMP echo, timestamp, and netmask request discovery probes
-PO[protocol list]: IP Protocol Ping
-n/-R: never do DNS resolution/Always resolve [default: sometimes]
--dns-servers <serv1[,serv2],...>: Specify custom DNS servers
--system-dns: use OS's DNS resolver
--traceroute: trace hop path to each host
SCAN TECHNIQUES:
-sS/sT/sA/sW/sM: TCP SYN/Connect()/ACK/Window/Maimon scans
-sU: UDP Scan
-sN/sF/sX: TCP Null, FIN, and Xmas scans
--scanflags <flags>: Customize TCP scan flags
-sI <zombie host[:probeport]>: Idle scan
-sO: IP protocol scan
-b <FTP relay host>: FTP bounce scan
PORT SPECIFICATION AND SCAN ORDER:
-p <port ranges>: Only scan specified ports
Ex: -p22; -p1-65535; -p U:53,111,137,T:21-25,80,139,8080
-F: Fast mode - scan fewer ports than the default scan
-r: scan ports consecutively - don't randomize
--top-ports <number>: Scan <number> most common ports
--port-ratio <ratio>: Scan ports more common than <ratio>
SERVICE/VERSION DETECTION:
-sV: Probe open ports to determine service/version info
--version-intensity <level>: Set from 0 (light) to 9 (try all probes)
--version-light: Limit to most likely probes (intensity 2)
--version-all: Try every single probe (intensity 9)
--version-trace: Show detailed version scan activity (for debugging)
SCRIPT SCAN:
-sC: equivalent to --script=default
--script=<Lua scripts>: <Lua scripts> is a comma separated list of directories, script-files or script-categories
--script-args=<n1=v1,[n2=v2,...]>: provide arguments to scripts
--script-trace: Show all data sent and received
--script-updatedb: Update the script database.
OS DETECTION:
-O: enable OS detection
--osscan-limit: limit OS detection to promising targets
--osscan-guess: guess OS more aggressively
TIMING AND PERFORMANCE:
Options which take <time> are in milliseconds,
unless you append 's' (seconds), 'm' (minutes), or 'h' (hours) to the value (e.g. 30m).
-T<0-5>: Set timing template (higher is faster)
--min-hostgroup/max-hostgroup <size>: Parallel host scan group sizes
--min-parallelism/max-parallelism <time>: Probe parallelization
--min-rtt-timeout/max-rtt-timeout/initial-rtt-timeout <time>: Specifies probe round trip time.
--max-retries <tries>: Caps number of port scan probe retransmissions.
--host-timeout <time>: Give up on target after this long
--scan-delay/--max-scan-delay <time>: Adjust delay between probes
--min-rate <number>: Send packets no slower than <number> per second
--max-rate <number>: Send packets no faster than <number> per second
FIREWALL/IDS EVASION AND SPOOFING:
-f; --mtu <val>: fragment packets (optionally w/given MTU)
-D <decoy1,decoy2[,ME],...>: cloak a scan with decoys
-S <IP_Address>: spoof source address
-e <iface>: use specified interface
-g/--source-port <portnum>: use given port number
--data-length <num>: append random data to sent packets
--ip-options <options>: send packets with specified ip options
--ttl <val>: set IP time-to-live field
--spoof-mac <mac address/prefix/vendor name>: spoof your MAC address
--badsum: send packets with a bogus TCP/UDP checksum
OUTPUT:
-oN/-oX/-oS/-oG <file>: output scan in normal, XML, s|<rIpt kIddi3, and Grepable format, respectively, to the given filename.
-oA <basename>: output in the three major formats at once
-v: increase verbosity level (use twice or more for greater effect)
-d[level]: set or increase debugging level (Up to 9 is meaningful)
--reason: display the reason a port is in a particular state
--open: only show open (or possibly open) ports
--packet-trace: show all packets sent and received
--iflist: print host interfaces and routes (for debugging)
--log-errors: log errors/warnings to the normal-format output file
--append-output: append to rather than clobber specified output files
--resume <filename>: resume an aborted scan
--stylesheet <path/URL>: XSL stylesheet to transform XML output to HTML
--webxml: reference stylesheet from Nmap.Org for more portable XML
--no-stylesheet: prevent associating of XSL stylesheet w/XML output
MISC:
-6: enable IPv6 scanning
-A: enables OS detection and Version detection, Script scanning and Traceroute
--datadir <dirname>: specify custom Nmap data file location
--send-eth/--send-ip: send using raw ethernet frames or IP packets
--privileged: assume that the user is fully privileged
--unprivileged: assume the user lacks raw socket privileges
-V: print version number
-h: print this help summary page.
EXAMPLES:
nmap -v -A scanme.nmap.org
nmap -v -sP 192.168.0.0/16 10.0.0.0/8
nmap -v -iR 10000 -PN -p 80
SEE THE MAN PAGE (http://nmap.org/book/man.html) FOR MORE OPTIONS AND EXAMPLES
Exemples :
$ nmap -sn 8.137.164.15 ; ping host, no port scan
$ nmap -p 1-65535 -T4 -A -v -PE -PA21,23,80,3389 9.137.164.15 ; intense scan, all TCP ports
$ nmap -T4 -A -v -PN 9.137.164.15 ; intense scan, no ping
$ nmap -p1-65535 ; all ports
$ nmap -sU -p6900-6920 <ip> ; UDP scan of ports 6900 thru 6920 (WYSE)
$ nmap 10.139.130.1-240 ; all IPs in range
SuSE SLES 10 SP1 - rpm requires rtld (GNU-HASH) requisite.
nmap session
Newer versions of nmap will only show the MAC address if you're running as root
$ sudo nmap -sn 192.168.0.* ; print the MAC addresses of all available hosts
$ sudo nmap -sL -T5 192.168.1.1-255 ; list all IPs, resolve hostnames
$ sudo nmap -sn -T5 192.168.1.1-255 ; do host discovery but no port scan
$ sudo nmap -p 1-65535 -T4 -A -v -PE -PA21,23,80,3389 2.138.9.18 ; scan all ports of a specific host
$ sudo nmap -sU -p8000-9100 83.59.168.116 ; scan a port range of a specific IP {mtv}
nc = netcat
netcat is used for just about anything under the sun involving TCP, UDP, or UNIX-domain sockets.
It can open TCP connections, send UDP packets, listen on arbitrary TCP and UDP ports, do port scanning, ...
port scan :
$ sudo nc -w 1 -z -v -n 83.59.168.116 1-65535
-w 1 : Set time out value to 1
-z : port scanning mode i.e. zero I/O mode
-v : be verbose [use twice -vv to be more verbose]
-n : use numeric-only IP addresses i.e. do not use DNS to resolve ip addresses
minimalistic TCP server
On the server launch :
sebas@minie:~$ nc -k -l 7678 // specify the port ; IP is the localhost
On the client launch :
pi@R4:~ $ nc 192.168.1.150 7678 // specify server IP and port
qweqweqwe // this text comes up in the server window
    0                   1                   2                   3
    0 1 2 3 4 5 6 7 8 9 0 1 2 3 4 5 6 7 8 9 0 1 2 3 4 5 6 7 8 9 0 1
   +-+-+-+-+-+-+-+-+-+-+-+-+-+-+-+-+-+-+-+-+-+-+-+-+-+-+-+-+-+-+-+-+
   |          Source Port          |       Destination Port        |
   +-+-+-+-+-+-+-+-+-+-+-+-+-+-+-+-+-+-+-+-+-+-+-+-+-+-+-+-+-+-+-+-+
   |                        Sequence Number                        |
   +-+-+-+-+-+-+-+-+-+-+-+-+-+-+-+-+-+-+-+-+-+-+-+-+-+-+-+-+-+-+-+-+
   |                    Acknowledgment Number                      |
   +-+-+-+-+-+-+-+-+-+-+-+-+-+-+-+-+-+-+-+-+-+-+-+-+-+-+-+-+-+-+-+-+
   |  Data |           |U|A|P|R|S|F|                               |
   | Offset| Reserved  |R|C|S|S|Y|I|            Window             |
   |       |           |G|K|H|T|N|N|                               |
   +-+-+-+-+-+-+-+-+-+-+-+-+-+-+-+-+-+-+-+-+-+-+-+-+-+-+-+-+-+-+-+-+
   |           Checksum            |         Urgent Pointer        |
   +-+-+-+-+-+-+-+-+-+-+-+-+-+-+-+-+-+-+-+-+-+-+-+-+-+-+-+-+-+-+-+-+
   |                    Options                    |    Padding    |
   +-+-+-+-+-+-+-+-+-+-+-+-+-+-+-+-+-+-+-+-+-+-+-+-+-+-+-+-+-+-+-+-+
   |                             data                              |
   +-+-+-+-+-+-+-+-+-+-+-+-+-+-+-+-+-+-+-+-+-+-+-+-+-+-+-+-+-+-+-+-+
|
From
here
0... .... = Congestion Window reduced
.0.. .... = ECN-Echo
..0. .... = U : urgent - urgent pointer field significant.
...0 .... = A : acknowledgement - ack field significant.
.... 0... = P : push - push function.
.... .0.. = R : reset - reset the connection.
.... ..0. = S : syn - synchronize sequence numbers.
.... ...0 = F : fin - no more data from sender.
|
Network Basic Input Output System
defines a standard method for the provision
and use of network services.
NetBIOS relies on a message format called Server Message Block (SMB).
NetBIOS resources are referenced by name.
The NetBIOS name space is flat, unlike DNS where it is hierachical
and so all names within a given network must be unique.
NetBIOS names are 16 bytes long with the last byte being reserved
to denote the service that the name has been registered with.
If not all 15 available bytes are used the remainder will be padded with spaces.
How does NETBIOS run over TCP/IP ?
The Internet uses the TCP/IP protocol suite to standarize
communications across it.
NetBIOS over TCP/IP
(
RFCs
1000
and ***
1001 ***
1002 and 1088
)
- or rather NetBT - has defined
for it a number of TCP and UDP ports for use.
These ports are:
TCP
139 - nbsession - NetBIOS session - eg net use \\123.123.123.123\ipc$ "" /user:""
42 - WINS - Windows Internet Name System - (also UDP port 42)
UDP
137 - nbname - Name Queries - eg nbtstat -A 123.123.123.123
138 - nbdatagram - UDP datagram services - eg net send /d:domain-name "Hello"
As far as attacks are concerned the majority of the more important hacks
will be aimed at TCP port 139 otherwise known as the nbsession well-known
port - the NetBIOS session port.
From
here :
The Windows NT and Windows 2000 implementation of NetBIOS over TCP/IP
is referred to as NetBT.
NetBT uses the following TCP and UDP ports:
- UDP port 137 (name services)
- UDP port 138 (datagram services)
- TCP port 139 (session services)
NBTSTAT : if we run nbtstat -A 118.24.210.56 we shall find some
interesting
info.
| Service identifiers |
| Unique Names |
| computer_name |
0x00 |
Workstation Service or base computer name |
| computer_name |
0x03 |
Messenger Service |
| user_name |
0x03 |
Messenger Service |
| computer_name |
0x06 |
Remote Access Server Service |
| domain_name |
0x1B |
Domain Master Browser |
| domain_name |
0x1D |
Master Browser |
| computer_name |
0x1F |
NetDDE Service |
| computer_name |
0x20 |
Server Service, used to provide sharepoints for file sharing |
| computer_name |
0x21 |
RAS Client Service |
| computer_name |
0xBE |
Network Monitor Agent |
| computer_name |
0xBF |
Network Monitor Application |
| Group Names |
| domain_name |
0x00 |
Domain Name |
| domain_name |
0x1B |
Primary Domain Controller |
| domain_name |
0x1C |
Domain Controller |
| domain_name |
0x1D |
Master Browser |
| domain_name |
0x1E |
Browser Service Elections |
| domain_name |
0x20 |
Internet group, registered with WINS servers to identify groups
of computers for administrative purposes |
The number <20> shows that the victim has enabled
the File And Printer Sharing.
NETBIOS is usually used on a small LAN where the traffic between the
machines are all visible to each other on the same LAN segment.
NETBIOS over TCP/IP has to be used when the network traffic has to
pass through a router to reach the machines that have to be connected.
NETBIOS (NETBIOS over NETBEUI) uses NETBEUI as the transport protocol.
NETBEUI is not routable.
NETBIOS over TCP/IP (NETBIOS over TCPBEUI) uses TCP/IP as the
transport protocol. TCP/IP is a routable protocol.
NETBIOS Calls :
- Name Support
- NCBADDGRNAME - add group name (0x36, wait; 0xB6, no-wait)
- NCBADDNAME - add name (0x30, wait; 0xB0, no-wait)
- NCBDELNAME - delete name (0x31, wait; 0xB1, no-wait)
- NCBFINDNAME - find name (0x78, wait; 0xF8, no-wait)
- Session Support
- NCBCALL - call : Session Request (0x10, wait; 0x90, no-wait)
- NCBHANGUP - hang up (0x12, wait; 0x92, no-wait)
- NCBLISTEN - listen (0x11, wait; 0x91, no-wait)
- NCBSSTAT - session status (0x34, wait; 0xB4, no-wait)
- Data-Transfer Support
- NCBCHAINSEND - chain send
- NCBCHAINSENDNA - chain send noack
- NCBRECV - receive
- NCBRECVAY - receive any
- NCBSEND - send
- NCBSENDNA - send noack
- Datagram Support
- NCBDGRECV - receive datagram
- NCBDGRECVBC - receive broadcast datagram
- NCBDGSEND - send datagram
- NCBDGSENDBC - send broadcast datagram
- General Support
- NCBASTST - adapter status
- NCBCANCEL - cancel (0x35, wait)
- NCBRESET - reset (0x32, wait)
- Extension Support
- NCBACTION - action
- NCBENUMERATE - enumerate
- NCBLANSTALERT - LAN status alert
- Positive Session Response (0x82)
The NetBIOS LANA number identifies the transport driver,
network interface card (NIC) driver, and adapter
that will be used to send and receive NetBIOS packets.
NetBIOS (computer) name resolution follows like this :
- the computer checks it's NetBIOS name cache
- if one is configured the computer makes three attempts to contact a NetBIOS name server (WINS)
- if a NetBIOS name server is not configured or is unavailable the computer makes three broadcasts on it's subnet for the name
- if the broadcasts don't find the computer then the computer consults the local LMHOSTS file if it is available
- if the NetBIOS name is not resolved thru the LMHOSTS the computer checks in it's HOSTS file
- finally the computer tries the DNS server if available
- if none of these steps work the computer gives up and you get the computer not found message.
while DNS host names resolution goes
- HOSTS file (/etc/hosts @ Unix)
- DNS server
- name cache
- WINS server
- broadcast
- LMHOSTS file
NETBIOS weaknesses (1) :
- does not support an internetworking naming convention
- does not provide authentication and security mechanisms
|
NB shared resources
If you are not joined to a specific workgroup
but your computer is in the same IP address range (for example 10.0.0.[x] OR 192.168.1.[x])
you can still access shared resources by typing the IP address or computer name, into the address bar.
For example typing \\server or \\192.168.1.2 would give you access to [server's] shared files and printers.
url
|
|
NetBios command categories
Page 431, "Client/Server programming", G325-0650-02.
General Services
Reset
Status
Cancel
Alert
Unlink
Name Services
Add Name
Add Group Name
Delete Name
Find Name
Session Services
Call
Listen
Send
Chain Send
Send No-Ack
Chain Send No-Ack
Receive
Receive Any
Hang Up
Session Status
Datagram Services
Send Datagram
Send-Broadcast Datagram
Receive Datagram
Receive-Broadcast Datagram
|
|
WORKGROUP
Open "Network Places" and select "view workgroup computers".
Note that the default workgroup name in Windows XP is "MSHOME" but in older versions of Windows is "WORKGROUP".
|
|
NET SEND
Basically NET SEND is an SMB (SERVER MESSAGE BLOCK) mesage sent over NetBIOS.
For NT4 for example the service is Messenger Service.
For 95/98, it is WinPopup. To install it under W95 :
- In Control Panel, double-click Add/Remove Programs.
- On the Windows Setup tab, click Accessories, and then click Details.
- Click the WinPopup check box to select it, and then click OK.
See
Microsoft
description of "Messenger Service of Windows", also known as "NETBIOS spam".
Used by
DirectAdvertiser.com
Under NT, it can be done using NetMessageBufferSend()
Test if
you
are under risk !
Try also mailslot("messngr")
From Linux to Win :
 To send the message "Hi there!" to the user on a host name WINHOST,
 the following command line would do the trick :

 /bin/echo "Hi there!" | smbclient -M WINHOST
If you need messages to be sent to different machines on a per-user basis,
use the nmblookup utility to find out
which machine the user is logged into before sending the message.
|
|
NULL sessions
Start
here - PING, NBTSTAT, NET VIEW, NET USE, NETSTAT, null sessions.
net use \\9.136.0.129\ipc$ "" /u:""
Read this
site
|
General Call
NCB header : defined in
NB30.H
( tp770, NT, D:\IBMCPPW\SDK\WINH or
D:\Microsoft Visual Studio\VC98\Include )
Win32 library : netapi32.lib
 UCHAR Netbios (
     PNCB pNcb  // address of network control block
 ) ;
|
NCB structure
typedef struct _NCB {
    UCHAR   ncb_command ;                        /* command code                */
    UCHAR   ncb_retcode ;                        /* return code                 */
    UCHAR   ncb_lsn ;                            /* local session number        */
    UCHAR   ncb_num ;                            /* number of our network name  */
    PUCHAR  ncb_buffer ;                         /* address of message buffer   */
    WORD    ncb_length ;                         /* size of message buffer      */
    UCHAR   ncb_callname [NCBNAMSZ] ;            /* blank-padded name of remote */
    UCHAR   ncb_name [NCBNAMSZ] ;                /* our blank-padded netname    */
    UCHAR   ncb_rto ;                            /* rcv timeout/retry count     */
    UCHAR   ncb_sto ;                            /* send timeout/sys timeout    */
    void (CALLBACK *ncb_post)( struct _NCB * ) ; /* POST routine address        */
    UCHAR   ncb_lana_num ;                       /* lana (adapter) number       */
    UCHAR   ncb_cmd_cplt ;                       /* 0xff => commmand pending    */
    UCHAR   ncb_reserve [10] ;                   /* reserved, used by BIOS      */
//
//   SPECIFIC TO WIN32
//
    HANDLE  ncb_event ;       // HANDLE to Win32 event which will be set
                              // to the signalled state
                              // when an ASYNCH command completes

} NCB, * PNCB ;
|
Sample code
----------------------------------------------------------------------
The information in this article applies to:

 - Microsoft Win32 Software Development Kit (SDK) versions 3.1 and 3.5
----------------------------------------------------------------------

SUMMARY
=======

You can get a list of NetBIOS names for a lana by using the Adapter Status
NetBIOS request and using the "*" character as the call name. However, on
Windows NT, this method lists only the names added by the current process.

If you want to list all of the NetBIOS names on the lana, use a unique
local name as the call name. This method causes the Adapter Status to be
treated as a remote call, which will disable the "filtering" of names added
by other processes. The sample code below demonstrates this technique.

SAMPLE CODE
-----------

/* The following makefile may be used to build this sample:

 !include

 PROJ = test.exe
 DEPS = test.obj
 LIBS_EXT = netapi32.lib

 .c.obj:
   $(cc) /YX $(cdebug) $(cflags) $(cvars) $<

 $(PROJ) : $(DEPS)
   $(link) @<<
 $**
 -out:$@
 $(conlibs)
 $(conlflags)
 $(ldebug)
 $(LIBS_EXT)
 <<

*/

#include <windows.h>
#include <stdio.h>
#include <string.h>

/*
 * LANANUM and LOCALNAME should be set as appropriate for your system
 */
#define LANANUM     0
#define LOCALNAME   "MAKEUNIQUE"

#define NBCheck(x)  if (NRC_GOODRET != x.ncb_retcode) { \
                        printf("Line %d: Got 0x%x from NetBios()\n", \
                               __LINE__, x.ncb_retcode); \
                    }

void MakeNetbiosName (char *achDest, LPCSTR szSrc);
BOOL NBAddName (int nLana, LPCSTR szName);
BOOL NBReset (int nLana, int nSessions, int nNames);
BOOL NBListNames (int nLana, LPCSTR szName);
BOOL NBAdapterStatus (int nLana, PVOID pBuffer, int cbBuffer,
                      LPCSTR szName);

void
main ()
{
    if (!NBReset (LANANUM, 20, 30))
        return;

    if (!NBAddName (LANANUM, LOCALNAME))
        return;

    if (!NBListNames (LANANUM, LOCALNAME))
        return;

    printf ("Succeeded.\n");
}

BOOL
NBReset (int nLana, int nSessions, int nNames)
{
    NCB ncb;

    memset (&ncb, 0, sizeof (ncb));
    ncb.ncb_command = NCBRESET;
    ncb.ncb_lsn = 0;            /* Allocate new lana_num resources */
    ncb.ncb_lana_num = nLana;
    ncb.ncb_callname[0] = nSessions;  /* max sessions */
    ncb.ncb_callname[2] = nNames;  /* max names */

    Netbios (&ncb);
    NBCheck (ncb);

    return (NRC_GOODRET == ncb.ncb_retcode);
}

BOOL
NBAddName (int nLana, LPCSTR szName)
{
    NCB ncb;

    memset (&ncb, 0, sizeof (ncb));
    ncb.ncb_command = NCBADDNAME;
    ncb.ncb_lana_num = nLana;

    MakeNetbiosName (ncb.ncb_name, szName);

    Netbios (&ncb);
    NBCheck (ncb);

    return (NRC_GOODRET == ncb.ncb_retcode);
}

/*
 * MakeNetbiosName - Builds a name padded with spaces up to
 * the length of a NetBIOS name (NCBNAMSZ).
 */
void
MakeNetbiosName (char *achDest, LPCSTR szSrc)
{
    int cchSrc;

    cchSrc = lstrlen (szSrc);
    if (cchSrc > NCBNAMSZ)
        cchSrc = NCBNAMSZ;

    memset (achDest, ' ', NCBNAMSZ);
    memcpy (achDest, szSrc, cchSrc);
}

BOOL
NBListNames (int nLana, LPCSTR szName)
{
    int cbBuffer;
    ADAPTER_STATUS *pStatus;
    NAME_BUFFER *pNames;
    int i;

    // Allocate the largest buffer we might need
    cbBuffer = sizeof (ADAPTER_STATUS) + 255 * sizeof (NAME_BUFFER);
    pStatus = (ADAPTER_STATUS *) HeapAlloc (GetProcessHeap (), 0,
                                            cbBuffer);
    if (NULL == pStatus)
        return FALSE;

    if (!NBAdapterStatus (nLana, (PVOID) pStatus, cbBuffer, szName))
    {
        HeapFree (GetProcessHeap (), 0, pStatus);
        return FALSE;
    }

    // The list of names immediately follows the adapter status
    // structure.
    pNames = (NAME_BUFFER *) (pStatus + 1);

    for (i = 0; i < pStatus->name_count; i++)
        printf ("\t%.*s\n", NCBNAMSZ, pNames[i].name);

    HeapFree (GetProcessHeap (), 0, pStatus);

    return TRUE;
}

BOOL
NBAdapterStatus (int nLana, PVOID pBuffer, int cbBuffer, LPCSTR szName)
{
    NCB ncb;

    memset (&ncb, 0, sizeof (ncb));
    ncb.ncb_command = NCBASTAT;
    ncb.ncb_lana_num = nLana;

    ncb.ncb_buffer = (PUCHAR) pBuffer;
    ncb.ncb_length = cbBuffer;

    MakeNetbiosName (ncb.ncb_callname, szName);

    Netbios (&ncb);
    NBCheck (ncb);

    return (NRC_GOODRET == ncb.ncb_retcode);
}
|
Que em caldria per escriure aquest codi de Delphi ?
On es el "NCB header" per Delphi ?
From
here :
WINS stands for Windows Internet Naming Service.
It's a name resolution service that uses the NetBIOS method
to locate computer resources on a network by name.
It's the follow-on from the LMHOSTS file,
and it's an automatic system insofar
as you don't need to manually update name records.
WINS is slightly misnamed because,
contrary to what its name implies,
it can't be used to resolve names over the Internet.
That requires DNS.
Many older applications still require WINS.
For example, the Map Network Drive function,
the 'My Network Places', (as well as "Network Neighborhood")
and the net command with supported options
such as net view
all require WINS name resolution.
If WINS servers aren't specified on a client, (use IPCONFIG /ALL)
that client will, by default,
try to resolve NetBIOS names by sending a broadcast to the network.
If the required resource is on a different subnet,
then these broadcasts can't be routed because
broadcasts aren't routed in Microsoft TCP/IP.
Well Known Ports [WKP]
|
Top
|
Use netstat -an to display !
url.
20 - ftp (data channel)
21/tcp - ftp (control channel)
22/tcp - ssh
23/tcp - telnet
25/tcp - smtp, outgoing mail
42 - wins
53{2} - dns
bootps 67/udp - dhcps # Servidor del protocolo de inicio del sistema
bootpc 68/udp - dhcpc # Servidor del protocolo de inicio del sistema
69/{2} - tftp
80/tcp - http
110/tcp - pop3, incoming mail
119/tcp - nntp, network news transfer
123/udp - ntp - europe.pool.ntp.org
135 - DCE endpoint resolution (W2K sends SYNC to a span of IPs)
137/udp i udp - nbname : NETBIOS name queries service (nbns)
138/udp - nbdatagram : NETBIOS datagram service.
139/tcp - nbsession : NETBIOS session service (nbss)
161 - snmp
389 - LDAP
443/tcp - HTTPS, secure web server
517-518/udp - TALK
636 - LDAPS
1352/tcp - Lotus Domino server, NRPC connections
1414 - MQ default port
1434/udp - SQL server
1533 - Community Server
1883 - TT
2000/tcp udp - Net2Phone
2300:2400/tcp udp - Age of Empires II
3278 - GigaTribe
3389 - Terminal Server
4000/tcp - Star Craft
4070 - Spotify
4662/tcp, 4672/udp - Emule = eD2K network + Kad network (TCP=28.853, UDP=40.996)
5000+ - Unreal Tournament
5631-5632/udp tcp - PCAnyWhere
5800-5809/tcp - VNC - remote display system
5900-5909/tcp - VNC - remote display system
6000+n - x-windows server, where n is the display-number.
6112 - CDE subprocess control service (dtspcd)
6667 - public IRC servers
7777/udp - Unreal Tournament
8000 - SHOUTcast streaming
14147 - Filezilla FTP server
27015/tcp udp - Half Life Team Fortress
27950/udp - Quake II
52409 - Vuze (ex Azureus) & more
Wiki about WKP.
A client starts an LDAP session by connecting to an LDAP server,
called a Directory System Agent (DSA), by default on TCP port 389.
url.
Lotus Domino uses these default ports for Internet services:
Service Default TCP port Default SSL port
POP3 110 995
IMAP 143 993
LDAP 389 636
SMTP inbound 25 465
SMTP outbound 25 465
HTTP 80 443
IIOP 63148 63149
Server Controller n/a 2050
|
WKP are assigned by
IANA
See /etc/services and /etc/inetd.conf !!!
Start a inetd service using /etc/inetd.conf
Win : C:\WINDOWS\system32\drivers\etc\SERVICES
FTP Active/Passive mode
description.
This guy has a
port table.
|
MQ - 1414
Oracle - 1521
Derby - 1521
DB2 :
To find out the port used, issue this command from the CLP: get dbm cfg
Then, look for the parameter SVCENAME.
If the value of SVCENAME is not the port number but a string,
then look in your system for the file 'services' (c:\win\system32\drivers\)
and grep for this string.
|
See P2P soft and ports here
netstat details
netstat at W2K / T30
El filtre a Guindous es així :
netstat -an | find "14"
TCP 0.0.0.0:1416 0.0.0.0:0 LISTENING
TCP 0.0.0.0:1437 0.0.0.0:0 LISTENING
netstat at WXP / P4
C:\>netstat -an
Active Connections
Proto Local Address Foreign Address State
TCP 0.0.0.0:135 0.0.0.0:0 LISTENING
TCP 0.0.0.0:445 0.0.0.0:0 LISTENING
TCP 0.0.0.0:1025 0.0.0.0:0 LISTENING
TCP 0.0.0.0:1051 0.0.0.0:0 LISTENING
TCP 0.0.0.0:2869 0.0.0.0:0 LISTENING
Veure qui ha obert un port
C:\> netstat -ano
Active Connections
Proto Local Address Foreign Address State PID
TCP 9.137.165.88:2040 9.17.136.77:1533 ESTABLISHED 6036
TCP 9.137.165.88:2750 209.85.229.17:443 ESTABLISHED 3868
M'agrada mes
netstat -tulpn
Seguit de :
C:\> tasklist | find "6036"
sametime75.exe 6036 Console 0 40.972 K
c:\> tasklist | find "3868"
firefox.exe 3868 Console 0 135.928 K
Millor encara :
c:\> netstat -anb
Active Connections
Proto Local Address Foreign Address State PID
TCP 0.0.0.0:21 0.0.0.0:0 LISTENING 2292
[FileZilla Server.exe]
TCP 0.0.0.0:25 0.0.0.0:0 LISTENING 2668
[inetinfo.exe]
El millor de tots (20150506):
[root@rhv7 ~]# netstat -lnp | grep 8124
tcp 0 0 9.137.164.60:8124 0.0.0.0:* LISTEN 2395/node
netstat32 code
Author,
Salvatore Meschini,
says to download latest version from
here
Own site is at :
http://smeschini.altervista.org ;
old (dead) was
http://web.tiscali.it/no-redirect-tiscali/salvatoremeschini/download/netstat32.htm
Read it here.
netstat is obsolete
Replacement for "netstat" is "ss" - another utility to investigate sockets
Replacement for "netstat -r" is "ip route "
Replacement for "netstat -i" is "ip -s link"
Replacement for "netstat -g" is "ip maddr"
Network Neighborhood
|
Top
|
|
W95 : "NN" icon + right button + Properties + "Identification" gives access to
- Computer name
- Workgroup
- Computer Description
Those values can be displayed from a remote computer, using (W95) net view,
that displays "Servers available in (actual) Workgroup".
|
W95 : "TCP/IP" Properties + "DNS Configuration" gives access to
- Host (name)
- Domain [bar.es.hal.com]
|
|
W2K :
|
DHCP
uSoft :
Dynamic Host Configuration Protocol (DHCP) is a standard protocol defined by RFC 1541 (which is superseded by RFC 2131)
that allows a server to dynamically assign IP address and other parameters (DHCP options) to devices on the network.
The protocol uses both UDP port 67 (server) and UDP port 68 (client) and several different message types.
Normally the DHCP server provides the client with at least this basic information:
- IP address
- subnet mask
- default gateway
Other information can be provided as well,
such as Domain Name Service (DNS) server addresses
and Windows Internet Name Service (WINS) server addresses.
Managing MS DHCP Servers - com fer que el DHCP propagui el DNS !
Wiki
DHCP
DHCP configuration
To configure a DHCP server, the /etc/dhcpd.conf configuration file must be created.
DHCP also uses the file /var/lib/dhcp/dhcpd.leases to store the client lease database.
First line must select DNS update shema.
Refer to the dhcpd.conf man page for details about the different modes.
- ddns-update-style ad-hoc; // old fashion, deprecated
- ddns-update-style interim; // recommended mode
- ddns-update-style none; //
DNS's are included in a sentence like:
option domain-name-servers 192.168.1.1, 192.168.1.2;
Centos,
HowToForge
Format of a DHCP message
0 1 2 3
0 1 2 3 4 5 6 7 8 9 0 1 2 3 4 5 6 7 8 9 0 1 2 3 4 5 6 7 8 9 0 1
+-+-+-+-+-+-+-+-+-+-+-+-+-+-+-+-+-+-+-+-+-+-+-+-+-+-+-+-+-+-+-+-+
| op (1) | htype (1) | hlen (1) | hops (1) |
+---------------+---------------+---------------+---------------+
| xid (4) |
+-------------------------------+-------------------------------+
| secs (2) | flags (2) |
+-------------------------------+-------------------------------+
| ciaddr (4) |
+---------------------------------------------------------------+
| yiaddr (4) |
+---------------------------------------------------------------+
| siaddr (4) |
+---------------------------------------------------------------+
| giaddr (4) |
+---------------------------------------------------------------+
| chaddr (16) |
+---------------------------------------------------------------+
| sname (64) |
+---------------------------------------------------------------+
| file (128) |
+---------------------------------------------------------------+
| options (variable) |
+---------------------------------------------------------------+
FIELD OCTETS DESCRIPTION
----- ------ -----------
op 1 Message op code / message type. 1 = BOOTREQUEST, 2 = BOOTREPLY
htype 1 Hardware address type, e.g., '1' = 10mb ethernet.
hlen 1 Hardware address length (e.g. '6' for 10mb ethernet).
hops 1 Client sets to zero, optionally used by relay agents when booting via a relay agent.
xid 4 Transaction ID, a random number chosen by the
client, used by the client and server to associate
messages and responses between a client and a server.
secs 2 Filled in by client, seconds elapsed since client
began address acquisition or renewal process.
flags 2 Flags (see figure 2).
ciaddr 4 Client IP address; only filled in if client is in
BOUND, RENEW or REBINDING state and can respond to ARP requests.
yiaddr 4 'your' (client) IP address.
siaddr 4 IP address of next server to use in bootstrap;
returned in DHCPOFFER, DHCPACK by server.
giaddr 4 Relay agent IP address, used in booting via a relay agent.
chaddr 16 Client hardware address.
sname 64 Optional server host name, null terminated string.
file 128 Boot file name, null terminated string; "generic" name or null in DHCPDISCOVER, fully qualified directory-path name in DHCPOFFER.
options var Optional parameters field.
RFC 2131
- DHCP_discover
- DHCP_offer
- DHCP_request
- DHCP_ack
Managing dynamic IP networks, page 22 and 72.
DHCP Message Types
- DHCPDISCOVER
This DHCP message type is used by the DHCP client to discover DHCP servers.
- DHCPOFFER
This DHCP message type is used by the DHCP server to respond to a received DHCPDISCOVER message and also offers configuration details at that time.
- DHCPREQUEST
This message comes from a client and to the DHCP server to convey three various messages.
The first is to request configuration details from one specific DHCP server and specifically rejecting offers from any other potential DHCP servers.
Secondly it can be used for verification of previously used IP address after a system has undergone a reboot.
Lastly, it can be used to extend the lease of a specific IP address.
DHCP tutorial
part1
part 2
DHCP explorer
1,
2,
Web Admin tools.
Linux:
if you want to get a new IP address assigned from your DHCP server,
use the pump command or dhclient
DHCP tools :
ipconfig /showclassid "Conexiones de red inalámbricas 2"
Netsh commands for DHCP.
DHCP @ uSoft TechNet.
dhcp_probe
dhcp_probe : locate DCHP and BootP servers
who is your DHCP server ?
I want to know who provided me my IP
"cat /var/log/syslog | grep dhcp"
mind you can have a "fixed" IP
DHCP sample
From file /var/lib/named/log/named_query.log
Sep 16 12:19:28 network dhcpd: DHCPREQUEST for 9.137.164.123 from f4:38:61:67:64:b4 via eth1: ignored (not authoritative).
Sep 16 12:19:29 network dhcpd: DHCPDISCOVER from f4:38:61:67:64:b4 via eth1
Sep 16 12:19:30 network dhcpd: DHCPOFFER on 192.168.78.253 to f4:38:61:67:64:b4 (patan) via eth1
Sep 16 12:19:30 network dhcpd: Wrote 155 leases to leases file.
Sep 16 12:19:30 network dhcpd: DHCPREQUEST for 192.168.78.253 (192.168.78.7) from f4:38:61:67:64:b4 (patan) via eth1
Sep 16 12:19:30 network dhcpd: DHCPACK on 192.168.78.253 to f4:38:61:67:64:b4 (patan) via eth1
All leases story can be found in file /var/lib/dhcp/db/dhcpd.leases
DHCP & DNS & fixed IPs
For the DHCP server to provide a fixed IP, we must declare its MAC explicitly :
network:/etc # vi dhcpd.conf
. . .
cat /etc/dhcpd.conf
. . .
host earth {
hardware ethernet 00:00:45:12:EE:F4;
fixed-address 192.168.1.21;
}
network:/etc # rcdhcpd check-syntax
Checking syntax of /etc/dhcpd.conf:
Config is okay. Hope you also specified existent network devices ;)
Lease file is okay
network:/etc # rcdhcpd stop
network:/etc # rcdhcpd start
network:/etc # /etc/init.d/dhcpd restart
network:/etc # /sbin/service dhcpd stop / start / restart
url.
DNS configuration : traces
We configure the destination file in named.conf :
logging {
category queries { log_syslog; };
category xfer-in { log_syslog; };
category xfer-out { log_syslog; };
category default { log_syslog; };
channel log_syslog { severity dynamic;
# syslog;
file "/var/log/named_query.log" versions 3 size 100M; // => /var/lib/named/log/named_query.log ?
print-time yes; // timestamp log entries
print-severity yes;
print-category yes;
};
We administer the trace level using rndc, nameserver control utility :
(root)network:~ # rndc trace 4
# tail -f /var/log/named_query.log
08-Sep-2011 13:07:41.849 general: info: received control channel command 'trace 4'
08-Sep-2011 13:07:41.849 general: info: debug level is now 4
DNS record types
wiki
DNS and BIND tools
Online
O'Reilly book !
Llibre administració
SuSE.
L'eina principal és el
nslookup i el dig i el host :
c:\> nslookup
Default Server: deibp9eh1--31ndcr.wan.com
Address: 99.64.163.21
> ?
Commands: (identifiers are shown in uppercase, [] means optional)
NAME - print info about the host/domain NAME using default server
NAME1 NAME2 - as above, but use NAME2 as server
help or ? - print info on common commands
set OPTION - set an option
all - print options, current server and host
[no]debug - print debugging information
[no]d2 - print exhaustive debugging information
[no]defname - append domain name to each query
[no]recurse - ask for recursive answer to query
[no]search - use domain search list
[no]vc - always use a virtual circuit
domain=NAME - set default domain name to NAME
srchlist=N1[/N2/.../N6] - set domain to N1 and search list to N1,N2, etc.
root=NAME - set root server to NAME
retry=X - set number of retries to X
timeout=X - set initial time-out interval to X seconds
type=X - set query type (ex. A,ANY,CNAME,MX,NS,PTR,SOA,SRV)
querytype=X - same as type
class=X - set query class (ex. IN (Internet), ANY)
[no]msxfr - use MS fast zone transfer
ixfrver=X - current version to use in IXFR transfer request
server NAME - set default server to NAME, using current default server
lserver NAME - set default server to NAME, using initial server
finger [USER] - finger the optional NAME at the current default host
root - set current default server to the root
ls [opt] DOMAIN [> FILE] - list addresses in DOMAIN (optional: output to FILE)
-a - list canonical names and aliases
-d - list all records
-t TYPE - list records of the given type (e.g. A,CNAME,MX,NS,PTR etc.)
view FILE - sort an 'ls' output file and view it with pg
exit - exit the program
>
Per veure a quin domini som fem servir la comanda:
> set all
Default Server: network.visc.es
Address: 11.22.78.7
Set options:
nodebug
defname
search
recurse
nod2
novc
noignoretc
port=53
type=A
class=IN
timeout=2
retry=1
root=A.ROOT-SERVERS.NET.
domain=visc.es
MSxfr
IXFRversion=1
srchlist=visc.es
>
Per veure quins host(s) veu un DNS, fem servir la comanda:
> ls -d visc.es
[network.visc.es]
visc.es. SOA network.visc.es hostmaster.visc.es. (201109091 28800 14400 2419200 86400)
visc.es. NS network.visc.es
bcnlab022 A 192.168.78.95
localhost A 127.0.0.1
network A 192.168.78.7
visc.es. SOA network.visc.es hostmaster.visc.es. (201109091 28800 14400 2419200 86400)
>
Espectacular:
c:\> nslookup
Default Server: aag-dns-vip1.ehningen.de.hal.com
Address: 99.0.136.50
> set type=all
> .
Server: aag-dns-vip1.ehningen.de.hal.com
Address: 99.0.136.50
Non-authoritative answer:
(root)
primary name server = a.root-servers.net
responsible mail addr = nstld.verisign-grs.com
serial = 2012101100
refresh = 1800 (30 mins)
retry = 900 (15 mins)
expire = 604800 (7 days)
default TTL = 86400 (1 day)
(root) nameserver = a.root-servers.net
(root) nameserver = f.root-servers.net
(root) nameserver = d.root-servers.net
(root) nameserver = e.root-servers.net
(root) nameserver = m.root-servers.net
(root) nameserver = i.root-servers.net
(root) nameserver = k.root-servers.net
(root) nameserver = g.root-servers.net
(root) nameserver = h.root-servers.net
(root) nameserver = l.root-servers.net
(root) nameserver = j.root-servers.net
(root) nameserver = c.root-servers.net
(root) nameserver = b.root-servers.net
>
Any answer that originates from the DNS Server which has
the complete zone file information available for the domain is said to be authoritative answer.
Que vol dir si no funciona ?
c:\> nslookup
Default Server: ad.cloud.bisc
Address: 192.168.66.73
> set type=all
> .
Server: ad.cloud.bisc
Address: 192.168.66.73
*** ad.cloud.bisc can't find .: Server failed
>
BIND and DNS files
Los archivos de configuración que tendremos que modificar en el servidor DNS son :
- /etc/bind/named.conf
- /etc/bind/named.conf.options
- /etc/bind/named.conf.local
- /etc/bind/db.aulaESI.com
- /etc/bind/db.192.168.1
url
DNS/BIND/DHCP/WINS Issues Forum (tek tips) [/].
El fitxer de configuració principal és named.conf:
root@network:/etc> cat named.conf
forwarders { 192.168.78.2; } ; // send unresolved queries to this server
. . .
zone "visc.es" in {
type master;
file "master/zone.visc.es";
};
zone "78.22.11.in-addr.arpa" in {
file "master/78.22.11.in-addr.arpaXXXX";
type master;
allow-transfer { any; };
};
Compte :
sebas@network:/etc/named.d> cat forwarders.conf
### /etc/named.d/forwarders.conf file autogenerated by netconfig!
#
# Before you change this file manually, consider to define the
# static DNS configuration using the following variables in the
# /etc/sysconfig/network/config file:
# NETCONFIG_DNS_STATIC_SEARCHLIST
# NETCONFIG_DNS_STATIC_SERVERS
# NETCONFIG_DNS_FORWARDER
# or disable DNS configuration updates via netconfig by setting:
# NETCONFIG_DNS_POLICY=''
#
# See also the netconfig(8) manual page and other documentation.
#
forwarders {
192.168.78.2;
};
sebas@network:/etc/named.d>
Resolució directe (linux)
I el detall de cada zona:
network:/var/lib/named/master # cat zone.visc.es
;
; dns zone for visc.es
;
$ORIGIN visc.es.
$TTL 1D
@ IN SOA network hostmaster (
201109091 ; serial (YYYYMMDDI)
8H ; refresh (8 hours)
4H ; retry (4 hours)
4W ; expire (4 weeks)
1D ) ; minimum
; network.visc.es server this domain as the name server (NS)
NS network
; just in case someone asks for network.visc.es
localhost A 127.0.0.1
; our hosts, in alphabetical order
lab022 A 11.22.78.95
network A 11.22.78.7
zonesample url
Resolució inversa (linux)
No funciona d'inici:
c:\>nslookup 11.22.78.93
Server: network.bisc.es
Address: 11.22.78.7
*** network.bisc.es can't find 11.22.78.93: Non-existent domain
Modifiquem:
network:/var/lib/named/master # cat 78.22.11.in-addr.arpaXXXX
$TTL 2d
@ IN SOA network.visc.es. root.network.visc.es. (
2011090701 ; serial
3h ; refresh
1h ; retry
1w ; expiry
1d ) ; minimum
78.22.11.in-addr.arpa. IN NS network.bisc.es.
95 IN PTR bcnlab022.bisc.es.
93 IN PTR bcnlab003.bisc.es.
7 IN PTR network.bisc.es.
Ara ja funciona:
c:\>nslookup 11.22.78.93
Server: network.visc.es
Address: 11.22.78.7
Name: bcnlab003.visc.es
Address: 11.22.78.93
Reinici del servei named
Si fem cap canvi, cal reiniciar el dimoni :
root # /etc/init.d/named restart
root # service named restart
servei rndc
root # rndc stats -> /var/lib/named/log/named.stats
root # rndc dumpdb -> /var/lib/named/log/named_dump.db
root # rndc status
DNS Troubleshooting
Com verificar el funcionament ?
url.
# netstat -tulpn | grep :53 - verify DNS is listening
# netstat -atve
# ps -ef | grep named
# ps -ef | grep bind - verify service is running
# iptables -L -n - make sure iptables firewall is not blocking request on server
# /etc/init.d/named status - make sure service is running
# chkconfig named on - if not,
# service named start - ... start named
# tail –f /var/log/messages - use log files to verify it started ok
# named-checkconf /etc/named.conf - check zone file syntax
# named-checkzone localhost /var/named/localhost.zone
# host nixcraft.org - List IP address associated with host names
# host -l nixcraft.org - Perform a zone transfer for zone name using -l option
# dig mail.nixcraft.org - ... or use DIG tool
# dig 192.168.0.5
DNS
tools.
Interrogating DNS.
c:\> hostname
RS6000-512
c:\> nslookup RS6000-512.bar.es.hal.com
Server: deibp9eh1--31ndcr.wan.hal.com
Address: 99.64.163.21
Name: RS6000-512.bar.es.hal.com
Address: 99.137.165.51
DNS forwarders
If netconfig utility is in use, "forwarders" values are in file /etc/sysconfig/network/config
Otherwise, they are in file /etc/named.conf
# The forwarders record contains a list of servers to which queries should be forwarded.
# Enable this line and modify the IP address to your provider's name server.
# Up to three servers may be listed.
forwarders { 194.25.2.129; };
# Enable the next entry to prefer usage of the name server declared in the forwarders section.
#forward first;
forward only;
forward is only relevant in conjunction with a valid forwarders statement.
If set to 'only' the server will only forward queries.
If set to 'first' (default) it will send the queries to the forwarder and if not answered will attempt to answer the query.
See details
here
BIND provides two tools to check the syntax of named.conf and zone files:
named-checkconf
named-checkzone <path to zone file>
More information and samples for Opensuse's implementation of BIND located here:
/usr/share/doc/packages/bind
google public DNSs
c:> nslookup 8.8.8.8
Name: google-public-dns-a.google.com
Address: 8.8.8.8
c:\> nslookup 8.8.4.4
Name: google-public-dns-b.google.com
Address: 8.8.4.4
Forward DNS and reverse DNS
Forward DNS for "abc.com" points to IP address "1.2.3.4".
Reverse DNS for IP "1.2.3.4" points to "abc.com".
Non-existent domain
Problema:
c:\> nslookup 192.168.78.100
Server: network_dns_bcn.bisc.es
Address: 192.168.78.7
*** network_dns_bcn.bisc.es can't find 192.168.78.100: Non-existent domain
Per arreglar-ho, cal crear una zona de reverse lookup :
*** Can't find server name for address w.x.y.z: Non-existent domain
This error occurs when there is no PTR record for the name server's IP address.
When nslookup.exe starts, it does a reverse lookup to get the name of the default server.
If no PTR data exists, this error message is returned.
To correct make sure that a reverse lookup zone exists and contains PTR records for the name servers.
For additional information, please see the following article(s) in the Microsoft Knowledge Base:
Q172953 How to Install and Configure Microsoft DNS Server -
url.
Lets do it - to create a reverse lookup zone, perform the following steps:
- In DNS Manager, right-click your DNS server, and then click New Zone.
- Click Primary from the "Creating New Zone for" dialog box, and then click Next.
- The Zone Name is derived from your IP network address.
In the example information, the Zone Name is 58.168.192.in-addr.arpa.
Type your reverse zone name (the least significant part of the IP address,
and work toward the most significant part of the address).
For example:
If your network ID is: Then your reverse zone is:
10.0.0.0 10.in-addr.arpa
130.20.0.0 20.130.in-addr.arpa
250.30.203.0 203.30.250.in-addr.arpa
NOTE: The syntax of the reverse lookup zone is imperative to its operation.
- After you type the reverse lookup zone name, press Tab and the reverse lookup zone file name will automatically fill in using the zone name in step 3 appended by ".dns" (without the quotes).
- Click Next, and then click Finish.
AD and DNS
Tot va començar pel missatge
The query was for the SRV record for _ldap._tcp.dc._msdcs.cloud.bisc
The DNS record is not registered in DNS
Fitxer interessant : \system32\config\NETLOGON.DNS - conté ...
cloud.bisc. 600 IN A 192.168.66.73
_ldap._tcp.cloud.bisc. 600 IN SRV 0 100 389 ad.
_ldap._tcp.Default-First-Site-Name._sites.cloud.bisc. 600 IN SRV 0 100 389 ad.
_ldap._tcp.pdc._msdcs.cloud.bisc. 600 IN SRV 0 100 389 ad.
_ldap._tcp.gc._msdcs.cloud.bisc. 600 IN SRV 0 100 3268 ad.
_ldap._tcp.Default-First-Site-Name._sites.gc._msdcs.cloud.bisc. 600 IN SRV 0 100 3268 ad.
_ldap._tcp.ca14999a-0640-4493-a980-24ad50fd701b.domains._msdcs.cloud.bisc. 600 IN SRV 0 100 389 ad.
gc._msdcs.cloud.bisc. 600 IN A 192.168.66.73
e5987b69-c02a-4ced-82bf-375f4595be10._msdcs.cloud.bisc. 600 IN CNAME ad.
_kerberos._tcp.dc._msdcs.cloud.bisc. 600 IN SRV 0 100 88 ad.
_kerberos._tcp.Default-First-Site-Name._sites.dc._msdcs.cloud.bisc. 600 IN SRV 0 100 88 ad.
_ldap._tcp.dc._msdcs.cloud.bisc. 600 IN SRV 0 100 389 ad.
_ldap._tcp.Default-First-Site-Name._sites.dc._msdcs.cloud.bisc. 600 IN SRV 0 100 389 ad.
_kerberos._tcp.cloud.bisc. 600 IN SRV 0 100 88 ad.
_kerberos._tcp.Default-First-Site-Name._sites.cloud.bisc. 600 IN SRV 0 100 88 ad.
_gc._tcp.cloud.bisc. 600 IN SRV 0 100 3268 ad.
_gc._tcp.Default-First-Site-Name._sites.cloud.bisc. 600 IN SRV 0 100 3268 ad.
_kerberos._udp.cloud.bisc. 600 IN SRV 0 100 88 ad.
_kpasswd._tcp.cloud.bisc. 600 IN SRV 0 100 464 ad.
_kpasswd._udp.cloud.bisc. 600 IN SRV 0 100 464 ad.
ForestDnsZones.cloud.bisc. 600 IN A 192.168.66.73
_ldap._tcp.ForestDnsZones.cloud.bisc. 600 IN SRV 0 100 389 ad.
_ldap._tcp.Default-First-Site-Name._sites.ForestDnsZones.cloud.bisc. 600 IN SRV 0 100 389 ad.
DomainDnsZones.cloud.bisc. 600 IN A 192.168.66.73
_ldap._tcp.DomainDnsZones.cloud.bisc. 600 IN SRV 0 100 389 ad.
_ldap._tcp.Default-First-Site-Name._sites.DomainDnsZones.cloud.bisc. 600 IN SRV 0 100 389 ad.
Un altre fitxer interessant : %windir%\debug\NETSETUP.LOG - used for logging domain joins, including joinings to a workgroup.
NETSETUP.log will exist on every workstation, server and domain controller.
They will all have a copy of this file, which is updated on each join so it has a nice history.
Have a look also at DCPromo.log and the DCPromoUI.log at the Active Directory / Domain Controller server, %windir%\debug\
url
Comanda interessant:
c:\> ipconfig /displaydns
Windows IP Configuration
invitation.opinionbar.com
----------------------------------------
Record Name . . . . . : invitation.opinionbar.com
Record Type . . . . . : 1
Time To Live . . . . : 1235
Data Length . . . . . : 4
Section . . . . . . . : Answer
A (Host) Record . . . : 217.77.155.11
Eines interessants
aqui :
Windows Server 2003 Service Pack 2 32-bit Support Tool :
NETDIAG.exe & DCDIAG.exe !
Problema i
solució de
dcdiag /q:
Testing server: Default-First-Site-Name\MINNIE
Starting test: Connectivity
The host 405990df-28f4-4962-b53b-ead34915f175._msdcs.ad.imoveinc.com
could not be resolved to an IP address. Check the DNS server, DHCP, server name, etc.
......................... MINNIE failed test Connectivity
Let's manually create the missing record
- right click _msdcs.ad.imoveinc.com
- choose New Alias (CNAME)
- in the Alias Name field, type in 405990df-28f4-4962-b53b-ead34915f175
- in the "Fully qualified..." field, type in MINNIE.ad.imoveinc.com
- click OK
- ipconfig /registerdns
- net stop netlogon
- net start netlogon
Comanda interessant:
c:\> nslookup
> set type=SRV
> _ldap._tcp.hal.com <intro>
mostra els AD que hi ha a la xarxa hal.com, que escolten al port 389(ldap)
This query to the DNS Server will return all the domain controllers in the domain name:
c:\> nslookup
Default Server: ad.cloud.bisc
Address: 192.168.66.73
> set type=all ( or "set q=srv")
> _ldap._tcp.dc._msdcs.cloud.bisc (_ldap._tcp.dc._msdcs.FQADDN)
Server: ad.cloud.bisc
Address: 192.168.66.73
_ldap._tcp.dc._msdcs.cloud.bisc SRV service location:
priority = 0
weight = 100
port = 389
svr hostname = ad.cloud.bisc
ad.cloud.bisc internet address = 192.168.66.73
>
D'una altra manera :
c:\> nslookup
> set type=all
> _ldap._tcp <intro>
Explicació :
A workstation that is logging on to a Windows 2000 domain queries DNS for SRV records in the general form:
_Service._Protocol.DnsDomainName
Active Directory servers offer the LDAP service over the TCP protocol;
therefore, clients find an LDAP server by querying DNS for a record of the form:
_ldap._tcp.DnsDomainName
SRV Resource Records [***]
Configure AD/DC record in DNS
- connect to your Windows DNS server and open the DNS control panel (start->Administrative Tools->DNS)
- expand the node corresponding to your server
- expand the "Forward Lookup Zones" node
- expand the node corresponding to your domain
- delete the _msdcs node if it exists
- right click on the domain node and select "New Domain..."
- enter "_msdcs" as the name
- right click on the new "_msdcs" node, select "New Domain...", and choose "dc" as the name
- right click on the new "dc" node and select "Other New Records..."
- select "Service Location (SRV)" as the record type and click the "Create Record" button
- select "_ldap" as the service and "_tcp" as the protocol
- enter 389 as the port
- put in the fully qualified host name of your DC, or the IP address, in the "Host offering this service:"
- click "OK" and then "Done"
- open up the services console (start->run->services.msc)
- right click on the "DNS Server" service and select "Restart"
- your domain DNS record should now be set up
url
Després de un canvi en un AD/DC :
ipconfig /registerdns
net stop netlogon
net start netlogon
Internet root servers
Read
DNS root zone :
The root servers have the official names a.root-servers.net to m.root-servers.net.
The root name servers are hosted in multiple secure sites with high-bandwidth access to accommodate the traffic load.
Usually each DNS server installation at a given site is physically a cluster of machines with load-balancing routers.
A comprehensive list of servers, their locations, and properties
is available at http://root-servers.org.
Llista actualitzada :
ftp://ftp.rs.internic.net/domain/named.root
[sebas@lab2 perl]$ dig
; <<>> DiG 9.2.4 <<>>
;; global options: printcmd
;; Got answer:
;; ->>HEADER<<- opcode: QUERY, status: NOERROR, id: 57056
;; flags: qr rd ra; QUERY: 1, ANSWER: 13, AUTHORITY: 0, ADDITIONAL: 0
;; QUESTION SECTION:
;. IN NS
;; ANSWER SECTION:
. 89503 IN NS e.root-servers.net.
. 89503 IN NS c.root-servers.net.
. 89503 IN NS a.root-servers.net.
. 89503 IN NS b.root-servers.net.
. 89503 IN NS i.root-servers.net.
. 89503 IN NS m.root-servers.net.
. 89503 IN NS k.root-servers.net.
. 89503 IN NS f.root-servers.net.
. 89503 IN NS g.root-servers.net.
. 89503 IN NS d.root-servers.net.
. 89503 IN NS j.root-servers.net.
. 89503 IN NS h.root-servers.net.
. 89503 IN NS l.root-servers.net.
;; Query time: 52 msec
;; SERVER: 99.64.163.21#53(99.64.163.21)
;; WHEN: Tue Mar 13 17:21:34 2012
;; MSG SIZE rcvd: 228
[sebas@lab2 perl]$
Ubicacions, as Mountain View
Firewall
RH manual install
# yum install iptables
# yum install iptables-ipv6
Make sure the service is started and will auto-start on reboot.
# service iptables start
# chkconfig --level 345 iptables on
Check the current status of the service
# service iptables status
To disable the firewall, run the following commands.
# service iptables stop
# chkconfig iptables off
The GUI screen to control the firewall is available from the menu (System > Administration > Firewall)
or can be started from the command line using the system-config-firewall command.
If it is not already present, it can be installed using the following command.
# yum install system-config-firewall
FTP
Active / passive mode
Always read
wiki - active vs passive.
Also Filezilla
Network Configuration
PORT = active mode
PASV = passive mode (recommended)
Filezilla (client) logging
Read documentation
send ALL HTM files to server
sebas@minie:~/dades/_local_tinet_files$ ftp -i usuaris.fut.es usuaris.tinet.cat
Connected to www.tinet.org.
220 TINET (Tarragona InterNET)
Name (usuaris.fut.es:root): user
331 Password required for user
Password:
cd html
mput *.htm
quit
Tinet charset problem
If a filename has an accent at source, Filezilla will admit it and send the file to Tinet
That filename will be displayed by Tinet in Filezilla with strange signs and wont be deleted by usual way
We have to use manual FTP then ...
sebas@minie:~$ ftp usuaris.fut.es
ftp> cd html
ftp> mdelete Cen*
ftp> mdelete petroglif_*
mdelete petroglif_Roko_amic_casadors.jpeg [anpqy?]? n
mdelete petroglif_Роко, друг охотников.jpeg [anpqy?]? y
250 DELE command successful
mdelete petroglif_2.jpeg [anpqy?]? n
ftp>
Automatització del FTP
ftp_script.cmd
open ehngsa.hal.com
anonymous
CheckAutoChecker@us.hal.com
bin
get projects/c/ftp/checkerv2/checkerv2inst280.exe C:/temp/Chckr/chkrv2.exe
mput proj*.exe
quit
ftp_driver.bat
ftp -i -s:C:/temp/ftp_script.cmd
WS_FTP
Transfer and Session logs : C:\Users\bisc\AppData\Roaming\Ipswitch\WS_FTP\Logs
PC Connectivity and protocols
Mínims :
- 2 tarjes de xarxa
- cable creuat
- ficar IP's manuals ( as 192.169.1.30 ), Mask 255.255.255.0, sense GW ni DNS.
-
propietats de la tarja de xarxa - ha de tenir "File and Printer Sharing for uSoft Networks"
*** NO seleccionar "Show icon in notification area when connected" ***
- W98 : Primary Logon := "uS Network Client"
- ambdós a "System" + "WorkGroup" := WORKGROUP ;
Un ordinador pot aconseguir conectivitat mitjançant :
- una tarja Ethernet
- un enllaç d'infrarrojos
- un enllaç Bluetooth
- un enllaç Wifi
- una tarja PCMCIA
- una conexió USB
- una conexió Firewire
NCSI - how Windows detects "no Internet access"
Description on
how NCSI determines
whether a network has Internet connectivity:
- a request for DNS name resolution of dns.msftncsi.com - [131.107.255.255]
- a HTTP request for
http://www.msftncsi.com/ncsi.txt
returning 200 OK and the text Microsoft NCSI
This can be disabled with a registry setting. If you set
HKEY_LOCAL_MACHINE\SYSTEM\CurrentControlSet\Services\NlaSvc\Parameters\Internet\EnableActiveProbing
... to 0, Windows will no longer probe for internet connectivity.
hostname
Under W2K
In Windows 2000,
the Host name (Directory Naming Service, DNS)
and Computer name (NetBIOS) must be the same.
In some previous operating systems,
you could have two or more aliases
that point to the same computer,
by having multiple host names.
To view/change the computer name,
use
Start / Settings / Control Panel / System / Network Identification / Properties.
NOTE: In Windows 2000,
the host name is the actual point of reference.
The computer name was provided for backwards compatibility.
How do you set, under W95 :
- (*) Computer name - NetBIOS ; broadcasts or WINS ; 16 chars ; no domain ;
Control Panel + Network + Identification : set Computer Name and Workgroup.
Displayed using nbtstat -A <hostip>
W2000 : Control Panel + System + Network Identification.
Displayed using hostname
- (*) Host name - TCP/IP based ; HOSTS file or DNS ; 255 chars ; usualy as part of a domain ;
TCP/IP Properties + DNS configuration : set Host and Domain.
Displayed using winipcfg.
W2000 : nslookup <hostip>
What goes wrong if you change HOSTNAME ?
- el WAS deix de funcionar si canviem el HostName !
- el DB2 deix de funcionar si canviem el HostName !
Solució : fitxer ... ?
Under Linux
Each distribution has a script that runs at boot time which sets the hostname.
The way to change the hostname permanently thus differs by distribution.
- Debian has an init script, /etc/init.d/hostname.sh, which is called at boot time and sets the hostname what is given in /etc/hostname.
To change the hostname, place only the unqualified hostname (e.g., gauss) in /etc/hostname and run sudo /etc/init.d/hostname.sh.
- Ubuntu, like Debian, also uses /etc/hostname, but to update the hostname after making a change, run sudo service hostname start.
- Slackware uses /etc/HOSTNAME. Set the appropriate hostname there and run hostname -F /etc/HOSTNAME as root.
- Red Hat systems look for a line like
HOSTNAME=gauss
in /etc/sysconfig/network
url
[root@demo6stk1 ~]# hostname -f
demo6stk1.in.ibm.com
Compte : agafa el domini de /etc/hosts !
Kinds of Network Error messages
|
Top
|
Few network error messages :
URL - prevent registry continous read.
Is there a way to get adapter statistics without involving Registry polling?
I suspect there is, but without seeing the source code I can't say for sure.
The work around is to uncheck the "Show icon in notification area
when connected" check box in the properties dialog of the network adapter.
Feu servir
C:\Archivos de programa\VMware\VMware Workstation\vnetsniffer.exe
usage: vnetsniffer.exe [/e] (/p "pvnID" | VMnet?)
Troubleshooting
|
Depuració de problemes de la xarxa
|
|
ipconfig /all
|
Hem de apuntar :
- IP address
- default gateway
- DNS server(s)
|
|
ping 127.0.0.1
|
Veure si tenim el stack IP
|
|
ping <adreça IP pròpia>
[adreça numérica]
|
Veure si el IP està ben configurat
|
|
ping <adreça IP veí>
[adreça numérica]
|
Veure si el cable està bé
|
|
ping <adreça IP Gateway>
[adreça numérica]
|
Verificar l'accés al Gateway
|
|
ping <adreça IP DNS>
[adreça numérica]
|
Comprobar l'accés al DNS
|
|
A partir d'aquest moment podem fer servir NOMS en lloc de adreces numèriques
|
|
ping www.google.es
|
Comprobar l'accés a la xarxa [64.233.161.99]
|
|
tracert <adreça IP DNS>
|
Veure si les rutes son correctes
|
|
nbtstat -A <IP veí>
|
El "flag" ha de ser "a" majúscula, val ?
Veure que la NetBios arriba a l'altre màquina.
P4:c:> nbtstat -A 192.168.1.7
Failed to access NetBT driver -- NetBT may not be loaded
User does not have sufficient permissions to run nbtstat.
url
|
|
ipconfig /flushdns or ipconfig /displaydns
|
Veure com es comporta la cache de DNS
|
Problemes :
- ping rc = 65 :
firewall or router did disable ICMP Echo and Echo Reply packets.
troubleshooting "mtr" tool
mtr - a network diagnostic tool
mtr combines the functionality of the traceroute and ping programs in a single network diagnostic tool.
nicolau@mars:~$ mtr -rn 8.8.8.8
Start: 2022-10-25T10:56:04+0200
HOST: mars Loss% Snt Last Avg Best Wrst StDev
1.|-- 192.168.1.1 0.0% 10 1.2 1.8 1.2 6.0 1.5
2.|-- 93.176.160.1 0.0% 10 4.7 6.4 4.5 9.9 2.2
3.|-- 10.14.3.49 0.0% 10 5.2 5.5 5.2 7.3 0.6
4.|-- ??? 100.0 10 0.0 0.0 0.0 0.0 0.0
5.|-- 209.85.168.54 0.0% 10 14.4 14.2 14.0 14.4 0.1
6.|-- 172.253.50.41 0.0% 10 14.4 14.8 14.0 17.1 1.1
7.|-- 74.125.253.201 0.0% 10 16.2 15.7 14.9 18.2 1.1
8.|-- 8.8.8.8 0.0% 10 14.2 14.5 14.1 15.3 0.4
Troubleshooting "ping" procedure
- click Windows Start and then click Run.
In the Run dialog box, Windows 95, 98, and Me users: Type command and click OK.
Windows NT, 2000, and XP users: Type cmd and click OK.
The command line screen opens.
- type PING 127.0.0.1.
This is your local host address.
The address assures that TCP/IP is installed and functions properly.
If you can't complete this ping, disconnect the router and then
repeat the installation procedure.
- type PING followed by your IP address.
This assures that your PC responds to requests.
If you can't complete this ping, make sure all the cables connect properly
and that all the correct drivers are installed.
- type PING followed by your gateway address to check the communication
with your gateway. (The default gateway address is 192.168.1.1.)
This assures that you can connect to other machines and the router.
If you can establish communication with the router,
you can access the Administration page and configure settings.
If you can't complete this ping, make sure that the router power cord is
plugged in. Also make sure that the router is properly connected to your PC.
- type PING followed by the outside Internet address of your router.
This is the address that is provided either by your ISP or by
the outside LAN. This procedure will assure that your router functions
properly and allows traffic to pass through.
- type PING followed by your known DNS server address.
This will allow you to resolve valid Internet host names to IP addresses
and to verify that you can access the Internet.
Event : all ports blocked
C:\Derby\databases> ..\bin\startNetworkServer
Mon Dec 30 10:55:58 CET 2013 : Security manager installed using the Basic server security policy.
Mon Dec 30 10:55:59 CET 2013 : Could not listen on port 1527 on host localhost:
java.net.BindException: Cannot assign requested address: JVM_Bind
The HOSTS file had 2 "localhost" entries, the last one of them pointing to some external IP.
Cómo cambiar el puerto en el que escucha Terminal Server
support nicrosoft
1) Para cambiar el puerto predeterminado de todas las conexiones nuevas creadas en el servidor Terminal Server,
hay que abrir esta clave del Registro :
HKEY_LOCAL_MACHINE\System\CurrentControlSet\Control\Terminal Server\WinStations\RDP-Tcp
Busque la subclave "PortNumber" y observe el valor 00000D3D (hexadecimal de 3389). Modifique el número de puerto en hexadecimal y guarde el nuevo valor.
2) Para cambiar el puerto de una conexión específica en el servidor Terminal Server:
Ejecute Regedt32 y vaya hasta esta clave:
HKEY_LOCAL_MACHINE\System\CurrentControlSet\Control\Terminal Server\WinStations\connection
Busque la subclave "PortNumber" y observe el valor 00000D3D (hexadecimal de 3389).
Modifique el número de puerto en hexadecimal y guarde el nuevo valor.
Display it from command line :
c:\> reg query "HKLM\System\CurrentControlSet\Control\Terminal Server\WinStations\RDP-Tcp" /v PortNumber
HKEY_LOCAL_MACHINE\System\CurrentControlSet\Control\Terminal Server\WinStations\RDP-Tcp
PortNumber REG_DWORD 0xd3d
Using Telnet to Test Port 3389 Functionality
url
Terminal Server Clients use TCP port 3389 to communicate with Terminal Server.
A common problem in a WAN environment is that a firewall or other network
filter prevents connectivity with this port.
You can run a simple troubleshooting test to make sure the Client
can connect to the port.
Just try to telnet to the port from the Client.
To test the functionality of port 3389, use this command from the Client:
Telnet tserv 3389
If Telnet reports that you cannot connect, there are several possible reasons:
- If you can connect by replacing "tserv" with the Terminal Server's IP address but not the host name, you may have a DNS or WINS resolution problem.
- If you can connect when "tserv" is the host name, but cannot connect when "tserv" is the computer name, then you may have a NetBIOS name resolution issue with WINS or an LMHOSTS file.
- If you cannot connect when "tserv" is the IP address, the host name, or the computer name, then it is likely that port 3389 is blocked somewhere in your WAN.
Using Telnet to test SMTP
Test your smtp server with telnet utility - sample :
user@hostname:~$ telnet 192.168.66.137 25
Trying 192.168.66.137...
Connected to 192.168.66.137.
Escape character is '^]'.
220 testob.domain.com ESMTP Postfix (Ubuntu)
helo pccicla.blogspot.com
250 testob.domain.com
helo pccicla.blogspot.com
250 testob.domain.com
mail from: pier[at]pccicla.it
250 Ok
rcpt to: piergiovanni[at]gmail.com
250 Ok
data
354 End data with .
Test
.
250 Ok: queued as 4010719220
quit
221 Bye
Connection closed by foreign host.
url
Some interesting ports :
80 - WebServer Port 80
When a user types in your IP address or Host Name in their browser, the browser will look at the IP address on port 80 by default for the web pages.
81 - WebServer Alternate Port 81
When a user types in your IP address or Host Name in their browser, the browser will look at the IP address on port 80. If the Port is blocked, port 81 is used as an alternate port for hosting a website.
21 - FTP Server Port 21
When someone attempts to connect to your FTP Server, the FTP client will attempt the connection on Port 21 by default. Port 21 must be open for standard FTP clients to log in and connect to your server.
22 - SSH Secure Shell Port 22
If you run a SSH Secure Shell, this port is required for the SSH Client to connect to your server.
23 - Telnet Server Port 23
If you run a Telnet server, this port is required for the Telnet Client to connect to your server. Telnet can be used for other ports to check services, but in order to use telnet for remote admin and login, port 23 must be open.
25 - SMTP Server Port 25
When someone sends a mail message to your SMTP Server, the mail will attempt to come in to your server on Port 25. This is the standard SMTP (Simple Mail Transport protocol) port.
2525 - SMTP Alternate Server Port 2525
When someone sends a mail message to your SMTP Server,
the mail will attempt to come in to your server on Port 25.
Port 2525 is an alternate port used by TZO for the Store
and forward services.
This is a non-standard port, but useful if the standard SMTP
(Simple Mail Transport protocol) port is blocked
110 - POP Server Port 110
When you run a mail server computer, users will typically log into that machine via POP3 (Post Office Protocol) or IMAP4 (Internet Message Access Protocol) to retrieve their mail. POP3 is the most popular protocol for accessing mailboxes.
119 - News (NNTP) Server Port 119
When you run a News server, typically News Clients wanting to connect to your news server will connect on port 119. This port needs to be open to run your own news server.
3389 - Remote Desktop port 3389
Port 3389 is used for Windows Remote Desktop.
Windows 2008 Server :
- Server Manager
- Roles
- right-click + "Add Roles"
- Remote Desktop Services
- Remote Desktop Session Host
Use the "quser" command or "quser /server:<hostname>"
389 - LDAP Server Port 389
LDAP or Lightweight Directory Access Protocol is becoming popular for Directory access, or Name, Telephone, Address directories. For Example LDAP://LDAP.Bigfoot.Com is a LDAP directory server.
143 - IMAP4 Server Port 143
IMAP4 or Internet Message Access Protocol is becoming more popular and
is used to retrieve Internet Mail from a remote server.
It is more disk intensive, since all messages are stored on the server,
but it allows for easy online, offline and disconnected use.
443 - Secure Sockets Layer (SSL) Server Port 443
When you run a secure server, SSL Clients wanting to connect to your Secure server will connect on port 443. This port needs to be open to run your own Secure Transaction server.
1503 & 1720 - Microsoft NetMeeting and VOIP Ports 1503 and 1720
MS NetMeeting and other VOIP allows you to host an Internet call or VideoConference with other NetMeeting or VOIP users. NetMeeting is a free product that can be found on the Microsoft Website at http://www.microsoft.com
5631 - PCAnywhere Port 5631
When a PCAnywhere server is set up to receive remote requests, it listens on TCP port 5631. This allow you to run a PCAnywhere host and use the Internet to connect back and remotely control your PC.
5900 - Virtual Network Computing (VNC) Port 5900
When you run an VNC server to remotely control your PC, it uses port 5900.
VNC is useful if you wish to remotely control your server.
Get
PortDetective !
Listado de puertos versus
juegos !
Exemple de trassa des Tele2 fins Google.es :
C:\google> tracert -d 66.102.11.104
Tracing route to 66.102.11.104 over a maximum of 30 hops
1 1 ms 2 ms 1 ms 192.168.1.1
2 1341 ms 2531 ms * 83.177.32.1
3 2680 ms 1650 ms 2429 ms 130.244.195.242
4 2062 ms 2523 ms 2825 ms 130.244.198.25
5 2489 ms 2235 ms * 213.248.70.33
6 1998 ms 2246 ms 1773 ms 213.248.70.5
7 1211 ms * 3202 ms 213.248.64.10
8 2854 ms 1738 ms 2028 ms 213.248.65.150
9 2374 ms 2712 ms 2597 ms 213.248.64.158
10 2339 ms 2096 ms 2432 ms 213.248.72.150
11 3252 ms 2567 ms 2346 ms 64.233.175.246
12 2274 ms 2482 ms 2601 ms 216.239.46.173
13 2828 ms 2676 ms 3003 ms 216.239.49.254
14 2201 ms 2176 ms 1495 ms 216.239.48.158
15 2929 ms * 1235 ms 64.233.174.49
16 1989 ms 1914 ms 2479 ms 216.239.49.46
17 2636 ms 2060 ms 2149 ms 66.102.11.104
Trace complete.
Display active ports under Linux
- Using "lsof -i" :
mate@punt-omnia:~$ sudo lsof -i :80
COMMAND PID USER FD TYPE DEVICE SIZE/OFF NODE NAME
node 1682 root 19u IPv6 23200 0t0 TCP *:http (LISTEN)
- Using "netstat" :
mate@punt-omnia:~$ sudo netstat -peanut | grep 80
tcp 0 0 10.139.238.194:48164 10.139.130.119:80 TIME_WAIT 0 0 -
tcp 0 0 10.139.238.194:39048 10.139.130.102:80 TIME_WAIT 0 0 -
tcp 0 0 10.139.238.194:39050 10.139.130.102:80 TIME_WAIT 0 0 -
tcp 0 0 10.139.238.194:39046 10.139.130.102:80 TIME_WAIT 0 0 -
tcp 0 0 10.139.238.194:52130 10.139.130.117:80 TIME_WAIT 0 0 -
tcp 0 0 10.139.238.194:59694 10.139.130.69:80 TIME_WAIT 0 0 -
tcp 0 1 10.139.238.194:36854 10.139.130.230:80 SYN_SENT 0 883273 1545/node
tcp 0 0 10.139.238.194:59692 10.139.130.69:80 TIME_WAIT 0 0 -
tcp6 0 0 :::80 :::* LISTEN 0 23200 1682/node
tcp6 0 0 10.139.238.194:80 10.139.238.194:41118 TIME_WAIT 0 0 -
udp6 0 0 ::1:50743 ::1:41544 ESTABLISHED 13 835880 4368/(pinger)
- Using nmap [*****]
Problem to solve
I have a strange problem :
 PC "Server" is a W2000, WorkGroup("FRANCESC"), IP(9.136.0.226).
 PC "Client" is a W95, WorkGroup("KOMPARTIT"), IP(9.136.0.183).

 All commands issued at "Client" PC (logged as a user accepted by W2K) :

 c:\> ping FRANCESC
 Pinging FRANCESC [9.136.0.226] with 32 bytes of data:
 Reply from 9.136.0.226: bytes=32 time<10ms TTL=128

 c:\> tracert -d 9.136.0.226
 Tracing route to 9.136.0.226 over a maximum of 30 hops
   1 <10 ms  <10 ms  <10 ms  9.136.0.226
 Trace complete.

 Strange return code :

 c:\> net use r: \\9.136.0.226\tempt30
 Error 53: the computer name specified in the network path cannot be located.

 Because this command works :

 c:\> net use r: \\francesc\tempt30
 The command was completed successfully.
Open SSHD
Open SSH 4 Windows - minimal OpenSSH server and client utilities.
OpenSSH url,
download
OpenSSH suite replaces rlogin and telnet with the ssh program, rcp with scp, and ftp with sftp.
AIX scp para copiar un fichero remoto : $ scp remote_user@remote_ip:remote_file_name local_file_name
Copies between two remote hosts are permitted.
El scp es el client i ve instal.lat amb el ssh. Al servidor hi ha d'haver el ssh-server corrent i escolant (normalment per la porta 22) i res mes.
exemple 1:
vull enviar l'arxiu albert.tgz que tinc al meu homedir del meu pc, al meu homedir del server "kaka.com".
$ scp ~/albert.tgz albert@kaka.com:
(no et deixis els dos punts finals)
exemple 2: vull baixar-me l'arxiu dades.tgz del subdirectori "merdetes" que es al servidor kaka.com al homedir del pep:
$ scp pep@kaka.com:merdetes/dades.tgz .
(no et deixis el punt final amb espai)
Aixo et demanarà la password cada vegada ...
Amb un port diferent : scp -p 2222 nom.mp4 sebas@93.176.177.116 {compte "P" ay cygwin}
OpenSSH cfg
Install the (guindous) program into "openssh"
c:\OpenSSH\bin\> mkgroup -l >> ..\etc\group
c:\OpenSSH\bin\> mkpasswd -l >> ..\etc\passwd
The OpenSSH server listens for traffic on TCP port 22 by default.
Interessant : $ ssh usuari@nom_maquina "<comanda> <parametres>"
c:\> ssh sag@lab.com "uname -a"
sag@lab.com's password:
Linux lab.com 2.6.18-128.ESX #1 Thu Oct 15 16:11:16 PDT 2009 x86_64 x86_64 x86_64 GNU/Linux
C:\> ssh sag@9.137.165.177 "df -h"
sag@9.137.165.177's password:
Filesystem Size Used Avail Use% Mounted on
/dev/sdd8 4.9G 650M 4.0G 14% /
/dev/sdc1 1.1G 75M 952M 8% /boot
/dev/sdd5 510M 17M 467M 4% /home
/dev/sdd6 1004M 18M 936M 2% /tmp
/dev/sdd7 5.0G 1.1G 3.6G 23% /usr
/dev/sdd2 2.0G 92M 1.8G 5% /var/log
C:\> ssh sag@9.137.165.177 "uname -a"
sag@9.137.165.177's password:
Linux BCNXLOG07.bar.es.com 2.6.18-128.ESX #1 Fri Apr 10 00:08:17 PDT 2009 x86_64 x86_64 x86_64 GNU/Linux
Brutal el SSH !
OpenSSH at XP details
Locate passwd in C:\Program Files (x86)\OpenSSH\etc
Replace /home/YOUR_NAME with /cygdrive/c/Documents and Settings/YOUR_NAME.
Under Windows, the format of passwd file is a bit tricky :
c:\Program Files\OpenSSH\etc> type passwd
joan:unused_by_nt/2000/xp:1005:513:pere,U-T400P8-2KX\joan,S-1-5-1005:/home/pere:/bin/switch
sp10304:unused_by_nt/2000/xp:500:513:U-T400P8-2KX\sp10304,S-1-5-500:/cygdrive/c/Program Files (x86)/OpenSSH/etc/sshd:/bin/switch
Now ssh-keygen writes into proper directory c:\sag\sshd\.ssh :
C:\openssh\bin> ssh-keygen -t rsa
Generating public/private rsa key pair.
Enter file in which to save the key (/cygdrive/c/sag/sshd/.ssh/id_rsa): <leave the path blank>
w500 Enter file in which to save the key (/cygdrive/c/openssh/sshd/.ssh/id_rsa):
Enter passphrase (empty for no passphrase):
Enter same passphrase again:
Your identification has been saved in /cygdrive/c/openssh/sshd/.ssh/id_rsa.
Your public key has been saved in /cygdrive/c/openssh/sshd/.ssh/id_rsa.pub.
The key fingerprint is:
36:91:ae:11:1a:6a:a2:6d:2f:b3:a4:28:00:c2:3f:88 Administrator@w500-w2008r2
no kex alg message while logging with ssh - you are using an old SSH client
Sebas
C:\> ssh -v
OpenSSH_3.8.1p1, OpenSSL 0.9.7d 17 Mar 2004
Enric
imac-de-enrique-sarradell-720:~ enrique$ ssh -V
OpenSSH_6.9p1, LibreSSL 2.1.8
W500 / W2008 SRV - Linux Debian @ Raspberry
C:\> ssh -v pi@192.168.1.123
OpenSSH_3.8.1p1, OpenSSL 0.9.7d 17 Mar 2004
debug1: Reading configuration data /etc/ssh_config
debug1: Connecting to 192.168.1.123 [192.168.1.123] port 22.
debug1: Connection established.
debug1: identity file /cygdrive/c/openssh/sshd/.ssh/identity type -1
debug1: identity file /cygdrive/c/openssh/sshd/.ssh/id_rsa type 1
debug1: identity file /cygdrive/c/openssh/sshd/.ssh/id_dsa type -1
debug1: Remote protocol version 2.0, remote software version OpenSSH_6.7p1 Raspbian-5+deb8u2
debug1: match: OpenSSH_6.7p1 Raspbian-5+deb8u2 pat OpenSSH*
debug1: Enabling compatibility mode for protocol 2.0
debug1: Local version string SSH-2.0-OpenSSH_3.8.1p1
debug1: SSH2_MSG_KEXINIT sent
debug1: SSH2_MSG_KEXINIT received
debug1: kex: server->client aes128-ctr hmac-sha1 none
debug1: kex: client->server aes128-ctr hmac-sha1 none
no kex alg
To fix it, creating a vulnerability on your server,
edit /etc/ssh/sshd_config on the server, append the following line {una sola linia} and restart sshd daemon :
KexAlgorithms diffie-hellman-group1-sha1,ecdh-sha2-nistp256,ecdh-sha2-nistp384,ecdh-sha2-nistp521,
diffie-hellman-group-exchange-sha256,diffie-hellman-group14-sha1
{bestp}
OpenSSH server best practices
- disable OpenSSH Server
- only use SSH protocol 2
- limit users' SSH access
- configure idle Log Out timeout interval
- disable .rhosts files
- disable Host-Based Authentication
- disable root login via SSH : vi /etc/ssh/sshd_config ; "PermitRootLogin no" ; /etc/init.d/sshd restart
- enable a warning banner : "vi /etc/ssh/sshd_config" to contain "Banner /etc/ssh/my_banner.txt" plus "sudo service sshd restart"
- firewall SSH Port # 22
- change SSH Port {I dont agree} and Limit IP Binding
- use strong SSH passwords and passphrase
- use Public Key Based Authentication
- use Keychain Based Authentication
- chroot SSHD (Lock Down Users To Their Home Directories)
- use TCP wrappers
- disable empty passwords
- thwart SSH crackers (Brute Force Attack)
- rate-limit incoming port # 22 connections
- use Port Knocking {I dont agree}
- use Log Analyzer : RH {/var/log/secure}, others {/var/log/auth.log}
- patch OpenSSH and operating systems
url
sshd config verify
Run the command
$ sudo /usr/sbin/sshd -T
... to check the validity of your configuration and of your keys.
increase sshd verbosity
To do it once run
$ sudo service ssh stop
$ sudo /usr/sbin/sshd -ddd
trace remote logins
- edit "/etc/ssh/sshd_config" to contain "LogLevel VERBOSE"
- sudo service rsyslog restart
- sudo tail -f /var/log/auth.log
url
ssh debug
ssh session closed right after login + motd + no mail
nicolau@mars:~$ ssh -v -v -v sebas@r0
. --- --- /etc/motd ---------------------------------------------------------------------- .
No mail.
Last login: Thu Oct 15 11:39:43 2020 from 192.168.1.59
debug3: receive packet: type 96
debug2: channel 0: rcvd eof
debug2: channel 0: output open -> drain
debug2: channel 0: obuf empty
debug2: channel 0: close_write
debug2: channel 0: output drain -> closed
debug3: receive packet: type 98
debug1: client_input_channel_req: channel 0 rtype exit-signal reply 0
debug3: receive packet: type 98
debug1: client_input_channel_req: channel 0 rtype eow@openssh.com reply 0
debug2: channel 0: rcvd eow
debug2: channel 0: close_read
debug2: channel 0: input open -> closed
debug3: receive packet: type 97
debug2: channel 0: rcvd close
debug3: channel 0: will not send data after close
debug2: channel 0: almost dead
debug2: channel 0: gc: notify user
debug2: channel 0: gc: user detached
debug2: channel 0: send close
debug3: send packet: type 97
debug2: channel 0: is dead
debug2: channel 0: garbage collecting
debug1: channel 0: free: client-session, nchannels 1
debug3: channel 0: status: The following connections are open:
#0 client-session (t4 r0 i3/0 o3/0 fd -1/-1 cc -1)
debug3: send packet: type 1
Connection to r0 closed.
Transferred: sent 2192, received 7560 bytes, in 3.4 seconds
Bytes per second: sent 654.2, received 2256.3
debug1: Exit status -1
Can enter after
nicolau@mars:~$ ssh -v -v -v sebas@r0 'bash --noprofile'
Also use
nicolau@mars:~$ ssh -t sebas@r0 ; force pseudo-terminal allocation
Symptom :
nicolau@mars:~$ cat /var/log/auth.log | grep pam_unix
pam_unix(sshd:session): session closed for user
Remove PAM :
nicolau@mars:~$ cat /etc/ssh/sshd_config | grep PAM
UsePAM yes
# UsePAM no
ssh_exchange_identification debug
Symptoms : client displays "ssh_exchange_identification: Connection closed by remote host"
- start sshd server on foreground on a diferent port
$ guifi@torrelles:/etc/ssh$ /usr/sbin/sshd -D -d -p 10222
- connect client to new port
C:\temp> ssh -v -v -v 10.139.130.34 -p 10222
- see results
debug1: Server will not fork when running in debugging mode.
debug1: rexec start in 5 out 5 newsock 5 pipe -1 sock 8
debug1: inetd sockets after dupping: 3, 3
debug1: Connection refused by tcp wrapper
Solution : edit /etc/hosts.deny
OpenSSH debug
Have a look at the log file:
c:\Program Files\OpenSSH\var\log> type OpenSSHd.log
C:\Program Files\OpenSSH\usr\sbin\sshd.exe: *** fatal error - system shared memory version mismatch detected - 0x75BE0074/0x8A88009C
This problem is probably due to using incompatible versions of the cygwin DLL.
Search for cygwin1.dll using the Windows "Start->Find/Search" facility and delete all but the most recent version.
The most recent version *should* reside in x:\cygwin\bin, where 'x' is the drive on which you have installed the cygwin distribution.
Rebooting is also suggested if you are unable to find another cygwin DLL.
tricky SSHD problem
(p7029) remote ssh was closed, and sshd.log had
fatal: /var/lib/empty must be owned by root and not group or world-writable.
Fixed by
chown -R root.root /var/lib/empty
own sshd logs under SuSE
- create destination files
p7029-6E3:/var/log # mkdir sshd
p7029-6E3:/var/log # touch /var/log/sshd/sshderr.log
p7029-6E3:/var/log # touch /var/log/sshd/sshd.log
- configure /etc/syslog-ng/syslog-ng.conf.in
# SSH Filters
filter f_sshderr { match('^sshd\[[0-9]+\]: error:'); };
filter f_sshd { match('^sshd\[[0-9]+\]:'); };
# SSH Logging
destination sshderr { file("/var/log/sshd/sshderr.log"); };
log { source(src); filter(f_sshderr); destination(sshderr); flags(final); };
destination sshd { file("/var/log/sshd/sshd.log"); };
log { source(src); filter(f_sshd); destination(sshd); flags(final); };
- run SuSEconfig
- restart daemon
service syslog restart
url
sshd own banner
Configure to have a banner :
p7029-6E3:~ # cat /etc/ssh/sshd_config
# no default banner path
Banner /etc/ssh/sshd_banner.txt
On hi tenim
sebas@minie:/etc/ssh$ cat /etc/ssh/sshd_banner.txt
*
* ********************************************** *
* HENRY says HI ... from /etc/ssh/sshd_banner.txt
* usr(a) ki(b)
* ********************************************** *
*
Finalment
sudo service ssh restart
sudo service sshd restart
sudo systemctl reload ssh.service
systemctl restart sshd.service
Note : even if the banner is enabled in sshd_config and sshd is fully restarted, the user's own ~/.ssh/config can suppress the banner using:
LogLevel QUIET
On Ubuntu systems, /etc/motd is typically a symbolic link to /run/motd.dynamic - see "man update-motd"
ssh/scp without pwd [***]
- [u1@lab1 ~]$ ssh-keygen -t rsa
- [u1@lab1 ~]$ ssh u2@lab2 mkdir -p .ssh
- [u1@lab1 ~]$ cat .ssh/id_rsa.pub | ssh u2@lab2 'cat >> .ssh/authorized_keys'
- [u1@lab1 ~]$ ssh u2@lab2 hostname
Sample session:
[u1@lab1 ~]$ ssh-keygen -t rsa
Generating public/private rsa key pair.
Enter file in which to save the key (/home/u1/.ssh/id_rsa):
Created directory '/home/u1/.ssh'.
Enter passphrase (empty for no passphrase):
Enter same passphrase again:
Your identification has been saved in /home/u1/.ssh/id_rsa.
Your public key has been saved in /home/u1/.ssh/id_rsa.pub.
The key fingerprint is:
b8:0c:33:d4:93:b7:9f:e5:0f:ae:ba:08:96:7a:6d:41 u1@lab1
[u1@lab1 ~]$ ssh u2@lab2 mkdir -p .ssh
The authenticity of host 'lab2 (9.137.164.158)' can't be established.
RSA key fingerprint is bc:84:9c:c1:da:63:dc:2b:f8:31:a9:f0:34:1b:61:73.
Are you sure you want to continue connecting (yes/no)? yes
Warning: Permanently added 'lab2,9.137.164.158' (RSA) to the list of known hosts.
u2@lab2's password:
[u1@lab1 ~]$ cat .ssh/id_rsa.pub | ssh u2@lab2 'cat >> .ssh/authorized_keys'
u2@lab2's password:
[u1@lab1 ~]$ ssh u2@lab2 hostname
lab2
[u1@lab1 ~]$
linuxproblem
How to provide pwd to scp
1.- decide which user on the local machine will be using scp later : "sebas".
2.- log as "sebas"
3.- generate a public/private key pair : ssh-keygen -t rsa (empty passphrase)
It is saved by default in ~/.ssh/id_rsa.pub
Your identification has been saved in /home/sebas/.ssh/id_rsa.
Your public key has been saved in /home/sebas/.ssh/id_rsa.pub.
Do not ever share the private key with anyone!
4.- copy the public key to destination host using ftp or scp, lets say to /tmp/
5.- on host_dest, login as the remote user which you plan to use when you run scp, lets say "user_dest" at "host_dest".
6.- add the contents of id_rsa.pub to ~/.ssh/authorized_keys file on destination machine
$ cat /tmp/id_rsa.pub >> ~/.ssh/authorized_keys
$ chmod 700 ~/.ssh
$ chmod 600 ~/.ssh/authorized_keys
7.- [sebas@local] $ ssh user_dest@host_dest hostname
url,
url.
M.A. (gracias!) :
user1 en servidorFuente
user2 en servidorDestino
user1@servidorFuente # ssh-keygen -t rsa {destino "/home/user1/.ssh/id_rsa.pub"}
user1@servidorFuente # scp /home/user1/.ssh/id_rsa.pub user2@servidorDestino:/tmp/.
user2@servidorDestino # mkdir /home/user2/.ssh
user2@servidorDestino # chmod 700 .ssh
user2@servidorDestino # touch /home/user2/.ssh/authorized_keys
user2@servidorDestino # chmod 600 /home/user2/.ssh/authorized_keys
user2@servidorDestino # cat /tmp/id_rsa.pub >> /home/user2/.ssh/authorized_keys
user1@servidorFuente # scp fichero.tar.gz user2@servidorDestino:/ruta/.
scp sense password
scp sense password via ssh-keygen
- [lab001] fer logon com "sebas", usuari que es fa servir pel SCP
- [lab001] crear clau pública / clau privada :
ssh-keygen -t rsa
- [lab001] copiar la clau pública a destinació :
scp id_rsa.pub sebas@bcnlab0s8:.
- [lab008] add 001’s public key at /home/sebas/.ssh/ & change permissions :
cat id_rsa.pub >> authorized_keys
chmod 600 authorized_keys
- [lab001] verificar funciona sense password :
ssh sebas@lab008
scp src_file sebas@lab008:.
scp sense password via sshpass
pi@pi0:~/njs/fronius/dades $ apt-get update
pi@pi0:~/njs/fronius/dades $ sudo apt-get install sshpass
Reading package lists... Done
Building dependency tree
Reading state information... Done
pi@pi0:~/njs/fronius/dades $ sshpass -V
sshpass 1.06
(C) 2006-2011 Lingnu Open Source Consulting Ltd.
(C) 2015-2016 Shachar Shemesh
pi@pi0:~ $ sshpass -p pwdnose scp -o User=pi -o StrictHostKeyChecking=no pi@R4:/home/pi/python/pkw/dades/potencies/csv/pot_CSV_2024_06_02.csv /home/pi/njs/fronius/dades/.
How to know SSH version
[root@lab1 log]# telnet <hostname/ip> 22
Trying 99.137.164.158...
Connected to lab2.com (99.137.164.158).
Escape character is '^]'.
SSH-1.99-OpenSSH_3.9p1
Protocol mismatch.
Connection closed by foreign host.
Auth problems
Good page.
Win 7 problem
Just installed but does not start:
c:\Program Files (x86)\OpenSSH\bin> cygrunsrv.exe -Q OpenSSHd
Service OpenSSHd exists
Type : Own Process
Current State : Stopped
Controls Accepted :
c:\Program Files (x86)\OpenSSH\bin> cygrunsrv.exe -S OpenSSHd
cygrunsrv: Error starting a service: QueryServiceStatus: Win32 error 1062:
The service has not been started.
No log in "c:\Program Files (x86)\OpenSSH\var\log>"
SSH misc
Per saber si hi es :
netstat -antp | grep sshd
ps -ef | grep sshd
documentar PSCP.EXE - FTP via SSH (Putty Secure Copy Client)
Coger :
pscp sebas@bigrisk.bar.es.hal.com:~/LinEx-3r01g22.iso .
pscp sebas@bigrisk.bar.es.hal.com:~/vmware/VMware-workstation-3.2.0-2230.exe .
Poner :
pscp gnUAMix_1.0.iso sebas@bigrisk.bar.es.hal.com:~/vmware/SEBASgnUAMix_1.0.iso
pscp cs61.zip sebas@bigrisk.bar.es.hal.com:~/vmware/cs61.zip
Similar al WinSCP ...
SNMP
SNMP provides its users with a "simple" set of operations
that allows these devices to be managed remotely.
The core of SNMP is a simple set of operations (and the information these operations gather)
that gives administrators the ability to change the state of some SNMP-based device.
For example, you can use SNMP to shut down an interface on your router
or check the speed at which your Ethernet interface is operating.
SNMP can even monitor the temperature on your switch and warn you when it is too high.
O'Reilly - Essential SNMP.chm
SNMP (Simple Network Management Protocol) is a protocol for managing networks.
Each managed entity in the network will run an snmp server (snmpd)
which is going to collect datas from the server such as networking, load, cpu ...
Links
TCP/IP
SNMP uses UDP because it outperforms TCP in lossy networks.
SNMP uses the User Datagram Protocol (UDP) as the transport protocol
for passing data between managers and agents.
UDP, defined in RFC 768, was chosen over the Transmission Control Protocol (TCP)
because it is connectionless;
that is, no end-to-end connection is made between the agent and the NMS when datagrams (packets) are sent back and forth.
This aspect of UDP makes it unreliable, since there is no acknowledgment of lost datagrams at the protocol level.
It's up to the SNMP application to determine if datagrams are lost and retransmit them if it so desires.
Compte amb els "trap"
SNMP uses the UDP port 161 for sending and receiving requests,
and port 162 for receiving traps from managed devices.
Structure
A computer network system that uses SNMP for network management consists of the three fundamental components :
- The SNMP manager
It is a software that usually runs on the machine of network administrator or any human manager managing the computer network.
- The SNMP agent
It is a software that usually runs on the network node that is to be monitored. This node could be a printer, router etc.
- The SNMP MIB
MIB stands for Management information base. This component makes sure that the data exchange between the manager and the agent remains structured.
MIB objects
In SNMP, MIB objects are defined by the convention x.y,
where x is the actual OID of the managed object and y is the instance identifier.
For scalar objects (that is, objects that aren't defined as a row in a table) y is always 0.
In the case of a table, the instance identifier lets you select a specific row of the table;
SNMP communities
SNMPv1 and SNMPv2 use the notion of communities to establish trust between managers and agents.
An agent is configured with three community names: read-only, read-write, and trap.
The community names are essentially passwords;
there's no real difference between a community string and the password you use to access your account on the computer.
The three community strings control different kinds of activities.
Most vendors ship their equipment with default community strings,
typically public for the read-only community and private for the read-write community.
It's important to change these defaults before your device goes live on the network.
SNMP Messages
SNMP communication between manager and agent takes place in form of messages.
Following are the basic messages used for communication :
- SNMP GET
- SNMP GET-NEXT
- SNMP GET-RESPONSE
- SNMP SET
- SNMP TRAP
The messages GET and GET-NEXT are used to fetch the value of a particular MIB object.
The message GET-RESPONSE is used mostly by the agent to send the response to a GET or GET-NEXT message.
The message SET is used by the manager to set the new value of a particular MIB object at the agent.
The message TRAP is used by the agent to send information about some alarming values for some object to the manager so that appropriate action could be taken by the manager.
$ snmpget cisco.ora.com public .1.3.6.1.2.1.1.6.0
system.sysLocation.0 = "" ; Note that the response from snmpget is in variable binding format, OID=value.
$ snmpget linuxserver.ora.com public system.sysDescr.0
system.sysDescr.0 = "Linux version 2.0.34 (root@porky.redhat.com)
(gcc version 2.7.2.3) #1 Fri May 8 16:05:57 EDT 1998"
$ snmpwalk cisco.ora.com public system
. . . [quite large]
$ snmpbulkget -v2c -B 1 3 linux.ora.com public sysDescr ifInOctets ifOutOctets
$ snmpset cisco.ora.com private system.sysLocation.0 s "Atlanta, GA"
system.sysLocation.0 = "Atlanta, GA"
Configuring SNMP agents
All SNMP devices share the following common configurable parameters:
- sysLocation
- sysContact
- sysName
- Read-write and read-only access community strings (and frequently, a trap community string)
- Trap destination
Traps
Receiving traps using net-snmp
snmptrapd allows you to send SNMP trap messages to facilities such as Unix syslog or stdout.
$ ./snmptrapd -P
Sending traps using net-snmp
Here's how the Net-SNMP snmptrap program is invoked:
snmptrap hostname community enterprise-oid agent \
generic-trap specific-trap uptime [OID type value]...
SuSE 11 install
# zypper info net-snmp
# zypper install net-snmp
/etc/snmp/snmpd.conf ; configuration file
# /etc/init.d/snmpd start ; start it now
# chkconfig snmpd on ; start on restart
# snmpwalk localhost -c public -v1 ; testing your configuration (large output)
# snmpcmd ;
Scan by Rexx
$ type scan.rex
/* rexx */
Net_Prefix = "192.168.78." ;
IP_Sufix = 0 ;
RC = 0 ;
do while ( IP_Sufix < 255 )
IP_Sufix = IP_Sufix + 1 ;
Actual_IP = Net_Prefix || IP_Sufix ;
say "IP = (" || Actual_IP || ")." ;
My_Expression = "snmpwalk " Actual_IP "-c public -v1" ; /* build an expression ... */
My_RC = MyExpression ; /* ... and execute it */
say "*** RC = (" || My_RC || ")." ;
end ; /* do while */
return RC ;
Pending
- analitzar conversa Sametime at "telnet 9.17.136.20 1533"
- tcpdump when I send a mail from Suse_8.2_T30 to W2K
- nmap from Suse_8.2_T30 to BigRisk
- what is the use of localhost 127.0.0.1 ???
TCPview displays Firefox connections from 127.0.0.1:3232 to 127.0.0.1:3233
(1118 vs 1124)
MindStormsNSX connects from 127.0.0.1:1741 to 127.0.0.1:1742
- to verify TCP/IP is installed on your machine : ping 127.0.0.1
-
localhost is used whenever a system wants to talk to itself
using a network protocol.
Quite a few applications use it for communications between modules;
this design makes it easy to extend to support network communications.
I wrote to "comp.protocols.dns.bind" (campdefabes/05042005).
- documentar netcat -
url
: NetCat - requires TCP/IP only.
Download.
zip
maquina A: nc -l -p 1234 > arxiu.dat
maquina B: nc ip-de-la-maquina-A 1234 < arxiu.dat
[C:] nc -vv 80.94.109.112 4000 < dreamweaver.exe
F: >nc -help
[v1.10 NT]
connect to somewhere: nc [-options] hostname port[s] [ports] ...
listen for inbound: nc -l -p port [options] [hostname] [port]
options:
-d detach from console, stealth mode
-e prog inbound program to exec [dangerous!!]
-g gateway source-routing hop point[s], up to 8
-G num source-routing pointer: 4, 8, 12, ...
-h this cruft
-i secs delay interval for lines sent, ports scanned
-l listen mode, for inbound connects
-L listen harder, re-listen on socket close
-n numeric-only IP addresses, no DNS
-o file hex dump of traffic
-p port local port number
-r randomize local and remote ports
-s addr local source address
-t answer TELNET negotiation
-u UDP mode
-v verbose [use twice to be more verbose]
-w secs timeout for connects and final net reads
-z zero-I/O mode [used for scanning]
port numbers can be individual or ranges: m-n [inclusive]
-
Try to TELNET to port 80 on a web server and see what happens !!!
Network Tuning
|
Top
|
From Performance Tuning for Linux Servers
[1] Documentation/networking/ip_sysctls.txt
[2] man (7) tcp
[3] man (7) udp
[4] man (7) socket
[5] man (7) ip
[6] man (8) sysctl
[7] man (8) netstat
[8] man (5) proc
[9] Stevens, W. Richard, TCP/IP Illustrated, Volume 1, Addison-Wesley, 1994.
scan IP and MAC
pi@pi0:~ $ sudo nmap -sP 192.168.1.0/24
Starting Nmap 7.70 ( https://nmap.org ) at 2022-12-27 20:01 CET
Nmap scan report for 192.168.1.1
Host is up (-0.17s latency).
MAC Address: B0:8B:92:F9:DC:3C (Unknown)
Nmap scan report for r3 (192.168.1.123)
Host is up (-0.11s latency).
MAC Address: B8:27:EB:12:C7:01 (Raspberry Pi Foundation)
Nmap scan report for xmi9 (192.168.1.128)
Host is up (0.013s latency).
MAC Address: E0:98:06:B5:A3:FD (Espressif)
Nmap scan report for 192.168.1.129
Host is up (-0.11s latency).
MAC Address: B4:E6:2D:74:D5:57 (Espressif)
Nmap scan report for ta8 (192.168.1.131)
Host is up (-0.11s latency).
MAC Address: A2:7C:11:B5:00:C4 (Unknown)
Nmap scan report for 192.168.1.133
Host is up (0.0046s latency).
MAC Address: 7C:7A:91:8C:CE:D6 (Intel Corporate)
Nmap scan report for 192.168.1.134
Host is up (0.0066s latency).
MAC Address: 98:48:27:CA:16:28 (Tp-link Technologies)
Nmap scan report for alexa (192.168.1.136)
Host is up (0.0040s latency).
MAC Address: 14:0A:C5:8C:DD:1E (Amazon Technologies)
Nmap scan report for r4 (192.168.1.200)
Host is up (-0.057s latency).
MAC Address: DC:A6:32:7F:45:80 (Raspberry Pi Trading)
Nmap scan report for fronius (192.168.1.229)
Host is up (0.010s latency).
MAC Address: 6C:1D:EB:F7:FA:A5 (u-blox AG)
Nmap scan report for 192.168.1.222
Host is up.
Nmap done: 256 IP addresses (11 hosts up) scanned in 6.67 seconds
Video Find Your Raspberry Pi
IP scan from CmdLine
If 41 is the first octet to "ping" ...
c:\> FOR /L %i IN (41,1,255) DO @echo 192.168.78.%i & @ping -n 1 192.168.78.%i -w 900 | find "Reply"
for /L %I in (1,1,254) DO ping -w 30 -n 1 192.168.1.%I | find "Reply" >> out.txt 2>&1
From a BAT file ...
FOR command variables which use a single leading % on the command line or a double leading %% when used in a batch file :
c:\> type scan_for_ips.bat
for /L %%I in (1,1,254) DO ping -w 30 -n 1 192.168.1.%%I | find "Reply" >> out.txt 2>&1
ss64
From cygwin :
me@w500-w2008r2 ~ for i in {1..254} ;do (ping 192.168.1.$i -n 1 -w 5 >/dev/null && echo "192.168.1.$i" &) ;done
192.168.1.1
192.168.1.37
Using nmap :
sebas@minie:~$ nmap -T5 -sP 192.168.1.1-254 ; skip port scan
Starting Nmap 7.80 ( https://nmap.org ) at 2025-01-21 13:39 CET
Nmap scan report for _gateway (192.168.1.1)
Host is up (0.0035s latency).
Nmap scan report for pi3 (192.168.1.123)
Host is up (0.011s latency).
Nmap scan report for 192.168.1.128
Host is up (0.046s latency).
Nmap scan report for 192.168.1.129
Host is up (0.012s latency).
Nmap scan report for 192.168.1.137
Host is up (0.020s latency).
Nmap scan report for minie (192.168.1.147)
Host is up (0.00013s latency).
Nmap scan report for pi0 (192.168.1.222)
Host is up (0.0090s latency).
Nmap scan report for fronius (192.168.1.229)
Host is up (0.0052s latency).
Nmap done: 254 IP addresses (8 hosts up) scanned in 2.45 seconds
Or netcat :
$ netcat -v -z -n -w 1 83.59.168.116 8000-8010
DNS lookup
C:\> FOR /L %i IN (1,1,255) DO @echo 192.168.78.%i IN: & @nslookup 192.168.78.%i 2>nul | find "Name"
Hostname display
c:\> FOR /L %i IN (1,1,255) DO @echo %i & @nbtstat -A 9.137.164.%i 2>nul | find "<00> UNIQUE"
SLEEP command
The windows shell has no "sleep" command, so a local ping can stand-in.
Following command is effectively sleep 4 :
ping -n 4 -w 1000 127.0.0.1
url
Tunneling
Wiki.
My tests
Investigar tunneling thru squid to koltrane !
ssh parameters
There are 2 class of tunnels : "L" local or "R" remote.
Local port forwarding
c:\> ssh -L port:host:hostport [user@]hostname
I want
to set up a tunnel from, port 10001 on the local host to port 3689 on the remote host :
c:\>ssh -L 10001:localhost:3689 fredrik@www.fredrikbostrom.net
"localhost" refers to the host at the remote side which we want to act as the other end of our tunnel
Now, I can type http://locahost:10001 in my browser, which will access port 3689 on my server
Easy and funny sample
Que tenim a casa :
Casa Tabor
--------------- ---------------------------------------
ST3 AP1
------------- -------------
10.139.130.117 10.138.238.1 .
172.25.51.181 172.25.37.121
Si a casa donem
c:\> ssh -f -L 10001:172.25.37.121:22 our-user@10.138.238.1 -N
The "-f" tells ssh to go into the background just before it executes the command.
The "-N" instructs OpenSSH to not execute a command on the remote system.
Estem dient : "quan jo parli amb el port local 10001 vull sortir a 172.25.37.121:22 passant per 10.138.238.1"
Després podem fer
c:\> ssh usuari-remot@localhost -p 10001
No funciona - encara no en se prou.
Remote port forwarding
c:\> ssh -R port:host:hostport [user@]hostname
By example
ssh -R 8080:localhost:80 public.example.com
This allows anyone on the remote server to connect to TCP port 8080 on the remote server.
The connection will then be tunneled back to the client host, and the client then makes a TCP connection to port 80 on localhost.
This particular example would be useful for giving someone on the outside access to an internal web server.
Or exposing an internal web application to the public Internet.
Proxy Tunnel
ProxyTunnel
homepage - nice description
ProxyTunnel is a small C program that is parameterised with
the proxy to connect through,
a proxy userid/password
and the name and port of a server to connect to.
ProxyTunnel builds a network connection to the proxy and executes the CONNECT command (authenticating to the proxy as specified).
Once it has done so it then acts as a bridge between its caller and the proxy/target server (it does this through inherited file descriptors 0 and 1)
Interesting Servers
|
Top
|
- Echo server
- Time server
- X-windows server
- Chess server
- own :
url
How to access a server on a dynamic IP
Are you trying to set up a website, ftp server, mail server or any other type of online service
that you want people to be able reach over the Internet?
Does your ISP only give you a dynamic IP address, one that changes from time to time and is not static ?
Here are a few simple steps to follow to get yourself setup and online with No-IP.com's free dynamic DNS service,
so you can run your servers at your home or business without a static IP address.
How to remote access your device:
- (internet) create an account at
no-ip and
create a Hostname - add a host or domain to your account : sebastiasebas.hopto.org
A hostname is used instead of your IP address whenever you want to connect to a service at your location.
- (server) download the Dynamic Update Client (DUC)
for guindows or
linux
The DUC keeps your hostname updated with your current IP address.
- (router) Port Forward your router
- the best alternative is Duck DNS
[ http://www.no-ip.com ] [hopto.org] { 20210505 coupon code: SUP8 (x2) }
How to configure new no-ip
- go to noip.com and configure a new Hostname pointing to our external IP
r3sag.ddns.net -> 2.138.10.107
- ... or use Duck DNS,
- go to FO modem and open the port so external requests are routed to local server
DUC for NOIP on Linux
Installing DUC for
linux :
howtoforge.com
Verificar :
How to run DUC in background
To run the client in the background using config "/usr/local/etc/no-ip2.conf" file, the command is :
pi@odin:/usr/local/etc $ sudo /usr/local/bin/noip2 -c /usr/local/etc/no-ip2.conf
Verify NOIP2 is running
- ps -aux | grep -v grep | grep noip2
- host myraspiodin.hopto.org
- host raspall.hopto.org
- host xarxatorrelles.ddns.net
Start NOIP2 at Linux startup
Place this line in file "/etc/rc.local" :
sag@odin:~ $ cat /usr/bin/odin_restart | grep noip2
/usr/local/bin/noip2 -c /usr/local/etc/no-ip2.conf >> $lfn
dynamic DNS - other DDNS servers - Duck DNS
servidors DDNS gratuits :
- no-ip (needs refresh)
- the best alternative is Duck DNS,
which is both free and Open Source - free dynamic DNS hosted on Amazon EC2 -
how-to
- other great apps like No-IP are FreeDNS (Freemium), Dynu Dynamic DNS (Free), NameCoin (Free, Open Source)
Duck DNS operation
In crontab, place
*/5 * * * * /home/pi/duckdns/duck.sh 1>/dev/null 2>&1
As a result, /home/pi/duckdns/duck.sh -> duck.log has "OK"
uTube howto
my forwarded ports
http://sebas-r0.duckdns.org:2000/ 
---> r0:3000 as http://pi0:3000/ === Fronius SmartMeter data APP at R0
http://sebas-r0.duckdns.org:9080 ---> r0:9080 === web server al R0
http://sebas-r3.duckdns.org:9083 ---> r3:9083 === web server al R3
access it !
http://sebas-r0.duckdns.org:9180 ---> r0:22 == 192.168.1.222:22 === R0 admin sebas@minie:~$ ssh 192.168.1.222 -p 22
http://sebas-r3.duckdns.org:9183 ---> r3:22 == 192.168.1.123:22 === R3 admin
http://sebas-r4.duckdns.org:9184 ---> r4:22 == 192.168.1.200:22 === R4 admin sebas@minie:~$ ssh sebas-r4.duckdns.org -p 9184
http://myraspiodin.hopto.org:8123/ === TC74 temperature {oldie}
Al ZTE de Masmovil {2025}
el "port forwarding" es configura a "Internet" + "Security" + "Port Forwarding"
Al ZTE de Lowi {2026}, a "Internet" -> "Seguridad" -> "Reenvio de puertos"
Verifiquem conectivitat :
sebas@minie:~$ ping sebas-r4.duckdns.org
PING sebas-r4.duckdns.org (93.176.181.216) 56(84) bytes of data.
64 bytes from static.masmovil.com (93.176.181.216): icmp_seq=1 ttl=64 time=2.18 ms
64 bytes from static.masmovil.com (93.176.181.216): icmp_seq=2 ttl=64 time=3.60 ms
^C
--- sebas-r4.duckdns.org ping statistics ---
4 packets transmitted, 4 received, 0% packet loss, time 3004ms
rtt min/avg/max/mdev = 2.176/2.965/3.601/0.527 ms
sebas@minie:~$ ping sebas-r3.duckdns.org
PING sebas-r3.duckdns.org (93.176.181.216) 56(84) bytes of data.
64 bytes from static.masmovil.com (93.176.181.216): icmp_seq=1 ttl=64 time=1.92 ms
64 bytes from static.masmovil.com (93.176.181.216): icmp_seq=2 ttl=64 time=106 ms
^C
--- sebas-r3.duckdns.org ping statistics ---
3 packets transmitted, 3 received, 0% packet loss, time 2004ms
rtt min/avg/max/mdev = 1.918/36.750/105.716/48.767 ms
sebas@minie:~$ ping sebas-r0.duckdns.org
PING sebas-r0.duckdns.org (93.176.181.216) 56(84) bytes of data.
64 bytes from static.masmovil.com (93.176.181.216): icmp_seq=1 ttl=64 time=1.83 ms
64 bytes from static.masmovil.com (93.176.181.216): icmp_seq=2 ttl=64 time=3.26 ms
^C
--- sebas-r0.duckdns.org ping statistics ---
6 packets transmitted, 6 received, 0% packet loss, time 5007ms
rtt min/avg/max/mdev = 1.830/2.770/3.264/0.450 ms
Servidor FTP a casa
- vamos a la web www.no-ip.com y abrimos una cuenta
y creamos una nombre de dominio, por ejemplo, "mi_prueba.no-ip.info"
- descargamos el software "No-Ip DUC" - debe correr en nuestro PC,
ya que será el enlace de nuestra IP variable al nombre de dominio
com configurar no-ip/DDNS al router
- entrem al router i anem a "Configuracion Avanzada"
- al "Advanced Setup -> DNS -> Dynamic DNS" piquem el botó "Afegir"
- D-DNS provider := "NO-IP" ;
- Hostname := el nostre hostname a no-ip
- Interface := 6/ppp0.1
- no-ip user/password := your values
ddns in router
Servidor HTTP a casa
Available tools :
nginx
Now that NGINX is installed we can start the server and test that its running.
sudo systemctl start nginx
sudo systemctl enable php7.4-fpm.service
Now we can use PHP or NodeJS
Chris
Linux Networking
- DHCP update problems : see /var/log/messages at DNS server
- DHCP setup, as NAMED.CONF : see /usr/share/doc/packages/dhcp-server/DDNS-howto.txt
Interface naming
enpXsY signifies that it's a pci device (from the p), on pci bus X, in slot Y
Copying data over the network
Knoppix includes the capability to transfer your important files over a network if that is the method you prefer.
By far the easiest way to accomplish this is to have your Knoppix system run an SSH server for you.
SSH provides the capability to interactively log into your Knoppix system as well as transfer files,
all over an encrypted transmission,
meaning that should anyone intercept your communication,
he'd have a very difficult time deciphering the actual data.
If the system to which you are transferring the files resides on a Linux or Knoppix system,
the capability to SFTP files is already built into the system.
If you are transferring your files to a Windows system,
you need to download an SFTP client
(one recommend free version is WinSCP, available at
WinSCP)
To allow a remote Linux or Windows system to connect to the Knoppix system
you want to back up,
start the SSH server on the Knoppix system by selecting Knoppix>Services>Start SSH Server.
A key used for encryption is generated in the window that opens.
Enter a strong password, and then enter it the second time the same way.
The password you enter here is used when logging into the system via SFTP,
and it is case sensitive,
so make sure that you remember your exact password.
You need to know your system's IP address
(use the command ipconfig eth0 to determine your IP address;
it is four sets of numbers separated by dots, such as 192.168.1.1).
Using WinSCP or another SFTP/SCP client,
connect to your Knoppix machine with the IP address.
Enter knoppix as the username,
and then enter the password you created earlier.
Now you can navigate the file system
to find the files you want to copy to the remote system
using SFTP commands if you are connecting via the command line,
or by dragging and dropping
if you are using a graphical application such as WinSCP.
extremetech
WinSCP cfg
You can save (bookmark) any directory you need to access regularly.
url.
Also, you can set Default directories also :
url.
WinSCP Login -> Environment -> Directories -> {set} -> Save.
Copy a whole site
Have you ever gone on a trip with a laptop and wanted access
that web page with all the information about where you are going?
Well, here is a complete open source solution and completely free.
- install cygwin GNU utilities from www.cygwin.com - Cygwin is a Linux-like environment for Windows.
- install HTTrack, a web mirroring application.
For Windows it's called WinHTTTrack - http://www.httrack.com/
You are now ready to copy a web site.
A final piece de resistance is to add the Spiderzilla extension to Firefox.
Before you do that you have to copy and paste the URL into the WinHTTTrack application.
After you do that, there is an option in the "tools" menu of Firefox "download this site with SpiderZilla...".
The result is that complete sites can be downloaded.
Since I also run a local Apache/PHP/MySQL, I simply save the site in my www folder.
I can then access it on http://localhost/egb/webs
It's all quite simple and innovative. I think this is what ought to be meant by "integration".
Compare
curl vs wget,
resum
WGET
wiki,
standalone [***],
win package
Get full site, using the -r, -k, and -l switches :
wget -m www.everydaylinuxuser.com
life wire
Output to screen :
$ wget -nv $my_url -O /dev/stdout
modifying wget
Pre-requisits:
cd /usr/local
chown -R sebas:sebas include
chown -R sebas:sebas lib
chown -R sebas:sebas share
chown -R sebas:sebas bin
chown -R sebas:sebas libexec
chown -R sebas:sebas etc
Baixem el paquet:
sebas@p9111-520:~/soft/wget/> wget ftp://ftp.gnu.org/gnu/wget/wget-1.13.4.tar.gz
sebas@p9111-520:~/soft/wget/> tar -xvzf wget-1.13.4.tar.gz
sebas@p9111-520:~/soft/wget/wget-1.13.4> ./configure
configure: error: --with-ssl was given, but GNUTLS is not available.
[sebas@labss2 wget-1.13.4]$ ./configure {OK}
[sebas@labss2 wget-1.13.4]$ make {OK}
[sebas@labss2 wget-1.13.4]$ make install {OK}
sebas@p9111-520:~/soft/wget/wget-1.13.4> ./configure
sebas@p9111-520:~/soft/wget/wget-1.13.4> make uninstall
wget requires
GnuTLS, 3.0.4 ;
GnuTLS depends on Libnettle, and you will need to install it before installing GnuTLS.
sebas@p9111-520:~/soft/nettle/> wget ftp://ftp.lysator.liu.se/pub/security/lsh/nettle-2.4.tar.gz
tar -xvzf nettle-2.4.tar.gz
sebas@p9111-520:~/soft/nettle/nettle-2.4> ./configure
sebas@p9111-520:~/soft/nettle/nettle-2.4> make
sebas@p9111-520:~/soft/nettle/nettle-2.4> make check
p9111-520:/home/sebas/soft/nettle/nettle-2.4 # make install // chown -R sebas:users /usr/local
TAR requires "xz-utils"
url.
p9111-520:/home/sebas/soft/xz-utils # wget http://tukaani.org/xz/xz-5.0.3.tar.gz
p9111-520:/home/sebas/soft/xz-utils # tar -xvzf xz-5.0.3.tar.gz
p9111-520:/home/sebas/soft/xz-utils/xz-5.0.3 # ./configure
p9111-520:/home/sebas/soft/xz-utils/xz-5.0.3 # make
p9111-520:/home/sebas/soft/xz-utils/xz-5.0.3 # make check
p9111-520:/home/sebas/soft/xz-utils/xz-5.0.3 # make install
p9111-520:/home/sebas/soft/xz-utils/xz-5.0.3 # make installcheck
Or get "tar v 1.22" - support for xz compression (--xz option) :
p9111-520:/home/sebas/soft/tar # wget http://ftp.gnu.org/gnu/tar/tar-1.26.tar.gz
p9111-520:/home/sebas/soft/tar # tar -xvzf tar-1.26.tar.gz
p9111-520:/home/sebas/soft/tar/tar-1.26 # ./configure
configure: error: you should not run configure as root
sebas@p9111-520:~/soft/tar/tar-1.26> ./configure
sebas@p9111-520:~/soft/tar/tar-1.26> make
sebas@p9111-520:~/soft/tar/tar-1.26> make install
sebas@p9111-520:~/soft/tar/tar-1.26> make installcheck
ln -s /usr/local/bin/tar /bin/tar
Lets get gnutls :
p9111-520:/home/sebas/soft/gnutls # wget ftp://ftp.gnupg.org/gcrypt/gnutls/gnutls-3.0.4.tar.xz
p9111-520:/home/sebas/soft/gnutls # /usr/local/bin/tar -Jxvf gnutls-3.0.4.tar.xz
[sebas@labss2 gnutls-3.0.4]$ tar -Jxvf gnutls-3.0.4.tar.xz
sebas@p9111-520:~/soft/gnutls/gnutls-3.0.4> scp -r sebas@labss2:/home/sebas/soft/gnutls/gnutls-3.0.4/* .
sebas@p9111-520:~/soft/gnutls/gnutls-3.0.4> ./configure
configure: error:
***
*** Libnettle 2.4 was not found.
Lets modify WGET (@labss2):
- vi main.c
- make
- make install
- ln -s /usr/local/bin/wget /usr/bin/wget ; create link to mycode
- wget --help
p9111-520:/home/sebas/soft/wget/src # ./wget --version
GNU Wget 1.13.4 built on linux-gnu.
+digest +https +ipv6 +iri +large-file +nls -ntlm +opie +ssl/gnutls
Wgetrc:
/usr/local/etc/wgetrc (system)
Locale: /usr/local/share/locale
Compile: gcc -DHAVE_CONFIG_H -DSYSTEM_WGETRC="/usr/local/etc/wgetrc"
-DLOCALEDIR="/usr/local/share/locale" -I. -I../lib -I../lib -O2
-Wall
Link: gcc -O2 -Wall /usr/local/lib/libgnutls.so /usr/local/lib/libnettle.a
/usr/local/lib/libhogweed.a -lgmp -lrt -lz -lpthread -Wl,-rpath
-Wl,/usr/local/lib -lz -lidn -lrt ftp-opie.o gnutls.o
../lib/libgnu.a
wget amb proxy
Do
wget -e use_proxy=yes -e http_proxy=http://70.32.89.160:3128 -e https_proxy=http://70.32.89.160:3128 http://www.apkmirror.com
or
- vi ~/.wgetrc
- paste
use_proxy = on
http_proxy = http://70.32.89.160:3128
https_proxy = http://70.32.89.160:3128
ftp_proxy = http://70.32.89.160:3128
- wget http://www.apkmirror.com
Debug wget problems
Use -d (debug) switch
save a site using WGET
wget --mirror --convert-links --adjust-extension --page-requisites --no-parent http://example.org
wget -mkEpnp http://example.org
url
save my Tinet site script
wget -r -np -L http://usuaris.tinet.cat/sag/mapa.htm
20140319 : 377 Dir(s), 1255 File(s), 55.366.793 bytes
Per fer-ho be, hem de agafar la sortida de "diskuse.shtml" i posar-ho com entrada formatejada a "wget -i lst.txt"
use WGET with a FORM (usr/pwd)
Si anem a la pagina http://www.tinet.cat i fem "View Source" i alli "find Form", veurem :
<form name="correu" action="https://webmail.tinet.cat/classic/src/redirect.php" method="post">
<input type="hidden" name="js_autodetect_results" value="1"/>
<input type="hidden" name="s" value="1"/>
<input type="hidden" name="LoginType" value="ajax"/>
<input type="hidden" name="MailServer" value="localhost" disabled="disabled" id="Mailserverinput"/>
<input type="hidden" name="MailType" value="imap"/>
<input type="hidden" name="username" id="user_a"/>
<input type="hidden" name="password" id="pwd_a"/>
<div class="sobre">
<div class="autor"> <input type="text" size="22" id="user" placeholder="NOM D'USUARI" name="login_username"></div>
<div class="contras"><input type="password" size="22" id="pwd" placeholder="******" name="secretkey"></div>
<div class="submit-login"><input class="submit-login" type="submit" class="greyButton" name="submit" value="" /></div>
</div>
</form>
Aixi, el requeriment a fer servir via wget sera :
wget --no-check-certificate "https://webmail.tinet.cat/classic/src/redirect.php?login_username=sebas&secretkey=sebaspwd"
From a browser : File 2 HD
CURL
Nice intro
All return codes
How to get RC properly
It fails when getting an Ad :
curl http://usuaris.tinet.cat/sag/test8.htm
La càrrega de contingut dinàmic amb curl no funciona, perque curl no executa el javascript. Això es fa amb altres eines.
Busca "headless browsing" o "automatic web testing".
curl GET / curl POST
-G, --get
When used, this option will make all data specified with -d, --data, --data-binary or --data-urlencode
to be used in an HTTP GET request instead of the POST request that otherwise would be used.
The data will be appended to the URL with a '?' separator.
Get own IP from diferent sources
use CURL
Use "m" to set overall timeout, and "s" to remove progress bar :
Ho podem fer doble :
sebas@pi0alby:~/python/telegram $ cat msg_a_tg.sh
eIP1=$(curl -m 2 -s icanhazip.com) >> $myLog 2>&1
rc1=$?
echo ">>> (1) icanhazip rc ($rc1)" >> $myLog
eIP2=$(curl -m 2 -s http://checkip.amazonaws.com) >> $myLog 2>&1
rc2=$?
echo ">>> (2) checkip amazonaws rc ($rc2)" >> $myLog
use WGET
sebas@pi0alby:~/eines $ cat wifi_wd.sh
wget -q --spider http://google.com
if [ $? -eq 0 ]; then
szQ="+++ Online"
else
szQ="--- Offline"
fi
Headless browsing
wiki :
a headless browser is a web browser without a graphical user interface.
List :
- PhantomJS - a headless WebKit scriptable with a JavaScript API
Phantom JS
Download
PhantomJS JavaScript API : open Wikipedia and, upon loading, save a screenshot to a file and exit.
console.log('Loading a web page');
var page = require('webpage').create();
var url = 'http://en.wikipedia.org/';
page.open(url, function (status) {
console.log('Page loaded');
page.render('wikipedia.org.png');
phantom.exit();
});
Lets do it :
homepage - create a file called github.js :
var page = require('webpage').create();
page.open('http://github.com/', function() {
page.render('github.png');
phantom.exit();
});
Run the command "phantomjs github.js"
Now with
parameters :
$ phantomjs save_page.js http://example.com > page.html
And the code is :
var system = require('system');
var page = require('webpage').create();
page.open(system.args[1], function()
{
console.log(page.content);
phantom.exit();
});
VPN
- start ADSL
- start IE and set Firewall User and Password
- start AT&T Network Client
- you have a VPN over ADSL
AT&T : 195.75.101.199
Proton VPN
Proton VPN : Minie 2025.05.14
how to get a russian IP ?
You need a russian VPN server ...
- VPN-приложения для доступа к российским сервисам за границей
- Planet
Используя Planet VPN для любого вашего устройства при подключении к VPN серверу России,
вы получаете полностью анонимное и безопасное соединение в сети интернет с IP-адреса России.
- fine VPN
Бесплатная служба VPN для России от FineVPN обеспечивает бесперебойную и безопасную работу в Интернете,
предоставляя российский IP-адрес,
обеспечивая доступ к контенту и услугам с географическим ограничением,
как если бы вы физически находились в России.
russian pages you cant access
state.gov Kremlin funded media !!!
Preus ADSL
| Companyia + URL
| Preu
| Inclou
|
|
Jazztel
| 30 €/mes
| 20Mb
|
|
Ono
| 36 €/mes
| 4 Mb
|
|
Tele2
| 35 €/mes
| Llamadas nacionales
|
|
Timofónica
| 30 €/mes
| 1 MB + llamadas Nacionales
|
|
Wanadoo
| 20 €/mes
*
| 1 Mb/320 Kbps, trucades Nacionals.
|
|
Ya.com
| 18 €/mes
| 20Mb + llamadas 24h
|
Streaming
Using VLC wizard
USB
The maximal speed of transfer makes 12 Mbit/s for standard USB 1.1
and 480 Mbit/s for Hi-Speed USB 2.0.
url
Interessant : wiki.
Firewire by Apple
IEEE 1394 "Host Adapter".
RFC 2734 specifies how to run IPv4 over the FireWire interface,
and RFC 3146 specifies how to run IPv6.
Wiki.
Speed chart
- USB 2.0 : 480 Mbps
- SATA (150) : 1200 Mbps
url
wiki
IP v6
- ipconfig displays ... Tunneling Pseudo-Interface
- At the command prompt, type ipv6 uninstall, and then press ENTER.
- IPV6.exe @ uSoft.
c:\>ipv6 -v if
- Manual configuration
IP v4 exhaurit
3 de Febrer de 2011 :
L'estoc central d'adreces IPv4 administrat per l'Internet Assigned Numbers Authority (IANA) s'ha exhaurit.
IPv6 és la nova generació de protocol d'internet.
Els cinc registres regionals d'internet han treballat per oferir assessorament en l'adopció d'aquest protocol, un cop exhaurit l'IPv4.
Windows XP trae por defecto un límite al ancho de banda del 20%.
La explicación que nos dá es la siguiente:
Limitar ancho de banda reservado.
Determina el porcentaje de ancho de banda de la conexión que el sistema puede reservar.
Este valor limita las reservas de ancho de banda
combinadas de todos los programas que se ejecutan en el sistema.
De forma predeterminada, el Programador de paquetes
limita el sistema al 20 por ciento del ancho de banda de una conexión.
Pero puede usar esta configuración para sobrescribir la predeterminada.
Si habilita esta configuración,
puede usar el cuadro "Límite de ancho de banda"
para ajustar la cantidad de ancho de banda que el sistema puede reservar.
Si deshabilita esta configuración o no la establece,
el sistema usa el valor predeterminado de 20 por ciento de la conexión.
Importante:
si se establece un límite de ancho de banda
para un adaptador de red en el Registro,
esta configuración se omite
cuando se configura el adaptador de red.
Para recuperarlo hacemos lo siguiente.
- - Pulsamos el botón Inicio y seleccionamos Ejecutar.
- - Tecleamos gpedit.msc y pulsamos Enter.
Con esto se nos arranca el programa de "Directiva de grupo".
- - Vamos a la carpeta "Configuración del equipo"
- - Click en "Plantillas administrativas"
- - Click en "Red"
- - Click en "Programador de paquetes QoS"
- - En la ventana de la derecha hacemos doble-click sobre "Limitar ancho de banda reservado"
- - En la nueva ventana que nos aparece
seleccionamos la opción "Habilitada"
y en el cuadro de abajo
donde pone "Límite de ancho de banda (%)"
ponemos el valor "0" (cero).
- - Click en "Aplicar" y en "Aceptar".
Ya está; no hace falta reiniciar el sistema.
Gracias, David !
Extensió FTP
Una empresa te moltes màquines i permet accés de clients externs.
Un client extern vol accedir per fer FTP a
- una determinada màquina ...
- un determinat disc ...
- un determinat directori ...
- determinats fitxers ...
Una generalització fora que tingués accés a diversos directoris ubicats a diferents màquines.
NAT router at guifi ?
FileZilla Server conectat a guifi.net em diu :
You appear to be behind a NAT router.
Please configure the passive mode settings and forward a range of ports in your router.
Warning: FTP over TLS is not enabled, users cannot securely log in.
Spanning Tree protocol
url
IP masquerading
La magia de que varies IPs puguin sortir sense fer-se un liu
es basa en que cada peticio a l'exterior te una "source ip + source port" que esdevé unic a la intranet.
Aixo es diu "ip masquerading", i el router es guarda una taula per saber a qui retornar les coses.
maskerade de les regles de firewall
E, 20200930
masquerading concepts
Masquerading is assuming you have two network cards,
moving traffic from one card to the other and in the process connecting two networks.
The other assumption is that you have an internal network with Private IP Addresses
that you will change to an external address on the machine
begin linux
To list the masquerade rules use the -l argument :
# ipfwadm -F -l -e
Read about masquerade
Putty i complements
putty at wiki ;
http://extraputty.free.fr/ - fork from 0.63 version of putty ;
User Manual ;
source code !
Get plink
(a command-line interface to the PuTTY back ends)
from the putty's
download page.
Then, you can use it like this
plink.exe -ssh -pw pass -noagent -m commands.txt user@10.0.0.2
Another way is
plink.exe -raw -P 23 192.168.1.2 < commands.txt
where commands.txt contents is:
login admin password
port list
quit
Maybe it's more general to use ssh ... {sebas}
PuTTY on Ubuntu
$ - verify if universe repository is enabled
$ sudo add-apt-repository universe - enable universe repository
$ sudo apt update - update Ubuntu
$ sudo apt install putty - install putty
$ sudo apt autoremove - remove non-required packages
"Paste" function is done by (Ctrl+) Shift + Insert
PuTTY links
- tips and tricks [****] as
- click on Window -> select the "Change the size of the font" under "When window size is resized" section
- move Putty sessions to another computer
- delete all PuTTY sessions together : "C:> putty -cleanup"
- add-ons as
- Connection Manager :
5 powerfull features
- PuTTYcyg - lets you use PuTTY as a local cygwin terminal
- PuTTY Portable - launch PuTTY from the USB drive and carry the sessions along with you
- session manager
Putty login message from SSHD
On ESX, we get:
login as:
* here you are ... /etc/ssh/sshd_banner.txt
* HENRY says HI
password:
Because in sshd_config we have
Banner /etc/ssh/sshd_banner.txt
Putty & X11
Si configurem be el Putty, ens estalviem la configuracio del X11 amb "display" :
- Connection
- SSH
- X11
- check Enable X11 Forwarding
Putty problems & solutions
"Access denied" initial message
After receiving the "Access denied" message,
hold Ctrl and right-click on the PuTTY window, then select Event log.
At the bottom you will see what exactly caused the failure.
2014-10-10 12:13:41 Looking up host "bcnlab0s8.bar.es.ibm.com"
2014-10-10 12:13:41 Connecting to 9.137.164.23 port 22
2014-10-10 12:13:41 Server version: SSH-2.0-OpenSSH_4.3
2014-10-10 12:13:41 Using SSH protocol version 2
2014-10-10 12:13:41 We claim version: SSH-2.0-PuTTY_Release_0.61
2014-10-10 12:13:41 Doing Diffie-Hellman group exchange
2014-10-10 12:13:41 Doing Diffie-Hellman key exchange with hash SHA-1
2014-10-10 12:13:41 Host key fingerprint is:
2014-10-10 12:13:41 ssh-rsa 2048 3f:4f:67:8d:ad:81:88:a2:1f:7e:e2:3d:d4:13:80:48
2014-10-10 12:13:41 Initialised AES-256 SDCTR client->server encryption
2014-10-10 12:13:41 Initialised HMAC-SHA1 client->server MAC algorithm
2014-10-10 12:13:41 Initialised AES-256 SDCTR server->client encryption
2014-10-10 12:13:41 Initialised HMAC-SHA1 server->client MAC algorithm
2014-10-10 12:14:00 Using SSPI from SECUR32.DLL
2014-10-10 12:14:00 GSSAPI authentication request refused
2014-10-10 12:14:00 Access denied
Solució: fer servir "putty v0.60", 454.656 bytes -
get it
putty sessions configuration backup
Run this CMD :
C:\sebas\miscosas\backups> type 1_agafa_putty.cmd
regedit /e ".\putty-sessions.reg" HKEY_CURRENT_USER\Software\SimonTatham\PuTTY\Sessions
To restore these profiles, just double-click on the "reg" file or
regedit /i putty-sessions.reg
Using plink in batch files and scripts
Once you have set up plink to be able to log in to a remote server without any interactive prompting,
you can use it for lots of scripting and batch purposes.
For example, to start a backup on a remote machine, you might use a command like:
plink root@myserver /etc/backups/do-backup.sh
Or perhaps you want to fetch all system log lines relating to a particular web area:
plink mysession grep /~fred/ /var/log/httpd/access.log > fredlog
Any non-interactive command you could usefully run on the server command line, you can run in a batch file using Plink in this way.
url
c:\eines\cisco> plink -v 9.10.11.12 -l cisco -pw cisco
Looking up host "9.10.11.12"
Connecting to 9.10.11.12 port 22
Server version: SSH-2.0-Cisco-1.25
We believe remote version has SSH-1 ignore bug
We believe remote version needs a plain SSH-1 password
We believe remote version can't handle SSH-1 RSA authentication
We claim version: SSH-2.0-PuTTY_Release_0.60
Using SSH protocol version 2
Using Diffie-Hellman with standard group "group1"
Doing Diffie-Hellman key exchange with hash SHA-1
Host key fingerprint is:
ssh-rsa 2048 63:79:da:d7:a0:54:2f:5c:c4:49:f0:6f:aa:a0:90:97
Initialised AES-256 CBC client->server encryption
Initialised HMAC-SHA1 client->server MAC algorithm
Initialised AES-256 CBC server->client encryption
Initialised HMAC-SHA1 server->client MAC algorithm
Using username "cisco".
Access denied
Access denied
Disconnected: Unable to authenticate
c:\eines\cisco>
Ethernet tap
Passive LAN taps essentially allow all traffic on a network device to be monitored
"network tap" at wiki
home made
Use WireShark in promisc mode - wiki wireshark
Some examples: url
- SharkTap Network Sniffer - amzn - unavailable
- SharkTap Gigabit Network Sniffer - amzn - 180 $
- Throwing Star LAN Tap - amzn - 11 $ {got it}
build your own
- hak5
video
- great Scott gadgets
- throwing star LAN tap - compro 20201213, 18 €
- get open source design files
- obrir amb KiCad
(minut 2:50 del video)
Normal gigabit signals travel in both directions and its impossible to build a completelly passive tap.
Throwing Star degrades the signal with 2 capacitors that force the connection down to 100 Mbps by adding a slight noise into the line
They use "back track 5" live CD - now Kali Linux (since 2013)
Another : build passive network tap by wiring
ThrowingStar a casa, 20201218
Podem monitoritzar :
- les dades de SmartLife cap al nuvol
- les dades del nuvol cap al SP21 i/o cap el SB50
- (202501) request de la APP "Solar Web" per rebre la energia consumida (la API es resisteix)
El esquema és :
T60 "ens0"
cable vermell
Tx channel (<---) "out" .-------------. rojo
.-------------. | | | --- --- [PLC] ... [PLC] --- [ 192.168.1.59 MARS ]
| | .-----. | |
| M5-16 | yellow | | white | Zyxel | --- < > --- [ 192.168.1.78 Mi9 SmartPhone + Smart Life ]
| | --- --- --- | tap | --- --- --- --- | | --- < > --- [ 192.168.1.85 Alexa ]
| 192.168.1.1 | | | | 192.168.1.2 | --- < > --- [ 192.168.1.87 SP21 Smart Plug ]
| | .-----| | | --- < > --- [ 192.168.1.94 SB50 Smart Bulb ]
.-------------. | .-------------.
Rx channel (--->) "in"
cable groc pla
T60 "eth0"
Que veiem :
- 20201218 - mirem sortida de casa :
- en tocar el estat del SP21 amb la APP SmartLife,
el SP21 envia un paquet TLS v1.2 de "Application Data" a
18.184.31.90 (ec2-18-184-31-90.eu-central-1.compute.amazonaws.com)
52.57.38.165 (ec2-52-57-38-165.eu-central-1.compute.amazonaws.com)
- periodicament el SP21 envia paquets
source = 192.168.1.87 destination = 255.255.255.255 protocol = UDP source port = 49154 destination port = 6667
- 20201221 - mirem la entrada a casa : en tocar el estat del SP21, el cloud envia 4 paquets via TLS
nicolau@mars:~$ nslookup 52.57.38.165
165.38.57.52.in-addr.arpa name = ec2-52-57-38-165.eu-central-1.compute.amazonaws.com.
- 20201221 - mirem que envia Smart Life : paquets UDP a 8.185.71.208 o 3.121.48.166
nicolau@mars:~$ nslookup 18.185.71.208
208.71.185.18.in-addr.arpa name = ec2-18-185-71-208.eu-central-1.compute.amazonaws.com.
nicolau@mars:~/eines/ubiquiti$ nslookup 3.121.48.166
166.48.121.3.in-addr.arpa name = ec2-3-121-48-166.eu-central-1.compute.amazonaws.com.
192.168.1.78 (Mi9) comença amb un DNS (a1.tuyaeu.com) :
nicolau@mars:~$ ping a1.tuyaeu.com
PING a1.tuyaeu.com (35.156.68.42) 56(84) bytes of data.
64 bytes from ec2-35-156-68-42.eu-central-1.compute.amazonaws.com (35.156.68.42): icmp_seq=1 ttl=227 time=38.7 ms
Curiosament 192.168.1.85 (Alexa) tambe fa un requeriment DNS (api.amazon.com) :
nicolau@mars:~$ ping api.amazon.com
PING api.amazon.com (52.119.196.31) 56(84) bytes of data.
64 bytes from 52.119.196.31 (52.119.196.31): icmp_seq=1 ttl=236 time=104 ms
"bonded" network interface
When using a passive or active LAN tap, both the "incoming" and "outgoing" channels need to be bonded together
for IDS systems to process as a single network flow channel.
This setup involves using a technique called bonding to take two physical interfaces and bond them together,
creating a logical interface that we can use for Snort as an example.
For step-by-step instructions on how to set up port bonding, see
How To Create a Bonded Network Interface
passive LAN taps
wireshark on multiple interfaces
Wireshark version 1.8 has a great new feature that allows data to be captured from multiple interfaces at the same time.
samkear
Read Ethernet capture setup ,
capture using a net tap
WireShark
Homepage,
wiki,
capture setup wlan {****}
Per treballar amb W7 ens cal la versio 4.0 com a maxim !
Pràctiques amb WireShark
- display own traffic to DHCP
- display own traffic to DNS
- display PING Request/Reply (only)
Auto Scroll
- "Go" menu
- Auto Scroll in Live Capture
Capture filter and Display filter
Capture filters are set before start capturing traffic in Wireshark.
This type of filter can’t be changed while capturing traffic.
It is generally used for capturing a specific type of traffic.
Apuntem alguns filtres "capture" interessants :
- capture only traffic to or from IP address 172.18.5.4 : host 172.18.5.4
- capture traffic to or from a range of IP addresses : net 192.168.0.0/24
- capture only DNS traffic : port 53
- capture only traffic to or from specific MAC : "ether host 1c:90:ff:43:c7:35"
Display Filters are used to reduce the packets which are showing in Wireshark.
This type of filter can be changed while capturing traffic.
It is generally used for hiding traffic to analyze the specific type of traffic.
Apuntem alguns filtres "display" interessants :
- display only traffic from port number 25 or icmp packets : tcp.port eq 25 or icmp
- display only traffic to or from IP address 192.168.0.87 : ip.addr == 192.168.0.87
- display only traffic to or from specific MAC : eth.src==MACaddress
- To only display packets containing a particular protocol,
type the protocol name in the display filter toolbar of the Wireshark window and press enter to apply the filter.
Capture only IPv4 traffic - the shortest filter, but sometimes very useful to get rid of lower layer protocols like ARP and STP:
ip
- capture only unicast traffic - useful to get rid of noise on the network if you only want to see traffic to and from your machine, not, for example, broadcast and multicast announcements:
not broadcast and not multicast
- capture except all ARP and DNS traffic:
port not 53 and not arp
wiki wireshark on "capture filters"
- display DHCP traffic : as DHCP is implemented as an option of BOOTP, you can only filter on BOOTP messages.
Show only the BOOTP based traffic:
bootp
capture Filter - as DHCP is implemented as an option of BOOTP, you can only filter on BOOTP messages.
You cannot directly filter BOOTP protocols while capturing if they are going to or from arbitrary ports.
DHCP
- set a filter for just MQTT - “tcp.port eq 1883” or "mqtt" as "display" filter after the capture
See this video
and its python scripts
how to use wireshark by non-root
Configure (at install time) :
- sudo dpkg-reconfigure wireshark-common
- select "yes" in response to "should non-superusers be able to capture packets?"
- add yourself to the "wireshark" group by running "sudo usermod -a G wireshark <your user>" and logging out and back
what is promiscuous mode
When a network card is in promiscuous mode it accepts all packets, even if the destination MAC of the frame does not match it's own MAC.
Broadcasts are accepted anyway.
Without promiscuous mode frames with MACs other than the one the interface has are ignored (apart from broadcasts, again)
wikipedia
How to check if promiscuous mode is enabled on network interface
Two ways to display its status :
nicolau@nicolau-desktop:~$ netstat -i
Kernel Interface table
Iface MTU RX-OK RX-ERR RX-DRP RX-OVR TX-OK TX-ERR TX-DRP TX-OVR Flg
enp4s0 1500 0 0 0 0 0 0 0 0 BMU
nicolau@nicolau-desktop:~$ ifconfig enp4s0
enp4s0: flags=4099<UP,BROADCAST,MULTICAST> mtu 1500
Now we change it :
nicolau@nicolau-desktop:~$ sudo ip link set enp4s0 promisc on
nicolau@nicolau-desktop:~$ ifconfig
enp4s0: flags=4355<UP,BROADCAST,PROMISC,MULTICAST> mtu 1500
tots.1o24
nicolau@mars:~$ sudo ifconfig enp4s0 promisc
nicolau@mars:~/sebas/_local_tinet_files$ ifconfig enp4s0
enp4s0: flags=4419<UP,BROADCAST,RUNNING,PROMISC,MULTICAST> mtu 1500
problems detecting promiscuous mode
- Verify that promiscuous mode is not enabled :
nicolau@mars:~$ sudo ip link show wlx8416f90e4d75
[sudo] password for nicolau:
4: wlx8416f90e4d75: <BROADCAST,MULTICAST,UP,LOWER_UP> mtu 1500 qdisc mq state UP mode DORMANT group default qlen 1000
link/ether 84:16:f9:0e:4d:75 brd ff:ff:ff:ff:ff:ff
Using "netstat" :
nicolau@mars:~$ sudo netstat -i
Kernel Interface table
Iface MTU RX-OK RX-ERR RX-DRP RX-OVR TX-OK TX-ERR TX-DRP TX-OVR Flg
enp4s0 1500 34922 0 17 0 17596 0 0 0 BMRU
lo 65536 7697 0 0 0 7697 0 0 0 LRU
wlx8416f 1500 17816 0 730 0 16502 0 0 0 BMRU
- Enable the promiscuous mode :
nicolau@mars:~$ sudo ip link set wlx8416f90e4d75 promisc on
nicolau@mars:~$ sudo ip link show wlx8416f90e4d75
4: wlx8416f90e4d75: <BROADCAST,MULTICAST,PROMISC,UP,LOWER_UP> mtu 1500 qdisc mq state UP mode DORMANT group default qlen 1000
link/ether 84:16:f9:0e:4d:75 brd ff:ff:ff:ff:ff:ff
nicolau@mars:~$ sudo netstat -i
Kernel Interface table
Iface MTU RX-OK RX-ERR RX-DRP RX-OVR TX-OK TX-ERR TX-DRP TX-OVR Flg
enp4s0 1500 34976 0 17 0 17596 0 0 0 BMRU
lo 65536 7725 0 0 0 7725 0 0 0 LRU
wlx8416f 1500 18099 0 739 0 16737 0 0 0 BMPRU
nicolau@mars:~$ grep -r 'promiscuous' /var/log/kern.log
Dec 8 16:29:29 mars kernel: [10202.015338] device wlx8416f90e4d75 entered promiscuous mode
url , from
here
wireshark monitor mode
If you're trying to capture network traffic that's not being sent to or from the machine running Wireshark or TShark,
i.e. traffic between two or more other machines on an Ethernet segment,
or are interested in 802.11 management or control packets,
or are interested in radio-layer information about packets,
you will probably have to capture in "monitor mode".
The easiest way to manually turn monitor mode on or off for an interface is with the
airmon-ng script in
aircrack-ng
The command "sudo airmon-ng start wlan0" will produce output such as
Interface Chipset Driver
wlan0 Intel 4965 a/b/g/n iwl4965 - [phy0]
(monitor mode enabled on mon0)
The "monitor mode enabled on mon0" means that you must then capture on the "mon0" interface, not on the "wlan0" interface, to capture in monitor mode.
To turn monitor mode off, you would use a command such as sudo airmon-ng stop mon0, not "sudo airmon-ng stop wlan0".
When capturing traffic in monitor mode, you can capture on a single, fixed channel, or capture while hopping through multiple channels (channel hopping).
capture setup wlan + turn on monitor mode
wireshark turning on monitor mode
If you are running Wireshark 1.4 or later on a *BSD, Linux system, and it's built with libpcap 1.0 or later,
for interfaces that support monitor mode,
there will be a "Monitor mode" checkbox in the "Capture Options" window in Wireshark.
wireshark exit without saving
How to capture traffic without constant nag of saving capture file?
Go to Edit > Preferences. Uncheck "Confirm unsaved capture files."
osqa-ask
wireshark from MARS to Zyxel
The card the MARS has is :
nicolau@nicolau-desktop:~$ sudo lsusb
Bus 008 Device 002: ID 0bda:8179 Realtek Semiconductor Corp. RTL8188EUS 802.11n Wireless Network Adapter
The linux driver is
rtl8188eu, quasi compatible with
Linux
We start like this :
nicolau@nicolau-desktop:~$ airmon-ng
Command 'airmon-ng' not found, but can be installed with:
sudo apt install aircrack-ng
After installing it, we have :
nicolau@nicolau-desktop:~$ sudo airmon-ng
PHY Interface Driver Chipset
null wlx8416f90e4d75 r8188eu Realtek Semiconductor Corp. RTL8188EUS 802.11n Wireless Network Adapter
We go with :
nicolau@nicolau-desktop:~$ iwconfig
wlx8416f90e4d75 IEEE 802.11bg ESSID:"WLAN_GAS2" Nickname:"<WIFI@REALTEK>"
Mode:Managed Frequency:2.462 GHz Access Point: 40:4A:03:AF:5B:FB
nicolau@mars:~$ nmcli device wifi list
IN-USE SSID MODE CHAN RATE SIGNAL BARS SECURITY
* WLAN_GAS2 Infra 11 54 Mbit/s 100 ▂▄▆█ WPA1
Now we can display
nicolau@nicolau-desktop:~$ sudo airmon-ng check
Found 5 processes that could cause trouble.
If airodump-ng, aireplay-ng or airtun-ng stops working after
a short period of time, you may want to run 'airmon-ng check kill'
PID Name
847 NetworkManager
849 avahi-daemon
857 wpa_supplicant
864 avahi-daemon
Then we kill them :
nicolau@nicolau-desktop:~$ sudo airmon-ng check kill
ath0 should have gone, but it does not
Guess we need this
RealTek RTL8188eus WiFi driver with monitor mode
airmon-ng UG
On T60 we get better results ...
forum answer
Guy Harris said :
There's promiscuous mode and there's promiscuous mode.
Originally, the only way to enable promiscuous mode on Linux was to turn on the IFF_PROMISC flag on the interface;
that flag showed up in the output of command such as ifconfig.
In the 2.2 kernel (i.e., a long time ago), a second mechanism was added;
that mechanism does not set the IFF_PROMISC flag, so the interface being in promiscuous mode does not show up in the output of ifconfig,
and it does not require promiscuous mode to be turned off manually - closing the last descriptor on which promiscuous mode was requested suffices.
libpcap uses the second mechanism if it's available; tcpdump and Wireshark both use libpcap to do packet capturing,
so they'll use the second mechanism on any Linux system with a 2.2 or later kernel.
Therefore, neither tcpdump nor Wireshark will, when capturing in promiscuous mode, cause ifconfig to show "PROMISC".
However:
wireshark links
Protocols en que es basa Internet
Internet de les maquines
Saber com es parlen :
- Whatsapp l Android amb el Whatsapp al Ubuntu - "telephone batery low"
- Alexa amb el endoll Teckin
- APP Android amb el endoll Teckin
Conexió a Internet
There are
few ways your computer can connect to the server
Type
- secure long polling (default)
- secure websocket
Network option
- live (default internet)
- live2 (CDN) - a route provided by our Content Delivery Network
non GUI speed test
Command-line speed test : speedtest-cli
Homepage and
python API -
installed at
R4
Try
curl -s https://raw.githubusercontent.com/sivel/speedtest-cli/master/speedtest.py | python -
wget --output-document=/dev/null http://speedtest.wdc01.softlayer.com/downloads/test500.zip
Mes complert :
- sudo apt-get update
- sudo apt-get install python-pip
- sudo apt autoremove
- pip install speedtest-cli
- python3 -m pip install speedtest-cli
sebas@r4:~/python/speed_test $ python3 -m pip install speedtest-cli
Looking in indexes: https://pypi.org/simple, https://www.piwheels.org/simple
Collecting speedtest-cli
Installing collected packages: speedtest-cli
The scripts speedtest and speedtest-cli are installed in '/home/sebas/.local/bin' which is not on PATH.
Consider adding this directory to PATH or, if you prefer to suppress this warning, use --no-warn-script-location.
Successfully installed speedtest-cli-2.1.3
how to forge
Compte que hem anat a python v3 ! (20200513)
- sudo apt-get install python3-pip
- pip install speedtest-cli
- python3 -m pip install speedtest-cli
20210512 :
nicolau@mars:~/.local/bin$ ./speedtest
Retrieving speedtest.net configuration...
Traceback (most recent call last):
File "./speedtest", line 11, in &module> sys.exit(main())
File "/home/nicolau/.local/lib/python3.6/site-packages/speedtest.py", line 1986, in main shell()
File "/home/nicolau/.local/lib/python3.6/site-packages/speedtest.py", line 1875, in shell secure=args.secure
File "/home/nicolau/.local/lib/python3.6/site-packages/speedtest.py", line 1091, in __init__ self.get_config()
File "/home/nicolau/.local/lib/python3.6/site-packages/speedtest.py", line 1174, in get_config map(int, server_config['ignoreids'].split(','))
ValueError: invalid literal for int() with base 10: ''
Solucio :
nicolau@mars:~/.local/bin$ sudo wget https://raw.githubusercontent.com/sivel/speedtest-cli/v2.1.3/speedtest.py
If we want to run it against a specific server, here is the way to discover them :
sebas@r4:~ $ speedtest-cli --list
Retrieving speedtest.net configuration...
2254) CSUC (Barcelona, Spain) [13.78 km]
1695) Adamo (Barcelona, Spain) [13.78 km]
21516) Grupo MasMovil (Barcelona, Spain) [13.78 km]
20672) apfutura (Barcelona, Spain) [13.78 km]
Now we can use curl :
sebas@r4:~/python/speed_test $ curl -s https://raw.githubusercontent.com/sivel/speedtest-cli/master/speedtest.py | python - --server 2254
Retrieving speedtest.net configuration...
Testing from Telefonica de Espana (83.37.66.21)...
Retrieving speedtest.net server list...
Retrieving information for the selected server...
Hosted by CSUC (Barcelona) [13.78 km]: 231.612 ms
Testing download speed................................................................................
Download: 4.00 Mbit/s
Testing upload speed................................................................................................
Upload: 5.83 Mbit/s
check internet speed using python
Find pyspeedtest in github - Discontinued -
use https://github.com/sivel/speedtest-cli or
https://github.com/zpeters/speedtest - abandonded 2019
$ sudo python3 -m pip install pyspeedtest # install package
$ pyspeedtest
Using server: speedtest.serv.pt
Ping: 9 ms
Download speed: 148.17 Mbps
Upload speed: 18.56 Mbps
sebas@r4:~ $ sudo pyspeedtest -s c.speedtest.net
>>> import pyspeedtest
>>> st = pyspeedtest.SpeedTest()
>>> st = pyspeedtest.SpeedTest(host="c.speedtest.net")
>>> st.ping()
9.306252002716064
>>> st.download()
42762976.92544772
>>> st.upload()
19425388.307319913
codegreeper
ifconfig al MAC de Apple
lo0 - loopback
en0 - ethernet
en1 - wifi
en2 -
en3 -
bridge0 - uneix en2 amb en3
gif0 - ?
stf0 - ?
p2p0 - ?
awdl0 - ?
llw0 - ?
utun0 - ?
utun1 - ?
PXE
wikipedia :
Preboot eXecution Environment specification describes
a standardized client-server environment
that boots a software assembly, retrieved from a network, on PXE-enabled clients.
The basic PXE process starts with a DHCP request which is expecting responses that include
- 1) an IP address for the booting system,
- 2) the address of the PXE server and
- 3) the name of the .0 file (the PXE boot menu).
If only #1 is returned and not 2,3, an E53 error is displayed.
Error: PXE-E53: No boot filename received
setup PXE server on T60
Lets try it on T60 :
- install DHCP server :
sebas@T60ubuntu:~$ sudo apt-get install isc-dhcp-server
- configure DHCP server for eth0 on T60 :
sebas@T60ubuntu:~$ sudo vi /etc/default/isc-dhcp-server
INTERFACESv4="eth0"
INTERFACESv6=""
- setup DHCP server :
sebas@T60ubuntu:~$ sudo vi /etc/dhcp/dhcpd.conf
# option definitions common to all supported networks...
option domain-name "T60ubuntu.lan";
option domain-name-servers 8.8.8.8, 8.8.4.4;
# If this DHCP server is the official DHCP server for the local
# network, the authoritative directive should be uncommented.
authoritative;
# A slightly different configuration for an internal subnet.
subnet 192.168.1.0 netmask 255.255.255.0 {
range 192.168.1.200 192.168.1.239;
option domain-name-servers 8.8.8.8, 8.8.4.4;
option domain-name "T60ubuntu.lan";
option subnet-mask 255.255.255.0;
option routers 192.168.1.1;
option broadcast-address 192.168.1.255;
default-lease-time 600;
max-lease-time 7200;
}
- restart DHCP service :
sebas@T60ubuntu:~$ sudo systemctl restart isc-dhcp-server
- verify status :
sebas@T60ubuntu:~$ sudo systemctl status isc-dhcp-server
â isc-dhcp-server.service - ISC DHCP IPv4 server
Loaded: loaded (/lib/systemd/system/isc-dhcp-server.service; enabled; vendor preset: enabled)
Active: active (running) since Tue 2019-06-11 00:16:41 CEST; 5s ago
Docs: man:dhcpd(8)
Main PID: 11546 (dhcpd)
Tasks: 1 (limit: 4915)
CGroup: /system.slice/isc-dhcp-server.service
ââ11546 dhcpd -user dhcpd -group dhcpd -f -4 -pf /run/dhcp-server/dhcpd.pid -cf /etc/dhcp/dhcpd.conf
jun 11 00:16:41 T60ubuntu sh[11546]: PID file: /run/dhcp-server/dhcpd.pid
jun 11 00:16:41 T60ubuntu dhcpd[11546]: Wrote 0 leases to leases file.
jun 11 00:16:41 T60ubuntu sh[11546]: Wrote 0 leases to leases file.
jun 11 00:16:41 T60ubuntu dhcpd[11546]: Listening on LPF/eth0/00:24:7e:14:2d:14/192.168.1.0/24
jun 11 00:16:41 T60ubuntu sh[11546]: Listening on LPF/eth0/00:24:7e:14:2d:14/192.168.1.0/24
jun 11 00:16:41 T60ubuntu dhcpd[11546]: Sending on LPF/eth0/00:24:7e:14:2d:14/192.168.1.0/24
jun 11 00:16:41 T60ubuntu sh[11546]: Sending on LPF/eth0/00:24:7e:14:2d:14/192.168.1.0/24
jun 11 00:16:41 T60ubuntu dhcpd[11546]: Sending on Socket/fallback/fallback-net
jun 11 00:16:41 T60ubuntu sh[11546]: Sending on Socket/fallback/fallback-net
jun 11 00:16:41 T60ubuntu dhcpd[11546]: Server starting service.
- install PXE server along with TFTP and other dependencies :
sebas@T60ubuntu:~$ sudo apt-get install apache2 tftpd-hpa inetutils-inetd
- configure PXE server :
sebas@T60ubuntu:/etc/default$ cat tftpd-hpa {add 2 lines at bottom}
# /etc/default/tftpd-hpa
TFTP_USERNAME="tftp"
TFTP_DIRECTORY="/var/lib/tftpboot"
TFTP_ADDRESS=":69"
TFTP_OPTIONS="--secure"
RUN_DAEMON="yes"
OPTIONS="-l -s /var/lib/tftpboot"
- edit internet daemon to disable tftp - it will be run as "service" :
sebas@T60ubuntu:~$ sudo vi /etc/inetd.conf {insert or modify}
# tftp dgram udp wait root /usr/sbin/in.tftpd /usr/sbin/in.tftpd -s /var/lib/tftpboot
- restart TFTP service :
sebas@T60ubuntu:~$ sudo systemctl restart tftpd-hpa
- verify TFTP service is running or not :
sebas@T60ubuntu:~$ sudo systemctl status tftpd-hpa
â tftpd-hpa.service - LSB: HPA's tftp server
Loaded: loaded (/etc/init.d/tftpd-hpa; generated)
Active: active (running) since Tue 2019-06-11 00:24:20 CEST; 1min 1s ago
Docs: man:systemd-sysv-generator(8)
Process: 14894 ExecStop=/etc/init.d/tftpd-hpa stop (code=exited, status=0/SUCCESS)
Process: 14899 ExecStart=/etc/init.d/tftpd-hpa start (code=exited, status=0/SUCCESS)
Tasks: 1 (limit: 4915)
CGroup: /system.slice/tftpd-hpa.service
ââ14907 /usr/sbin/in.tftpd --listen --user tftp --address :69 --secure /var/lib/tftpboot
jun 11 00:24:20 T60ubuntu systemd[1]: Starting LSB: HPA's tftp server...
jun 11 00:24:20 T60ubuntu tftpd-hpa[14899]: * Starting HPA's tftpd in.tftpd
jun 11 00:24:20 T60ubuntu tftpd-hpa[14899]: ...done.
jun 11 00:24:20 T60ubuntu systemd[1]: Started LSB: HPA's tftp server.
- copy Ubuntu installation files to the PXE Server :
$ ls -al /home/sebas/isos/
(
src) ubuntu-16.04-server-amd64.iso (686.817.280) {si te directori /install/netboot/}
ubuntu-18.04.2-live-server-amd64.iso (874.512.384) {no te directori /install/netboot/}
ubuntu-16.04.6-server-amd64.iso (915.406.848) {no te directori /install/netboot/}
- mount ISO on any mount point :
sebas@T60ubuntu:~$ sudo mkdir /mnt/uiso
sebas@T60ubuntu:~$ sudo su -
root@T60ubuntu:~$ sudo mount -o loop /home/sebas/isos/ubuntu-16.04-server-amd64.iso /mnt/uiso
mount: /mnt/uiso: failed to setup loop device for /home/sebas/isos/ubuntu-16.04-server-amd64.iso.
sebas@T60ubuntu:/etc/dhcp$ sudo lsmod | grep loop
sebas@T60ubuntu:/etc/dhcp$ {if you get no output, that means you have to mount the loop device kernel module}
sebas@T60ubuntu:/etc/dhcp$ sudo modprobe loop {still empty}
You don't need to "modprobe loop" in 9.04, as the loopback driver is compiled into the kernel, not as a module.
- wget http://releases.ubuntu.com/18.04.2/ubuntu-18.04.2-live-server-amd64.iso
- verify the ISO :
sebas@T60ubuntu:~/isos$ echo "d078985ad87562376cf9ed74610ba2f53 *ubuntu-18.04.2-live-server-amd64.iso" | sha256sum --check
ubuntu-18.04.2-live-server-amd64.iso: OK
root@T60ubuntu:/isos# echo "803a89a5a6bd1f6aabea2e5e34ac1ab7eb9786ac *ubuntu-16.04.6-server-amd64.iso" | sha256sum --check
ubuntu-16.04.6-server-amd64.iso: OK
sebas@T60ubuntu:~/isos$ echo "b8b107ccf66f00fc6a324a6da6eba67de71746f6 *ubuntu-16.04-server-amd64.iso" | sha256sum --check
ubuntu-16.04-server-amd64.iso: OK
- sudo su -
- cd /home/sebas/isos
- muntem el CD :
root@T60ubuntu:/home/sebas/isos# mount -o loop ubuntu-18.04.2-live-server-amd64.iso /mnt/uiso
mount: /mnt/uiso: WARNING: device write-protected, mounted read-only.
sebas@T60ubuntu:~/isos$ sudo mount -o loop ubuntu-16.04-server-amd64.iso /mnt/uiso/
mount: /mnt/uiso: WARNING: device write-protected, mounted read-only.
- copy the bootable installation files to /var/lib/tftpboot/ directory of our PXE server :
sebas@T60ubuntu:~$ cd /mnt/uiso
sebas@T60ubuntu:~$ sudo cp -fr install/netboot/* /var/lib/tftpboot/
sebas@T60ubuntu:/mnt/uiso/install/netboot$ ls -al /var/lib/tftpboot/
total 16
lrwxrwxrwx 1 root root 47 jun 11 21:02 ldlinux.c32 -> ubuntu-installer/amd64/boot-screens/ldlinux.c32
lrwxrwxrwx 1 root root 33 jun 11 21:02 pxelinux.0 -> ubuntu-installer/amd64/pxelinux.0
lrwxrwxrwx 1 root root 35 jun 11 21:02 pxelinux.cfg -> ubuntu-installer/amd64/pxelinux.cfg
dr-xr-xr-x 3 root root 4096 jun 11 21:02 ubuntu-installer
-r--r--r-- 1 root root 58 jun 11 21:02 version.info
- create a directory called "ubuntu" in the apache root document folder :
sebas@T60ubuntu:~$ sudo mkdir /var/www/html/ubuntu
- copy all the files from the Ubuntu ISO :
sebas@T60ubuntu:~$ sudo cp -fr /mnt/* /var/www/html/ubuntu/ {658M}
- edit /var/lib/tftpboot/pxelinux.cfg/default file and add at end
label linux
kernel ubuntu-installer/amd64/linux
append ks=http://192.168.1.60/ks.cfg vga=normal initrd=ubuntu-installer/amd64/initrd.gz ramdisk_size=16432 root=/dev/rd/0 rw --
Here 192.168.1.60 is the PXE server IP address
- configure DHCP server :
$ sudo vi etc/dhcp/dhcpd.conf (add at end)
allow booting;
allow bootp;
option option-128 code 128 = string;
option option-129 code 129 = text;
next-server 192.168.1.60;
filename "pxelinux.0";
- restart DHCP server and verify it runs ok :
$ sudo systemctl restart isc-dhcp-server
$ sudo systemctl status isc-dhcp-server
Your PXE server is ready to use !
Install PXE server on
ubuntu 16.04
Test PXE server
... using
PXE server logging and debugging
Logging goes to /var/log/syslog, so you can try :
$ grep tftp /var/log/syslog
T60ubuntu in.tftpd[7767]: tftp: client does not accept options
Also
$ tail -f /var/log/syslog | grep in.tftpd
Verify service status :
sebas@T60ubuntu:~$ sudo service tftpd-hpa status
[sudo] password for sebas:
â tftpd-hpa.service - LSB: HPA's tftp server
Loaded: loaded (/etc/init.d/tftpd-hpa; generated)
Active: active (running) since Tue 2019-06-11 00:24:20 CEST; 21h ago
Docs: man:systemd-sysv-generator(8)
Tasks: 1 (limit: 4915)
CGroup: /system.slice/tftpd-hpa.service
ââ14907 /usr/sbin/in.tftpd --listen --user tftp --address :69 --secure /var/lib/tftpboot
jun 11 00:24:20 T60ubuntu systemd[1]: Starting LSB: HPA's tftp server...
jun 11 00:24:20 T60ubuntu tftpd-hpa[14899]: * Starting HPA's tftpd in.tftpd
jun 11 00:24:20 T60ubuntu tftpd-hpa[14899]: ...done.
jun 11 00:24:20 T60ubuntu systemd[1]: Started LSB: HPA's tftp server.
See program status
sebas@T60ubuntu:~$ ps aux | grep -v grep | grep tftpd
root 14907 0.0 0.0 2984 120 ? Ss 00:24 0:00 /usr/sbin/in.tftpd --listen --user tftp --address :69 --secure /var/lib/tftpboot
PXE server errors
PXE server does not start after reboot
After a reboot the PXE server does not start. We do :
- we try to start it
root@T60ubuntu:~# systemctl restart tftpd-hpa
Job for tftpd-hpa.service failed because the control process exited with error code.
See "systemctl status tftpd-hpa.service" and "journalctl -xe" for details.
And now
root@T60ubuntu:~# systemctl status tftpd-hpa.service
â tftpd-hpa.service - LSB: HPA's tftp server
Loaded: loaded (/etc/init.d/tftpd-hpa; generated)
Active: failed (Result: exit-code) since Wed 2019-06-12 19:25:32 CEST; 1min 36s ago
Docs: man:systemd-sysv-generator(8)
Process: 2868 ExecStart=/etc/init.d/tftpd-hpa start (code=exited, status=71)
jun 12 19:25:32 T60ubuntu systemd[1]: Starting LSB: HPA's tftp server...
jun 12 19:25:32 T60ubuntu tftpd-hpa[2868]: * Starting HPA's tftpd in.tftpd
jun 12 19:25:32 T60ubuntu in.tftpd[2875]: cannot bind to local IPv4 socket: Address already in use
jun 12 19:25:32 T60ubuntu systemd[1]: tftpd-hpa.service: Control process exited, code=exited status=71
jun 12 19:25:32 T60ubuntu systemd[1]: tftpd-hpa.service: Failed with result 'exit-code'.
jun 12 19:25:32 T60ubuntu systemd[1]: Failed to start LSB: HPA's tftp server.
- service says "cannot bind to socket: address already in use"
- display who uses the port :
sebas@T60ubuntu:~$ sudo lsof -i :69 {or "sudo netstat -peanut | grep 69"} {or socklist from procinfo package}
command name
inetutils *:tftp
- tftp was started twice :
- solució : comentar la linia tftp de /etc/inetd.conf
- el PXE funciona perfectament !
Bandwidth
- radio : quality is related to bit-rate, as 128 Kbps
- youtube : 720p requires
2,5 Mbps
- Netflix - quin ample de banda li cal ?
Tools:
XHR long polling
The flow:
- A request is sent to the server.
- The server doesn’t close the connection until it has a message to send.
- When a message appears – the server responds to the request with it.
- The browser makes a new request immediately.
building Lichess ->
long polling
A sketch of client-side subscribe function that makes long requests:
async function subscribe() {
let response = await fetch("/subscribe");
if (response.status == 502) {
await subscribe(); // Status 502 is a connection timeout error - let's reconnect
} else if (response.status != 200) {
showMessage(response.statusText); // An error - let's show it
await new Promise(resolve => setTimeout(resolve, 1000)); // Reconnect in one second
await subscribe();
} else {
let message = await response.text(); // Get and show the message
showMessage(message);
await subscribe(); // Call subscribe() again to get the next message
}
}
subscribe();
Ingeniero Senior en Redes
AL1 Consulting Group - Barcelona y alrededores, España (Barcelona Area, Spain)
Job Description - Empresa líder en internet, requiere Ingeniero Senior en Redes para:
- Llevar a cabo el diseño tecnológico y la implementación de arquitecturas de red en entornos complejos.
- Implementar la configuración de los equipos y servicios asociados, documentando la configuración realizada.
- Proporcionar soporte técnico en la implementación de sistemas y mantenimiento de los mismos.
- Atender las necesidades y consultas de los usuarios.
Desired Skills & Experience
- Formación en Ingeniero Técnico deseable.
- Más de 5 años de experiencia en:
- Administración de Redes.
- Trabajando en entornos de redes en producción de alta criticidad
- Ser experto en Firewalls, Routing, Switching, Balanceadores de Carga, Sistemas de Autenticación, VPN’s,
BGP, wireless, alta disponibilidad y seguridad de red.
- Experiencia destacable en sistemas de monitorización.
- Clara orientación de servicio y a cliente, empatía, capacidad de resolución y actitud proactiva.
Deseable
- Certificación Cisco CCNP
- Conocimientos en protocolo 802.1X
- Conocimientos en IDP/IPS
- Conocimientos en ipv6
- Valorable aportar otras certificaciones
Problemes
Si no podem reiniciar la IP :
C:\> ipconfig /renew
Windows IP Configuration
An error occurred while renewing interface Wireless Network Connection : The object already exists.
Intentem reiniciar el stack de TCPIP :
C:\> netsh int ip reset c:\resetlog.txt
Reseting Global, OK!
Reseting Interface, OK!
Reseting Unicast Address, OK!
Reseting Route, OK!
Restart the computer to complete this action.
send SMS from Linux
Texbelt homepage
El codi es :
sebas@minie:~/eines$ cat ./send_sms.sh
$ curl -X POST https://textbelt.com/text \
--data-urlencode phone='5555555555' \
--data-urlencode message='Hello world' \
-d key=textbelt
{"success": true, "quotaRemaining": 40, "textId": 956929}
I el resultat :
sebas@minie:~/eines$ ./send_sms.sh
{"success":false,"error":"Sorry, free SMS are disabled for this country due to abuse."}
Try it now: use key=textbelt to send 1 free text per day.
Create your own key to send more messages afterwards ... [/]
API documentation
Testing this API
If you want to validate your key without actually using your text quota, append "_test" to your key
and you will receive a response from the /text endpoint confirming that a text would send.
However, credit will not be deducted from your account.
sebas@minie:~/eines$ ./send_sms.sh {amb "_test"}
{"success":true,"textId":"10701713464354396","quotaRemaining":1}
Dubtes
- com llistar els usuaris (hostname) als que he donat una IP dinamica ?
cat /var/lib/dhcp/db/dhcpd.leases
Com es que nslookup no troba .78.200 ?
- Com mostrar els valors assignats per un DHCP en Linux ? (DNS's & default gateway)
- SSH/SCP without PWD - cant make it work
- how to trace a problem in /var/log/secure ?
- Microsoft virtual vifi miniport adapter -- to disable it :
netsh wlan stop hostednetwork
netsh wlan set hostednetwork mode=disallow
- com saber les caraterístiques del nostre stack IP ?
Jo veig que vnetsniffer està aturat
i el ATT dialer l'engega
i vull saber-ne la raó ...
Tambe veig que ipconfig em treu informació "nova" ...
- que nassos és "Conexión de area local 2",
de nom "Conexión de TV/Video de Microsoft" ? [T42]
- que nassos vol dir Guindows amb el missatge
The current setting of search method requires at least one DNS suffix.
- com saber si hi ha un programa escoltant a un port ?
Solució : netstat -ano = display all connections, numerical form, display owning process
- how to reset your TCP/IP Stack :
- click Start
- type in Search box Command
- right click Command and select Run as Administrator
- ipconfig /flushdns
- nbtstat -R
- nbtstat -RR
- netsh int reset all
- netsh int ip reset
- netsh i i r r
- netsh winsock reset
- restart machine
- com reiniciar el stack TCP ?
The reset command is available in the IP context of the NetShell utility:
netsh int ip reset resetlog.txt
Reboot the computer. url.
When you run the reset command, it rewrites two registry keys that are used by TCP/IP.
This has the same result as removing and reinstalling the protocol.
The reset command rewrites the following two registry keys:
SYSTEM\CurrentControlSet\Services\Tcpip\Parameters\
SYSTEM\CurrentControlSet\Services\DHCP\Parameters\
url,
url.
Em sembla millor aquesta eina :
WinSock XP fix
- com modificar un parametre de TCP/IP des "Startup" ?
C:\WINDOWS\system32\reg.exe add HKLM\System\CurrentControlSet\Services\TCPIP\Parameters
/v SearchList /t REG_SZ /d spss.com /f
- com probar que arribem fins a un port ?
- que fer si la carpeta Network Connections es buida ? {empty My Network properties}
- que fem si un SCP s'atura dient "STALLED" ?
Use the "-C" flag on SCP command to "compress". Alsu, use "-vv" flag to see more details.
- si tenim un servidor amb un servei al port 5678 amb moltes IP's de clients conectats ...
com podem tallar la conexió d'una determinada IP ?
[sag@lab cmds]$ netstat -ano | grep 5678
tcp 0 0 0.0.0.0:5678 0.0.0.0:* LISTEN off (0.00/0/0)
tcp 0 0 99.137.164.154:5678 99.172.140.82:2111 ESTABLISHED keepalive (6514.07/0/0)
tcp 0 0 99.137.164.154:5678 99.172.140.48:1614 ESTABLISHED keepalive (1769.82/0/0)
tcp 0 0 99.137.164.154:5678 99.145.87.157:52364 ESTABLISHED keepalive (6178.23/0/0)
tcp 0 0 99.137.164.154:5678 99.145.31.215:4481 ESTABLISHED keepalive (2704.30/0/0)
cutter (via IPTABLES, as Fco),
tcpkill,
tcpkill is part of the
dsniff package.
Use "config" to verify pre-requisites, as "libnet not found" at labss.
- com es que no funciona WGET ni CURL amb aquesta URL ?
nicolau@mars:/tmp$ curl -v sebastianet.byethost6.com/pkw_byet.htm
* Trying 185.27.134.131...
* TCP_NODELAY set
* Connected to sebastianet.byethost6.com (185.27.134.131) port 80 (#0)
> GET /pkw_byet.htm HTTP/1.1
> Host: sebastianet.byethost6.com
> User-Agent: curl/7.58.0
> Accept: */*
>
* Empty reply from server
* Connection #0 to host sebastianet.byethost6.com left intact
curl: (52) Empty reply from server
Links
- Two popular references on TCP/IP are:
- "TCP/IP Illustrated, Volume 1: The Protocols," Richard Stevens, Addison Wesley, 1994
- "Internetworking with TCP/IP, Volume 1: Principles, Protocols, and Architecture," Douglas E. Comer, Prentice Hall, 1995
- shunnel
-
iftop does for network usage what top does for CPU usage.
It listens to network traffic on a named interface and displays a table of current bandwidth usage by pairs of hosts.
Handy for answering the question "why is our ADSL link so slow?".
-
Enable / disable adapter from win command line using devcon
- How to connect Ubuntu to Internet
- Linux Home Networking - bon texte, complert.
- Scanners,
for NT and NetBIOs, and
Tools.
- Eines :
- Molts articles .... en rus :
UINC.RU,
as
ARP i ICMP by Igor,
and
non-standard use of ARP
- Beginner scan
analysis
[pro, with
solutions]
There's one every
month !!!
- tcp/ip reference [good]
- DNS
book,
articles;
LDAP [*****]
- tcp/ip
commad line utilities :
arp, ipconfig, nbtstat, netstat, ping, tracert, getmac, netsh,
tasklist (xp pro), taskkill, set, recover, regsvr32.
- ping :
- DNS : RFC 882 & 883 (old, 1983), RFC 1034 & 1035 (1987).
- Cesca : serveis, as DNS.
- CATNIX : serveis, as servidor arrel de noms F.
- FTP servers :
Cerberus,
FileZilla
"could not connect to server, port 14147" -> start windows service "FTP server" !
- FTP clients (passive ?)
- CuteFTP
- CoreFTP
- Fire FTP (FireFox)
- SmartFTP
- WS_FTP
- Telnet Server(s) ?
- W2000 Pro Telnet Service is set to start "Manually".
Ep ! Hi ha un "Telnet Server Administration" dins la carpeta "Administrative Tools"
XP Pro el porta incorporat :
url.
Use tlntadmn !
- Kpt M - free, open source telnet/ssh server for Guindous 2000/XP.
Client : Putty !
Homepage (0.63).
Documentacio.
+ PSCP + PSFTP !
- Web Server : Abyss Web Server X1
- SMTP Server (outgoing mail, to be used by BLAT) ??? PostCast ???
- Linux
NETBIOS client (Samba) configuration
- Delphi
Networking
- NetBios & SMB protocols description
- (1) page 116, Robert Orfali and Dan Harkey, "Client/Server programming with OS/2 2.1"
- que fa
echo 'GET / HTTP/1.0\n' | nc hotbot.com 80 | egrep '^Server:'
Que es nc ? NetCat - see rpmfind
From here
- MAC @ to
vendor
- read uS TCP/IP ! [good]
Descripció MOLT complerta !
- Analyze a site : NetCraft : What's that site running ?
- ICANN - get domain registration date, registry expiration, owner’s name and mailing address.
- from "The Book of VMWARE", page 139 :
To learn more about IP networking,
read Andrew Tanenbaum's Computer Networks (Prentice-Hall, 1996);
for the ultimate programming reference,
look at W. Richard Stevens' Unix Network Programming, Volume 1 (Prentice-Hall, 1998).
In addition, your author's Linux Problem Solver (No Starch Press, 2000)
provides hands-on systems administration information for Linux kernel version 2.2.
-
Google or
All The Web
- Llibre : "Computer Networks and Internets with Internet Applications" by Douglas E. Comer.
See "Code Examples" button.
- Eines de xarxa
- Display IP in your tray : TYGI
-
NetTool :
Web & Network debugger
- Disassemble and reassemble
TCPIP in Guindous [not for the faint of heart, egb]
- SJ 34/3 : Network Technologies and Systems
- Firewall Builder.
- Here is the Microsoft's IPv6 Guide for Windows Sockets Applications:
url.
Appendix B has an IP-version agnostic source code sample.
- Peli New Stack -
- mr Stefan Savage - interessant ... San Diego.
Inside Slammer worm (with code)
Network Security
- Windows Server Support Tools alphabetical list :
- List of
Security Tools available in Ubuntu :
- wireshark - ex-Ethereal ! (portable) network protocol analyzer
- nessus
- nmap
- etherape
- kismet
- chkrootkit
- rkhunter
- tiger
- gnuPG
- seahorse
- nemesis
- tcpdump
- openSSH
- denyHosts
- snort
- firestarter
- clamav
- ettercap
- netcat
- MTR
- Hping3
- ngrep
- john
- tcptrace
- netdude
- tcpreplay
- dsniff
- scapy
- ntop
- NBTscan
- tripwire
- (large) Network Monitoring Tools
list & {lots of} URLs
Wiki comparison.
- 10 free
server network monitoring tools :
- Top
125
Network Security Tools :
51 is
IPScan (Angry IP scanner)
- TCP tuning (nice) article.
- IP info, similar to
what is my IP
-
SSH Port Forwarding : see "Remote Forward example".
- Fix
TCP stack or WinSock library corrupted (10038 = no socket)
- Improving windows networking defaults
- Gigabyte Ethernet finder
- Linux Home Networking
- Guide to IP Layer Network Administration with Linux, version 0.4.5, Martin A. Brown
-
CTDP Linux User's Guide (2000) - functions and files, as
DNS.
- Port Forwarding
-
Solar Wind - TFTP server.
Good
intro (to use it at PIX).
- Cisco 2641 XM - what is it ?
- Network security hacks
- T42 MfyReg T42:\Rexx\Registry\MfyReg\fer.bat tool
- IP Address Blocks
- SS7
- TOR : anonymizer proxy
- test port 32764 -
why ?
- Google ( hardping freeware )
- JA: Cisco airnet 1130ag
- uSoft tool : PortQryV2.exe,
a command-line utility that you can use to help troubleshoot TCP/IP connectivity issues,
"displays the state of TCP and UDP ports" -
direct url.
See \\w500\eines\PortQryV2
- defcon 16,
speakers
- una alternativa al wireShark : YAF
- kit herramientas de red -
crimpadora, probador de cables, conector de red, vainas de plástico, cortador de cables LAN - 13 €
- IPFS - InterPlanetary File System
https://dweb.link - how to link to content on IPFS
- turn any Linux computer into a SOCKS5 proxy with one command {***}
- *** iperf3,
tutorial
- Tinet
- Previous page
- Back to main page
- Site map
- Escriu-me !


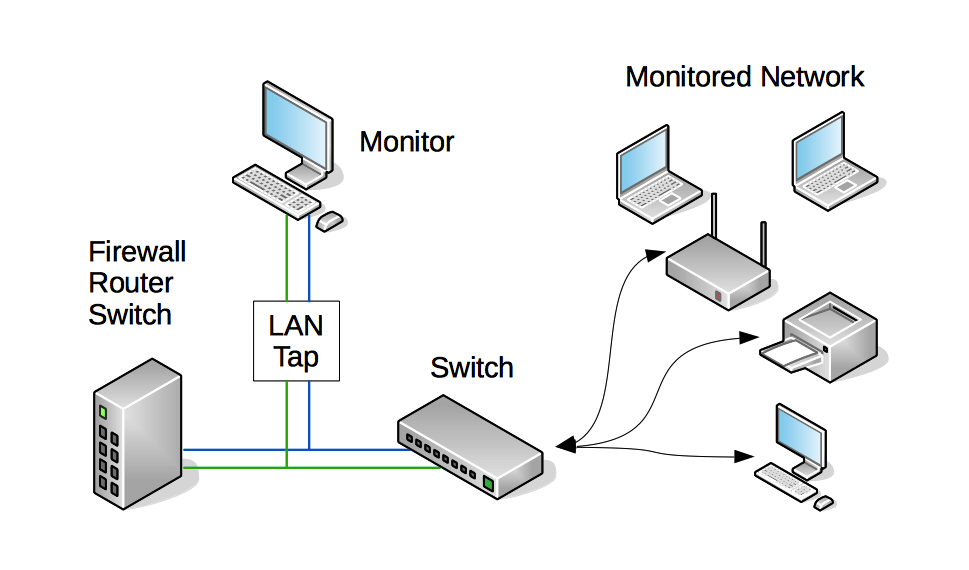
