Inici
|
|
Final
| home / infca / ptxop (navigation links) | La recerca de la felicitat és una lluita contra el mal humor |
| Potochop | Dicc | KBD | Links | End |
Open both files and then use cut from one and paste into the other. It should appear as a new layer.
En líneas generales
el menú Archivo posee los comandos relacionados
con la gestión del archivo,
tales como Abrir, Guardar, Cerrar, Importar o Exportar.
El menú Edición alberga los comandos comunes de edición,
como Copia, Cortar, Pegar, Deshacer y Rehacer.
Además, en él se insertan
las diferentes opciones de transformación de una imagen o una capa
y los ajustes y preferencias del programa.
En el menú Imagen encontrarás
los controles que determinan la imagen,
tales como el modo de color, los ajustes de color y el tamaño de imagen.
El menú Capa alberga las opciones de capa,
algunas de las cuales se encuentran también en la Paleta Capas.
Desde el menú Selección podrás controlar
cualquier selección realizada anteriormente,
como Invertir, Suavizar o Calar.
El siguiente menú es el que contiene los filtros de Photoshop.
Los filtros son pequeños programas desarrollados por Adobe Systems
que sirven para añadir funciones a Photoshop.
Los filtros que incorpora Adobe Photoshop están agrupados en 14 submenús.
Además, los filtros instalados de otros fabricantes
aparecen en la parte inferior del menú Filtro.
Existen filtros artísticos, de desenfoque, de distorsión, etc.
El menú Vista contiene los controles
que determinan la visualización o 'zoom' de las imágenes
y los que controlan los elementos de organización,
como guías, reglas o cuadrículas.
Desde el menú Ventana podrás
mostrar u ocultar las paletas de Photoshop.
Finalmente, el menú Ayuda
contiene un magnífico tutorial y ayuda en línea
a través del sitio web de Adobe.
Quina diferencia hi ha entre
Que vol dir ...
Ahora tiene la memoria virtual primaria de Adobe Photoshop y el archivo
de paginación primario de Windows en el mismo volumen
y esto puede generar un rendimiento reducido.
Es recomendable que configure en un volumen distinto
la memoria virtual primaria de Adobe Photoshop,
a ser posible en una unidad física distinta.
Adobe Systems Incorporated announced Adobe Photoshop CS2 (Photoshop 9).
CS stands for Creative Suite ...
Adobe has reduced the price for Photoshop CS2 to US$599 for new users and US$149 for upgraders.
           7.0 : 530 files, 499 MB
     CS2 (9.0) : 406 files, 379 MB.
Phone Activation : adobe_cs_keygen.exe
2. Ahora nos queda rellenar ese círculo pero primero necesitamos algún color interesante; hacemos un click en la zona indicada en la barra de herramientas. El color seleccionado aparece arriba a la derecha de la columna arcoiris, en este caso es un verde. Click en OK.
3. Ahora que tenemos el color elegido, hacemos click el el bote de pintura. Vamos sobre el círculo de líneas punteadas y hacemos un click, veremos que se rellena del color que elegimos.
4. Por último, para quitar las feas líneas puntedas que indican la selección apretamos las teclas Ctrl+D .
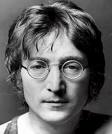
See "Russell" !
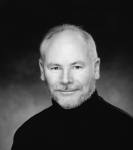
How to convert to B/W (from here)
Mira quina eina !!!
Open the two image to be joined
Find out the size of each images. Image - Image size gives height, width, resolution and print dimensions, note height and width e.g. 500 x 500 pixels.
Make a new image big enough to accommodate both images. File - New; set height to 500 and width to 1000 The images will be imported to the new image as two layers which can be moved together and joined. Ensure the layers window is visible with Window - Layers - will only show Background now.
Go to first image and select entire image and copy
Click on new image and paste selection
A new layer will appear in Layers window.
Go to second image and select entire image and copy
Zoom in to help with positioning the layers.
To make editing this new image easier combine the two layers, in the Layers window select the one on top (layer 2) of the one you wish it to be join to, and select Layers - Merge down.
Using Polygon Lasso and Magic Wand (and Tolerance)
Google - "blending photos"
Sibleyfineart - tutorial "join scans"
Start with your original, untouched photo. Choose Image > Mode > Grayscale. A dialogue box will appear that says "Discard color information?" The answer is yes, so click OK. Now we'll create our Sepia effect by applying a Duotone.
Adobe Photoshop tutorial - Sepia Tone Effect Choose Image > Mode > Duotone. This will bring up the Duotone Options dialog box. First make sure that Type: Duotone is selected.
We need to pick two different inks. Ink 1 will be EB8B23. Just click on the little color square and enter the number via the Color Picker. You must name your Inks so name this one SEPIA 1 (or whatever you wish). Repeat this for Ink 2. You may find that the Custom Color box that appears is set to Pantone. Simply click on the Picker Button on the right side and you'll get your original color picker. Enter 000000 for the black we want and SEPIA 2 for the name. Finish this step by clicking OK.
Go back to RGB mode now. Choose Image > Mode > RGB Color. Next we'll play with the saturation levels to make the effect more subtle. Choose Image > Adjustments> Hue/Saturation. Move the Saturation slider to the left, down to -40%. Done!
Tweaking Opportunities Everyone has their own idea of exactly what Sepia means and how rich the reddish brown should be. Experiment with the main Duotone color (but leave the black) and also experiment with the Saturation levels. Get in the habit of creating new layers for each tweak so you can turn them on and off to perform some comparative analysis.
This tutorial will describe the steps you will need to take to spice up your images in Photoshop using TV Scan Lines. This technique is extremely useful and easy to perform by people at all levels.
Step 1: Create your lines
Step 2: Applying your scan lines to an image
And it's as simple as that!
 File                Archivo
 Edit                Edicion
 Image               Imagen
 Layer               Capa
 Select              Seleccion
 Filter              Filtro
 View                Vista
 Window              Ventana
 Help                Ayuda
.
 Layers              Capas
 Channels            Canales
.
 Create a new fill or adjustement layer
 Crear nueva capa de relleno o ajuste
.
 Hue                 Tono
 Saturation          Saturacion
 Lightness           Luminosidad
.
 Blending Options    Opciones de fusion
 Flatten Image       Acoplar imagen      (juntar original + 2 filtros en 1 imagen final)
.
 Healing Tool        Pincel Corrector
.
 Select + Feather    Seleccion + Calar
.
 Filter + Blur       Filtro + Bosquejar
.
 Crop + Rotate       Pelar (copiar) + rotar
 Liquify + Mesh      Licuar + Malla
 Bevel and Emboss    Bisel y Relieve
.
 Blur                Bosquejar
 Dodge               ?
 Emboss              Relieve
 Plaster             Escayola
 Render              Interpretar
 Stylize             Estilizar
 ?                   Contorno
| Key | Use | On es troba |
|---|---|---|
| A | Path Selection tool | Tools Palette |
| B | Brush tool | Tools Palette |
| C | Crop tool | Tools Palette |
| D | resetear colores | Tools Palette |
| E | Eraser tool | Tools Palette |
| F | Full Screen mode | Tools Palette |
| G | Paint Bucket tool | Tools Palette |
| H | Hand tool | Tools Palette |
| I | Eyedropper tool | Tools Palette |
| J | Spot Healing Brush | Tools Palette |
| K | Slice tool | Tools Palette |
| L | Lasso tool | Tools Palette |
| M | Marquee tool | Tools Palette |
| N | Notes tool | Tools Palette |
| O | Dodge tool | Tools Palette |
| P | Pen tool | Tools Palette |
| Q | Edit in Quick Mask mode | Tools Palette |
| R | Smudge tool | Tools Palette |
| S | Clone Stamp tool | Tools Palette |
| T | Horizontal Type tool | Tools Palette |
| U | Rectangle tool | Tools Palette |
| V | Move tool | Tools Palette |
| W | Magic Wand tool | Tools Palette |
| Y | History Brush tool | Tools Palette |
| Z | Zoom tool | Tools Palette |
| Alt+ BackSpace | Rellenar con el bote de pintura | |
| Ctrl+ A | Select All | Select |
| Ctrl+ B | Color Balance | Image + Adjustments |
| Ctrl+ C | Copy | Edit |
| Ctrl+ D | Deselect | Select |
| Ctrl+ E | Merge layers | Layer |
| Ctrl+ F | Last Filter | Filter |
| Ctrl+ G | Group Layers | Layer |
| Ctrl+ H | Extras | View |
| Ctrl+ I | Invert | Image + Adjustments |
| Ctrl+ J | New Layer (copy) | Layer + New |
| Ctrl+ K | Preferences | Edit |
| Ctrl+ L | Layers | Image + Adjustments |
| Ctrl+ M | Curves | Image + Adjustments |
| Ctrl+ N | New File | File |
| Ctrl+ O | Open File | File |
| Ctrl+ P | Print File | File |
| Ctrl+ Q | Exit Program | File |
| Ctrl+ R | Rulers | View |
| Ctrl+ S | Save File | File |
| Ctrl+ T | Transform | Edit |
| Ctrl+ U | Hue / Saturation | Image + Adjustments |
| Ctrl+ V | Paste | Edit |
| Ctrl+ X | Cut | Edit |
| Ctrl+ Y | Proof Colors | View |
| Ctrl+ W | Close File | File |
| Ctrl+ Z | Undo | Edit |
| Ctrl+ 0 | Fit On Screen | View |
| Ctrl+ + | Zoom In | View |
| Ctrl+ - | Zoom Out | View |
| Ctrl+ ' | Grid | View + Show |
| Ctrl+ ; | Guides | View + Show |
We have CS2 v9
En Pere i el "contagotes" :
MS Paint basic dropper use :
Ubuntu has convert, member of the ImageMagick suite of tools - forum :
|
CD amb 36 MOVs : URL
Directorio de c:\sebas\Photoshop_Exercices
. Size . Name . Nivell . Detalls
30.771.242 01_CS2 Bridge Workflow.mov . .
15.059.688 02_CS2 Camera RAW.mov . .
8.610.629 03_CS2 Exporting RAW Images.mov . .
13.837.289 04_Watermark Action.mov . .
6.313.215 AcrobatPrintSM.mov . .
22.028.085 AdvancedMasking.mov . .
3.065.901 AdvancedSharpening.mov . .
15.107.209 AnimaticMaker!.mov . .
55.996.439 Atmospheric_Illusion.mov . .
19.266.351 AtmosphericSM.mov . .
13.792.111 CaptionMakerSM.mov . .
7.645.109 ColortoB&W.mov . .
7.645.109 ColortoBW.mov . .
28.788.495 Comic Wow!.mov . .
15.190.261 ComicWowSM.mov . .
21.937.707 ContactSheetSM.mov . .
12.670.939 CreatingBooksSM.mov . .
43.179.407 Creative Camera RAW.mov . .
13.243.309 Crop & Rotate.mov . .
24.797.107 CS2BridgeWorkflowSM.mov . .
12.127.899 CS2CameraRAWSM.mov . .
6.840.895 CS2ExportingRAWImageSM.mov . .
10.307.507 CS2WatermarkActionSM.mov . .
9.225.912 CustomBorders.mov . .
11.708.440 CustomPatternMaker.mov . .
24.917.880 Dancing with Type.mov . .
20.254.558 Design Variations.mov . .
8.291.029 DesignVariationsSM.mov . .
23.474.651 Digital Photo Flow.mov . .
6.581.178 DisappearingSurfer.mov . .
8.758.885 Eclipsing Shapes.mov . .
6.620.325 EclipsingShapesSM.mov . .
12.679.411 Evil_Fringe.mov . .
3.215.027 EvilFringeSM.mov . .
16.171.313 Frosty_Freeze.mov . .
7.667.319 FrostyFreezeSM.mov . .
39.774.425 GoAway.mov . .
9.546.807 GoAwaySM.mov . .
25.732.061 Hair Demo 1.mov . .
12.610.612 Hair Demo 2.mov . .
16.050.423 Hair Demo 3.mov . .
15.494.371 HandmadeBookIntro.mov . .
9.713.133 Hidden_In_the_Shadows.mov . .
8.919.005 HiddenShadowsSM.mov . .
20.578.951 Hocus Pocus Focus.mov . .
18.847.435 HocusPocusFocusSM.mov . .
8.696.521 IllustratorCSPrintSM.mov . .
16.515.633 Image Processor Tutorial.mov . .
4.365.653 InDesignCSPrintSM.mov . .
13.605.308 InstantExterior.mov . .
10.773.451 InstantExteriorSM.mov . .
3.103.998 Introducing 2.0.mov . .
15.065.571 Lighting With Layers.mov . .
8.888.453 LightingWithLayersSM.mov . .
11.414.734 LiquifyAlert.mov . .
14.494.557 MergeAndPlaceSM.mov . .
12.371.972 Open Type.mov . .
9.395.553 OpenTypeSM.mov . .
27.274.538 Photo Toner.mov . .
10.465.311 Photo-realistic Printing.mov . .
5.876.699 PhotoshopCSPrinSM.mov . .
10.526.998 PhotoTonerSM.mov . .
12.510.221 Sand_Dune.mov . .
5.676.077 SandDuneSM.mov . .
28.922.063 ShakeRattleRoll.mov . .
36.648.516 Starry Starry Night.mov . .
6.089.594 Transparent Patch.mov . .
6.385.507 TransparentPatchSM.mov . .
6.985.676 Vanished!.mov . .
4.760.025 VanishedSM.mov . .
13.267.481 VanishingPointMuseum.mov . .
8.784.091 VanishingPointMuseumSM.mov . .
13.112.453 WarpTextSM.mov . .
9.469.019 Zen of Type.mov . .
5.492.799 ZenTypeSM.mov . .
75 archivos 1.085.993.526 bytes
|
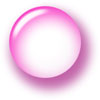
Read how to Create a Ball
|
|

|
"Rectangular Marquee Tool" + select half face + Delete the rest
Duplicate Layer
Edit > Transform > Flip Horizontal
get rid of the symmetrical hair
Tutorials :
3D trick
Curves tutorial (YouTube, 10 min) = aumentar/disminuir brillo/contraste, corrección/transformación de color. Image - Adjustements - Curves.
Retoc (3 min) professional de una cara
Smart Objects (4 min) & Edit + Transform + Warp !
Pro Tips (***)
Adobe tips :
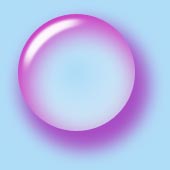
Graphics Soft - bons Tutorials, as Colored Orb (1) and (2)
Make SHARP ( usando CURVAS ...)
URL
Convertir (rapido) a B/N
URL
Pintar una letra o un dibujo ...
URL

|

|
Updated 20200904
|
|